Mitsubishi Colt Ralliart. Manual - part 505
DOOR
BODY
42-42
REMOVAL SERVICE POINT
<<A>> POWER WINDOW REGULATOR
REMOVAL
1. Remove the door window glass installation bolts.
AC100009AC
MB990480
CAUTION
If tinting film is adhered to the door window
glass, attach special tool window glass holder
(MB990480) to the outside of the glass to prevent
the film from peeling off.
2. Lift the door window glass, and attach special tool
window glass holder (MB990480) to the glass as
shown to prevent the glass from falling.
3. Remove the window regulator.
INSTALLATION SERVICE POINTS
>>A<< LOWER SASH INSTALLATION
<REAR DOOR>
Engage the rear lower sash with the window sash
(door) securely.
INSPECTION
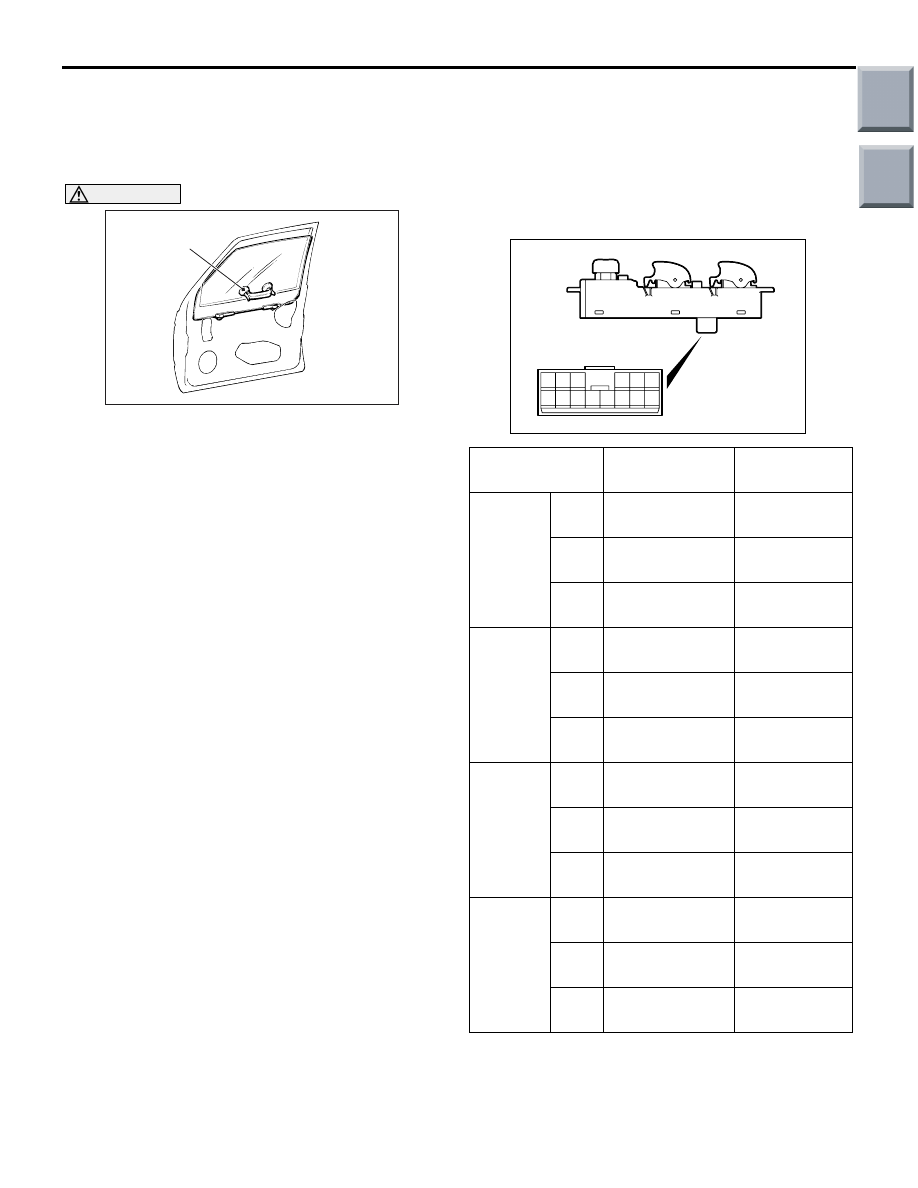
M1429001400583
POWER WINDOW SWITCH CONTINUITY
CHECK
Remove the power window switch (Refer to GROUP
52A, Door Trim
).
<MAIN SWITCH>
AC313194
1 2 3
4 5 6
7 8 9
12
10
13
11
14
Switch position Tester
connection
Specified
condition
FRONT
(LH)
UP
2
− 9*, 7 − 10
Continuity
(Less than 2
Ω)
OFF
2
− 7*, 2 − 9*
Continuity
(Less than 2
Ω)
DOW
N
2
− 7*, 9 − 10
Continuity
(Less than 2
Ω)
FRONT
(RH)
UP
2
− 14, 10 − 12
Continuity
(Less than 2
Ω)
OFF
2
− 12, 2 − 14
Continuity
(Less than 2
Ω)
DOW
N
2
− 12, 10 − 14
Continuity
(Less than 2
Ω)
REAR
(LH)
UP
1
− 10, 2 − 3*
Continuity
(Less than 2
Ω)
OFF
1*
− 2, 2 − 3*
Continuity
(Less than 2
Ω)
DOW
N
1*
− 2, 3 − 10
Continuity
(Less than 2
Ω)
REAR
(RH)
UP
2
− 6*, 4 − 10
Continuity
(Less than 2
Ω)
OFF
2
− 4*, 2 − 6*
Continuity
(Less than 2
Ω)
DOW
N
2
− 4*, 6 − 10
Continuity
(Less than 2
Ω)
NOTE: *: Set the window lock switch to UNLOCK
position.
Main
Index
Group
TOC