Mitsubishi Colt Ralliart. Manual - part 501


  Index      Mitsubishi     Mitsubishi Colt Ralliart - service repair manual


Search            


Content   ..  499  500  501  502   ..


Mitsubishi Colt Ralliart. Manual - part 501


ACX00476 AB

WINDOW GLASS

BODY

42-26

CAUTION

• Be careful not to remove more adhesive than 

is necessary.

• Be careful also not to damage the paintwork 

on the body surface with the knife. If the 
paintwork is damaged, repair the damaged 
area with repair paint or anti-rust agent.

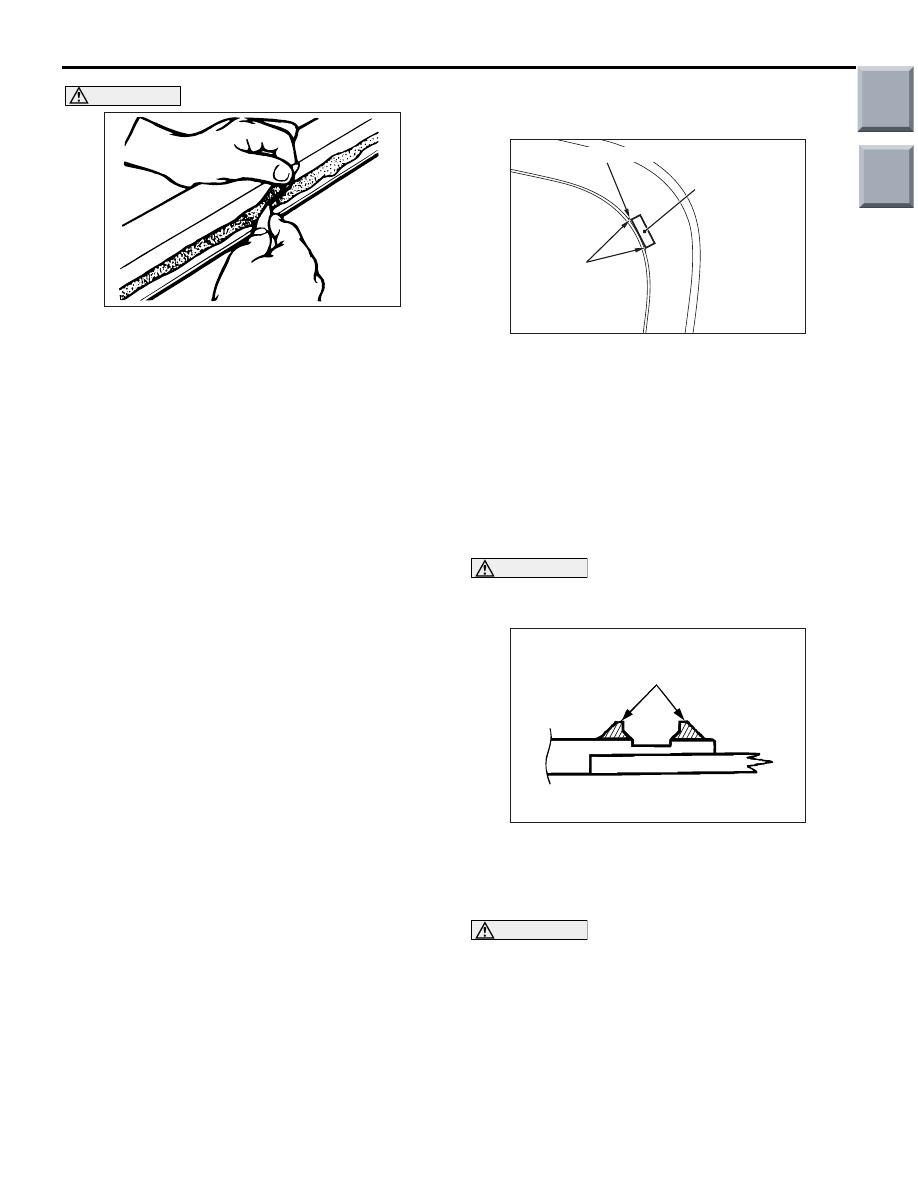
9. Use a knife to cut away the remaining adhesive so 

that the thickness is within 2 mm around the entire 
circumference of the body flange.

10.Finish the flange surfaces so that they are 

smooth.

11.When reusing the quarter window glass, remove 

the adhesive still adhering to the quarter window 
glass, and clean with isopropyl alcohol.

12.Clean the body side in the same way.

INSTALLATION SERVICE POINT
>>A<<FASTENER INSTALLATION

AC207282 AC

Attach the fastener 
in alignment with 
the notches

Notch on the body flange

Fastener

1. Install the fasteners to the specified positions on 

the body flange.

2. Install the fasteners to the quarter window glass at 

the positions which correspond to the fasteners 
on the body flange.

>>B<< GASKET/CLIP/QUARTER 
WINDOW GLASS INSTALLATION

1. Carry out the following procedure to re-install 

quarter window glass.

CAUTION

Do not forget gasket.

(1) Fit clips into body.

AC103606 AC

Cut off these convex parts

(2) Cut away clip fitting convex on quarter window 

glass.

NOTE: Convex gets broken when quarter win-
dow glass is removed.

CAUTION

Leave the degreased parts for 3 or more minutes 
to dry well, before starting on the next step. Do 
not touch the degreased parts.
2. Use isopropyl alcohol to degrease the inside and 

outside of the quarter window glass and the body 
flanges.

3. Apply the primer and adhesive.
4. Install the glass by the same procedure as for the 

windshield (Refer to 

P.42-16

).

Main

Index

Group

TOC

WINDOW GLASS

BODY

42-27

TAILGATE WINDOW GLASS

REMOVAL AND INSTALLATION

M1422003700471

Pre-removal and Post-installation Operation
• Rear Wiper Blade and Arm Assembly Removal and Instal-

lation (Refer to GROUP 51, Rear Wiper and Washer 

P.51-37

).

• Tailgate Spoiler Assembly Removal and Installation 

<Vehicles with tailgate spoiler> (Refer to GROUP 51, Tail-

gate Spoiler 

P.51-27

).

• Tailgate Trim Removal and Installation (Refer to GROUP 

52A, Tailgate Trim 

P.52A-15

).

AC401304 AD

1

2

3

3

4

4

5

6

6

7

N

N

N

N

N

N

N

N

N

Main

Index

Group

TOC

AC207274

AC207275

AC207276

AC401312

AC401307

AC

A

A

B

B

C

C

12

15

12

15

12

15

1

1

1

7

6

5

Section A – A

Section B – B

Section C – C

Units: mm

Ceramic line

Seal line

Mark

Centre of seal line

Centre of
seal line

Primer

Primer

Centre of seal line

Primer

Apply the primer and adhesive along the fictitious 

lines (seal line) between each of the marks.

Adhesive: 3M ATD Part No. 8609 Super Fast Urethane Auto Glass Sealant or equivalent and 
3M ATD Part No. 8608 Super Fast Urethane Primer or equivalent

Removal steps 

Harness connector 

<<

A

>>

>>

B

<<

1.

Tailgate window glass

>>

A

<<

2.

Pin

>>

A

<<

3.

Fastener

>>

A

<<

4.

Glass stopper

>>

A

<<

5.

Tailgate dam upper

>>

A

<<

6.

Tailgate dam side

>>

A

<<

7.

Tailgate dam lower

WINDOW GLASS

BODY

42-28

REMOVAL SERVICE POINT
<<A>> TAILGATE WINDOW GLASS 
REMOVAL

Remove the tailgate window glass using the same 
procedure as for the windshield (Refer to 

P.42-16

).

NOTE: Use a piano wire to remove the tailgate win-
dow glass.

INSTALLATION SERVICE POINTS
>>A<< TAILGATE DAM LOWER/TAIL-
GATE DAM SIDE/TAILGATE DAM 
UPPER/GLASS STOPPER/FASTENER/PIN 
INSTALLATION

CAUTION

Leave the degreased parts for 3 or more minutes 
to dry well, before starting on the next step. Do 
not touch the degreased parts.
1. Use isopropyl alcohol to clean the inside edge of 

the tailgate window glass and the tailgate flange.

Removal steps (Continued)

Main

Index

Group

TOC

AC401308

AC401309

AC401310

AC401311

AC401313

AB

Align end of the fastener 
with the tailgate window 
glass mark.

Align the window dam end with 
the tailgate window glass mark.

Tailgate dam upper

Ceramic line

Seal line

Fastener

Tailgate dam side

Ceramic line

Ceramic line

Seal line

Pin

Seal line

Glass stopper

Tailgate window glass

Align the window dam end with 
the tailgate window glass mark.

Tailgate dam lower

Tailgate dam lower

Align the glass stopper end with 
the tailgate window glass mark.

Tailgate dam side

Align the pin end with the 
tailgate window glass mark.

WINDOW GLASS

BODY

42-29

2. Install the tailgate dam lower, the tailgate dam 

side, the tailgate dam upper, the glass stopper, 
the fasteners and the pin as shown in the 
illustration.

Main

Index

Group

TOC


Content   ..  499  500  501  502   ..