Mitsubishi 380. Manual - part 317


  Index      Mitsubishi     Mitsubishi 380 - service repair manual 2005 year


Search            


Content   ..  315  316  317  318   ..


Mitsubishi 380. Manual - part 317


MAINTENANCE SERVICE

GENERAL

00-46

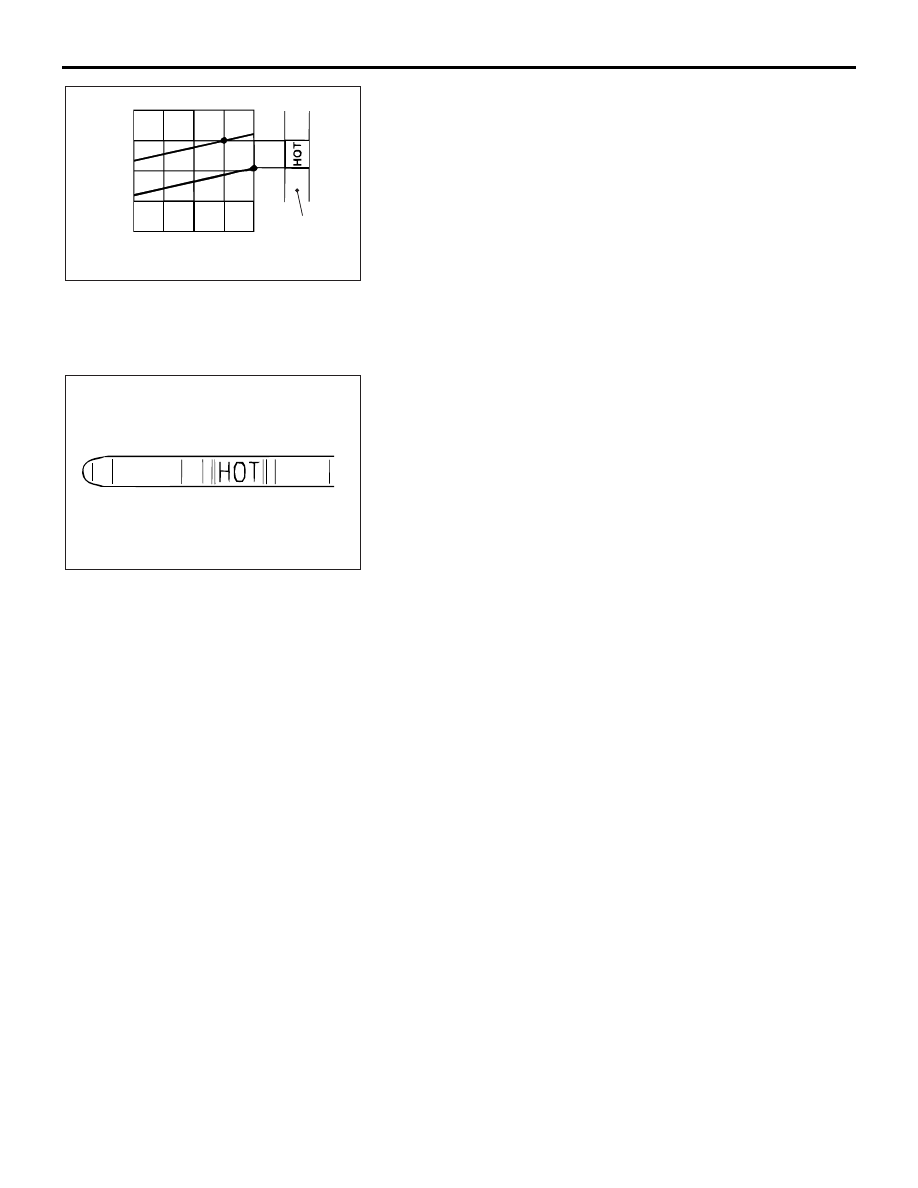
NOTE: If it takes some amount of time until the transmission 
fluid reaches its normal operating temperature [70 

 80°

(158 

 176°F)], check the transmission fluid level by refer-

ring to the left diagram.

2. Park the vehicle on a level surface.

3. Move the selector lever through all positions to fill the torque 

converter and the hydraulic circuits with fluid, and then move 
the selector lever to the "N" position.

4. After wiping off any dirt around the dipstick, remove the 

dipstick and check the condition of the transmission fluid.

NOTE: If the transmission fluid smells as if it is burnt, it 
means that the transmission fluid has been contaminated by 
fine particles from the bushings and friction materials. Tran-
saxle overhaul and cooler line flushing may be necessary.

5. Check transmission fluid level is at the "HOT" mark on the 

dipstick. If the transmission fluid level is less than this, add 
DIAMOND ATF SP III until the level reaches the "HOT" 
mark.

NOTE: If the transmission fluid level is too low, the oil pump 
will draw in air along with the transmission fluid, which will 
cause to form bubbles. If the transmission fluid level is too 
high, rotating components inside the transaxle will churn the 
fluid and air into a foamy liquid. Both conditions (level too 
low or too high) will cause the hydraulic pressure to drop, 
which will result in late shifting and slipping of the clutches 
and brakes.

NOTE: In either case, air bubbles can interfere with normal 
valve, clutch, and brake operation. Also, foaming can cause 
transmission fluid to escape from the transaxle vent where it 
may be mistaken for a leak.

AC005860

80

DIPSTICK

60

40

(176)

(140)

(104)

FLUID TEMPERATURE [˚C (˚F)]

– 30 (– 1.2)

– 20 (– 0.8)

– 10 (– 0.4)

0 (0)

10 (0.4)

FLUID LEVEL [mm (in)]

AB

AC106828AB

MAINTENANCE SERVICE

GENERAL

00-47

6. Securely insert the dipstick.

NOTE: The transmission fluid should always be replaced 
under the following conditions:

.

• When troubleshooting the transaxle.

• When overhauling the transaxle.

• When the transmission fluid is noticeably dirty or burnt 

(driving under severe conditions).

TRANSMISSION FLUID CHANGE

Refer to GROUP 23A, Automatic Transmission - On-vehicle 
Service 

P.23A-296

.

12. ENGINE COOLANT (CHANGE)

M1001003100357

Check the cooling system parts such as the radiator, heater 
and oil cooler hoses, thermostat and their connections for leak-
age and damage.

.

CHANGING COOLANT

1. Set the temperature control knob to the "HOT" position.

2. Run the engine until the engine coolant warms, and then 

stop the engine.

WARNING

When removing the radiator cap, use care to avoid 
contact with hot coolant or steam. Place a shop towel 
over the cap and turn the cap counterclockwise a lit-
tle to let the pressure escape through the vinyl tube. 
After relieving the steam pressure, remove the cap by 
slowly turning it counterclockwise.

3. Drain the water from the radiator, heater core and engine 

after unplugging the radiator drain plug and removing the 
radiator cap.

MAINTENANCE SERVICE

GENERAL

00-48

4. Drain the water in the water jacket by unplugging the drain 

plug of the cylinder block.

5. Remove the radiator condenser tank assembly and drain the 

coolant.

6. Drain the coolant then clean the path of the coolant by 

injecting water into the radiator from the radiator cap area.

7. Apply the designated sealant to the screw area of the 

cylinder block drain plug, and then tighten to the standard 
torque.

Specified sealant: Loctite 577 or equivalent
Tightening torque:

<3.8L Engine> 39 

± 5 N

8. Securely tighten the radiator drain plug.

9. Assemble the radiator condenser tank assembly.

CAUTION

Do not use alcohol or methanol anti-freeze or any engine 
coolants mixed with alcohol or methanol anti-freeze. The 
use of an improper anti-freeze can cause corrosion of the 
aluminum components.
10.By referring to the section on coolant, select an appropriate 

concentration for safe operating temperature within the 
range of 30 to 60%. Use special tool MB991871 to refill the 
coolant. A convenient mixture is a 50% water and 50% 
antifreeze solution [freezing point: 

−31°C (−32.8 °F)].

Recommended antifreeze: Long Life Antifreeze 

Coolant or an equivalent

Quantity: 

<3.8L Engine> 8.7 Litres 

NOTE: For how to use special tool MB991871, refer to its 
manufacturer’s instructions.

11.Reinstall the radiator cap.

12.Start the engine and let it warm up until the thermostat 

opens.

13.After repeatedly revving the engine up to 3,000 r/min 

several times, stop the engine.

AC306131AB

<3.8L ENGINE: LEFT BANK>

CYLINDER BLOCK
DRAIN PLUG

AC306132AB

<3.8L ENGINE: RIGHT BANK>

CYLINDER BLOCK
DRAIN PLUG

AC200625AD

CYLINDER BLOCK
DRAIN PLUG

<3.8L ENGINE: LEFT BANK>

AC306129

AIR HOSE

MB991871

AB

MAINTENANCE SERVICE

GENERAL

00-49

14.Remove the radiator cap after the engine has cooled, and 

pour in coolant up to the brim. Reinstall the cap.

CAUTION

Do not overfill the radiator condenser tank assembly.
15.Add coolant to the radiator condenser tank assembly 

between the "FULL" and "LOW" mark if necessary.

13. COOLANT HOSES (RADIATOR HOSE, 
HEATER HOSE) (INSPECT)

M1001009700034

Inspect the surface of radiator hoses and heater hoses for heat 
and mechanical damage. Hard and brittle rubber, cracking, 
tears, cuts, abrasions and excessive swelling indicate deterio-
ration of the rubber.

14. DISC BRAKE PADS, ROTORS (INSPECT FOR 
WEAR)

M1001003200291

Check for fluid contamination and wear. Replace the complete 
set of pads if any one pad is defective.

Thickness of lining
Minimum limit: 2.0 mm 

CAUTION

The pads for the right and left wheels should be replaced 
at the same time. Never split or intermix brake pad sets. All 
four pads must be replaced as a complete set.

15. BRAKE HOSES (CHECK FOR 
DETERIORATION OR LEAKS)

M1001003400314

Inspection of brake hoses should be included in all brake ser-
vice operations.
The hoses should be checked for:
1. Incorrect length, severe surface cracking, stretching, 

scuffing or worn spots (If the fabric casing of the hoses is 
exposed by cracks or abrasion in the rubber hose cover, the 
hoses should be replaced. Eventual deterioration of the 
hose and possible bursting failure may occur).

2. Incorrect installation, twisting or interference with wheel, tyre 

or chassis.

ACX00898AB

AC306483

AB

BRAKE HOSES


Content   ..  315  316  317  318   ..