Mitsubishi 380. Manual - part 236


  Index      Mitsubishi     Mitsubishi 380 - service repair manual 2005 year


Search            


Content   ..  234  235  236  237   ..


Mitsubishi 380. Manual - part 236


ON-VEHICLE SERVICE

ENGINE COOLING

14-28

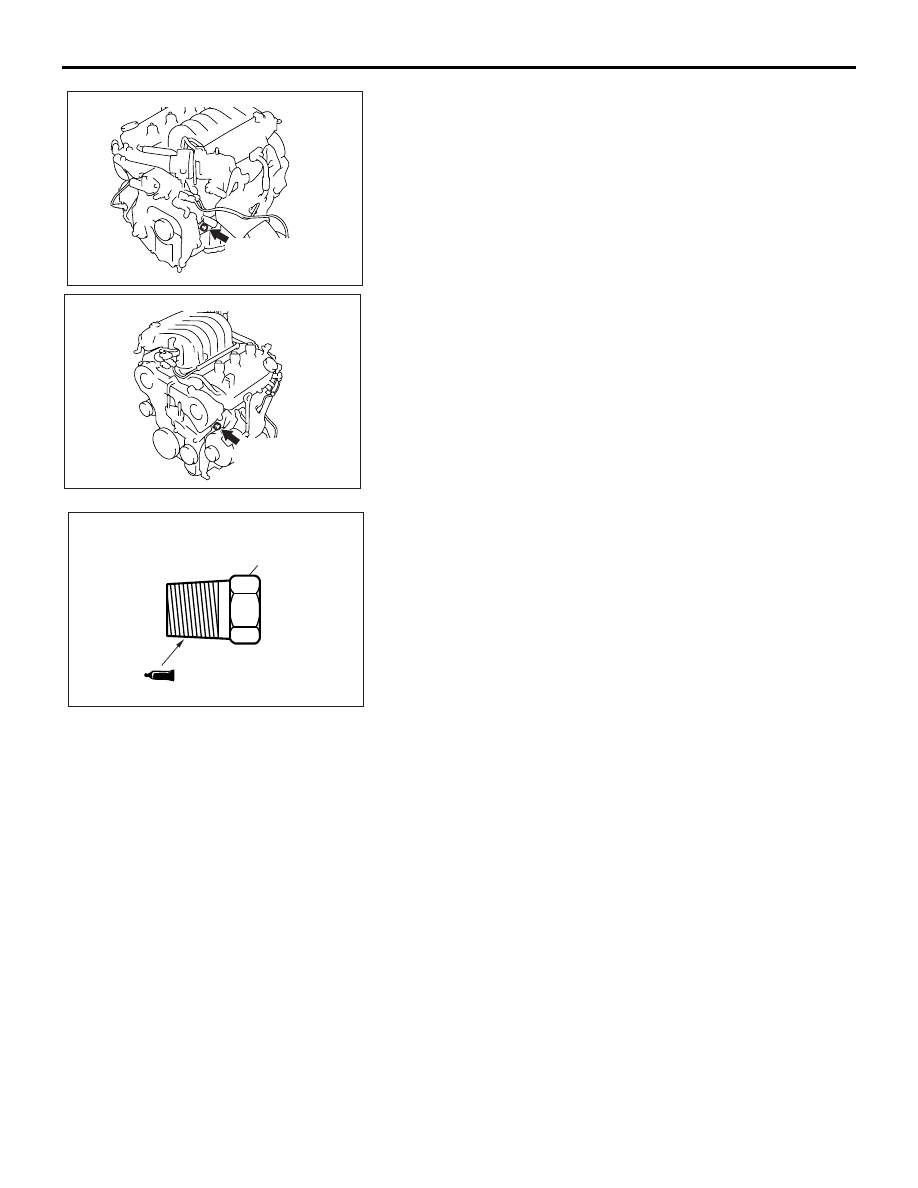
2. Drain the water in the water jacket by unplugging the drain 

plug of the cylinder block.

3. Remove the radiator condenser tank assembly and drain the 

coolant.

4. Drain the coolant then clean the path of the coolant by 

injecting water into the radiator from the radiator cap area.

5. Apply the designated sealant to the screw area of the 

cylinder block drain plug, and then tighten to the standard 
torque.

Specified sealant: 3M

 AAD Part No.8731 or equiva-

lent

Tightening torque:

39 

± 5 Nm

6. Securely tighten the radiator drain plug.

7. Assemble the radiator condenser tank assembly.

AC306131AB

<3.8L ENGINE: LEFT BANK>

CYLINDER BLOCK
DRAIN PLUG

AC306132AB

<3.8L ENGINE: RIGHT BANK>

CYLINDER BLOCK
DRAIN PLUG

AC200625AD

CYLINDER BLOCK
DRAIN PLUG

<3.8L ENGINE: LEFT BANK>

ON-VEHICLE SERVICE

ENGINE COOLING

14-29

CAUTION

• Do not use alcohol or methanol anti-freeze or any 

engine coolants mixed with alcohol or methanol 
anti-freeze. The use of an improper anti-freeze can 
cause corrosion of the aluminum components.

8. By referring to the section on coolant, select an appropriate 

concentration for safe operating temperature within the 
range of 30 to 60 %. Use special tool MB991871 to refill the 
coolant. A convenient mixture is a 50 % water and 50 % 
antifreeze solution [freezing point: 

−31°C (−32.8 °F)].

Recommended antifreeze: Long Life Antifreeze 

Coolant or an equivalent

Quantity: 

8.7 Litres

NOTE: For how to use special tool MB991871, refer to its 
manufacturer’s instructions.

9. Reinstall the radiator cap.

10.Start the engine and let it warm up until the thermostat 

opens.

11.After repeatedly revving the engine up to 3,000 r/min several 

times, stop the engine.

12.Remove the radiator cap after the engine has cooled, and 

pour in coolant up to the brim. Reinstall the cap.

CAUTION

Do not overfill the radiator condenser tank assembly.
13.Add coolant to the radiator condenser tank assembly 

between the "FULL" and "LOW" mark if necessary.

ENGINE COOLANT CONCENTRATION TEST

M1141001100396

Refer to GROUP 00, RECOMMENDED LUBRICANTS AND 
LUBRICANT CAPACITIES TABLE 35.

FAN CONTROLLER CHECK

M1141007400113

1. Remove the fan controller connector.

2. Turn the ignition switch to the "ON" position, and measure 

the voltage between the harness-side connector terminals.

Standard value: System voltage

AC306129

AIR HOSE

MB991871

AB

04DB017A

2

3

1

Fan controller

ON-VEHICLE SERVICE

ENGINE COOLING

14-30

3. Connect the fan controller connector, and disconnect the 

condenser fan motor connector.

4. Ensure that the A/C switch is off, and start the engine and 

run it at idle.

5. Measure the voltage between the fan controller-side 

connector terminals.

Standard value: 1V or less

WARNING

Stay clear of the fan when the fan starts running.

6. Turn the A/C switch to the "ON" position.

7. Measure the voltage between the fan controller-side 

connector terminals while the fan is running. The voltage 
should repeat the values below.

Standard value:

8.2 

± 2.6 V

System voltage 

± 2.6 V

8. If the voltage does not repeatedly change as indicated, 

replace the cooling fan motor and fan controller.

04DB018A

2

1

Fan controller

ON-VEHICLE SERVICE

ENGINE COOLING

14-31

FAN CONTROL RELAY CONTINUITY CHECK

M1141006200310

BATTERY 
VOLTAGE

TERMINAL NO. TO 
BE CONNECTED 
TO TESTER

CONTINUITY TEST 
RESULTS

Not applied

− 2

Open circuit

Connect 
terminal No.3 
and battery (

−) 

terminal.
Connect 
terminal No.1 
and battery (+) 
terminal.

− 2

Less than 2 ohms

AC305017

1

3

4

2

3

4

1

2

AC307445

FAN CONTROL RELAY

AB


Content   ..  234  235  236  237   ..