Mitsubishi Grandis. Manual - part 673
WINDOW GLASS
BODY
42-20
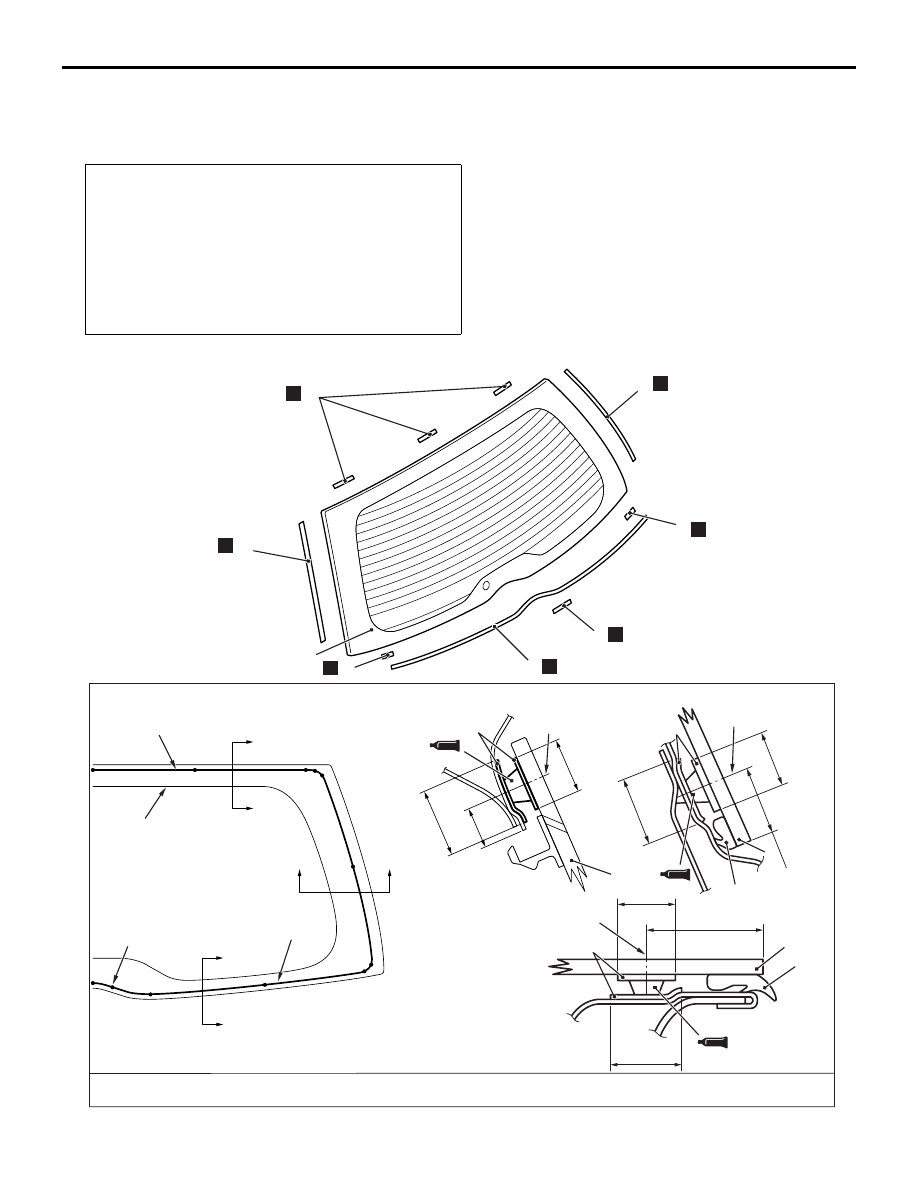
TAILGATE WINDOW GLASS
REMOVAL AND INSTALLATION
M1422003700244
Pre-removal and Post-installation Operation
• Rear Wiper Blade And Arm Assembly Removal and
Installation (Refer to GROUP 51, Rear Wiper and Washer
• Tailgate Spoiler Assembly Removal and Installation
(Refer to GROUP 51,Tailgate Spoiler
).
• Tailgate Trim Removal and Installation (Refer to GROUP
52A, Tailgate Trim
• Rear Wiper Motor Assembly Removal and Installation
(Refer to GROUP 51, Rear Wiper and Washer
AC303189AC
N
1
5
4
2
1
1
6
1
5
B
B
C
C
A
A
Section A – A
Section B – B
Section C – C
Units: mm
N
3
N
5
N
3
N
6
N
12
15
9
12
15
12
15
N
25
14.5
Apply the primer and adhesive
along the fictitious lines (seal line)
between each of the marks
Ceramic line
Mark
Seal line
Seal line centre
Seal line centre
Seal line centre
Primer
Primer
Primer
Adhesive: 3M ATD Part No. 8609 Super Fast Urethane Auto Glass Sealant or equivalent and
3M ATD Part No. 8608 Super Fast Urethane Primer or equivalent