Mazda CX-9 Grand Touring. Manual - part 505


  Index      Mazda     Mazda CX-9 Grand Touring - service repair manual 2008 year


Search            


Content   ..  503  504  505  506   ..


Mazda CX-9 Grand Touring. Manual - part 505


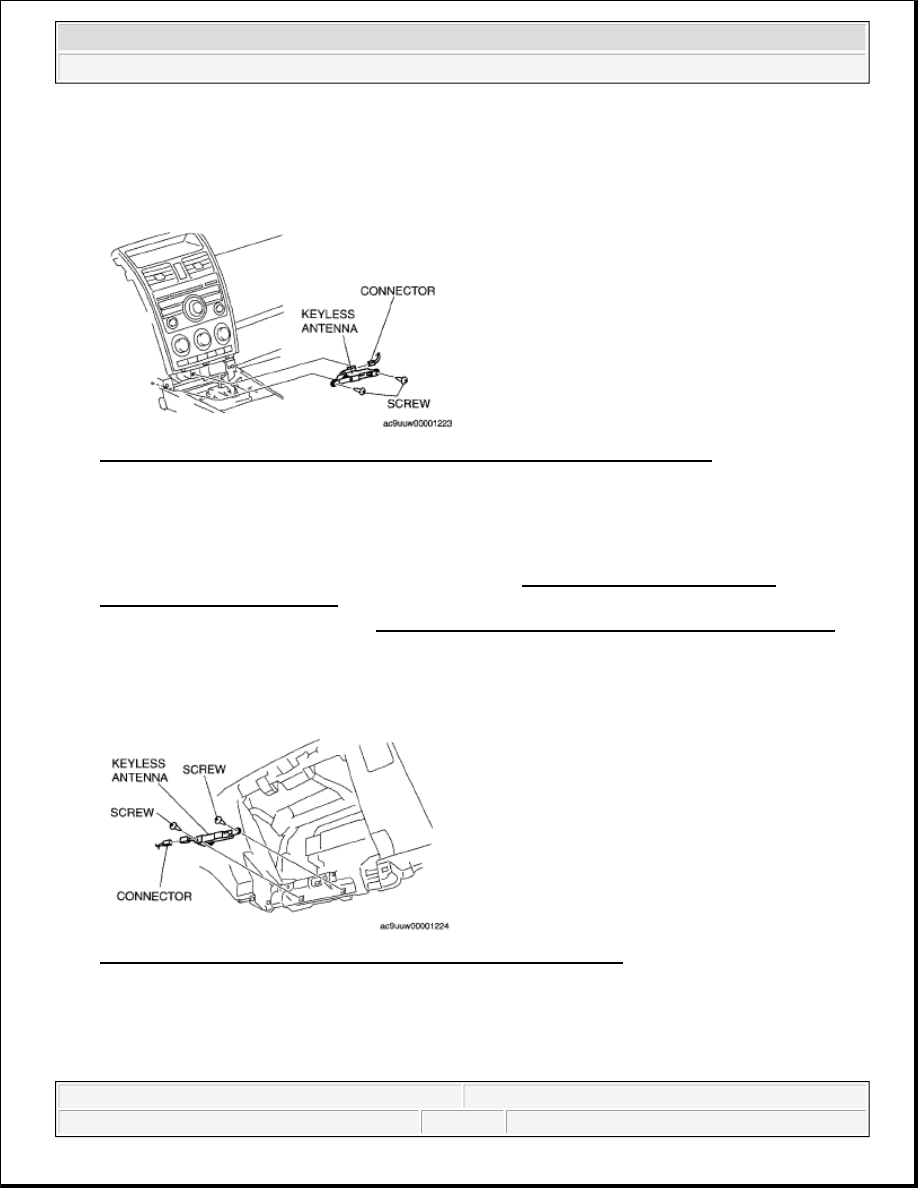
6. Disconnect the connector, then remove the screws.  

7. Remove the keyless antenna.  

8. Install in the reverse order of removal. 

Fig. 69: Identifying Keyless Antenna & Connector With Screw (Interior, Front) 
Courtesy of MAZDA MOTORS CORP. 

RH 

1. Disconnect the negative battery cable.  

2. Remove the dashboard under cover (Passenger side). (See DASHBOARD UNDER COVER 

REMOVAL/INSTALLATION .)  

3. Remove the glove compartment. (See GLOVE COMPARTMENT REMOVAL/INSTALLATION .)  

4. Disconnect the connector, then remove the screws.  

5. Remove the keyless antenna.  

6. Install in the reverse order of removal. 

Fig. 70: Identifying Keyless Antenna & Connector With Screw - RH 
Courtesy of MAZDA MOTORS CORP. 

INTERIOR, MIDDLE 

1. Disconnect the negative battery cable. 


2008 Mazda CX-9 Grand Touring 

2008 BODY & ACCESSORIES Security and Locks - Mazda CX-9


Microsoft 


Sunday, November 15, 2009 10:47:58 AM

Page 47 

© 2005 Mitchell Repair Information Company, LLC. 

2. Remove the console cover. (See CONSOLE COVER REMOVAL/INSTALLATION .)  

3. Remove the clips.  

4. Disconnect the connector, then remove the keyless antenna.  

5. Install in the reverse order of removal. 

Fig. 71: Identifying Keyless Antenna & Connector With Screw (Interior, Middle) 
Courtesy of MAZDA MOTORS CORP. 

INTERIOR, REAR 

1. Disconnect the negative battery cable.  

2. Remove the trunk box. (See TRUNK BOX REMOVAL/INSTALLATION .)  

3. Remove the third-row seat. (See THIRD-ROW SEAT REMOVAL/INSTALLATION .)  

4. Partially peel back the floor covering.  

5. Remove the nuts.  

6. Disconnect the connector, then remove the keyless antenna.  

7. Install in the reverse order of removal. 

Fig. 72: Identifying Keyless Antenna, Connector With Screw & Torque Specifications (Interior, 
Rear)
 
Courtesy of MAZDA MOTORS CORP. 

KEYLESS BEEPER REMOVAL/INSTALLATION [ADVANCED KEYLESS 


2008 Mazda CX-9 Grand Touring 

2008 BODY & ACCESSORIES Security and Locks - Mazda CX-9


Microsoft 


Sunday, November 15, 2009 10:47:58 AM

Page 48 

© 2005 Mitchell Repair Information Company, LLC. 

SYSTEM] 

1. Disconnect the negative battery cable.  

2. Partially peel back the splash shield (LH).  

3. Remove the bolt and screw.  

4. Disconnect the connector, then remove the keyless beeper.  

5. Install in the reverse order of removal. 

Fig. 73: Identifying Keyless Beeper, Connector, Bolt & Torque Specifications 
Courtesy of MAZDA MOTORS CORP. 

REQUEST SWITCH REMOVAL/INSTALLATION [ADVANCED KEYLESS 
SYSTEM] 

DRIVER SIDE/PASSENGER SIDE 

1. Disconnect the negative battery cable.  

2. Remove the following parts: 

1. Inner garnish (See INNER GARNISH REMOVAL/INSTALLATION .)  

2. Front door trim (See FRONT DOOR TRIM REMOVAL/INSTALLATION .)  

3. Front door speaker (See FRONT DOOR SPEAKER REMOVAL/INSTALLATION .)  

4. Front door glass (See FRONT DOOR GLASS REMOVAL/INSTALLATION .)  

5. Front door module (See FRONT DOOR MODULE REMOVAL/INSTALLATION .)  

3. Remove the screw A, then remove the handle seat. 


2008 Mazda CX-9 Grand Touring 

2008 BODY & ACCESSORIES Security and Locks - Mazda CX-9


Microsoft 


Sunday, November 15, 2009 10:47:58 AM

Page 49 

© 2005 Mitchell Repair Information Company, LLC. 

4. Remove screw B, then remove the request switch. 

Fig. 74: Identifying Request Switch & Handle Seat With Screws 
Courtesy of MAZDA MOTORS CORP. 

LIFTGATE 

1. Disconnect the negative battery cable.  

2. Remove the liftgate upper trim. (See LIFTGATE UPPER TRIM REMOVAL/INSTALLATION .)  

3. Remove the liftgate side trim. (See LIFTGATE SIDE TRIM REMOVAL/INSTALLATION .)  

4. Remove the liftgate lower trim. (See LIFTGATE LOWER TRIM REMOVAL/INSTALLATION .)  

5. Remove the rear finisher. (See LIFTGATE LOWER TRIM REMOVAL/INSTALLATION .)  

6. Press the tabs and remove the request switch.  

7. Install in the reverse order of removal. 

Fig. 75: Identifying Request Switch & Rear Finisher 
Courtesy of MAZDA MOTORS CORP. 

REQUEST SWITCH INSPECTION [ADVANCED KEYLESS SYSTEM] 

1. Inspect for continuity between request switch terminals A and B. 

If not as specified, replace the request switch. 


2008 Mazda CX-9 Grand Touring 

2008 BODY & ACCESSORIES Security and Locks - Mazda CX-9


Microsoft 


Sunday, November 15, 2009 10:47:58 AM

Page 50 

© 2005 Mitchell Repair Information Company, LLC. 


Content   ..  503  504  505  506   ..