Mazda CX-9 Grand Touring. Manual - part 474
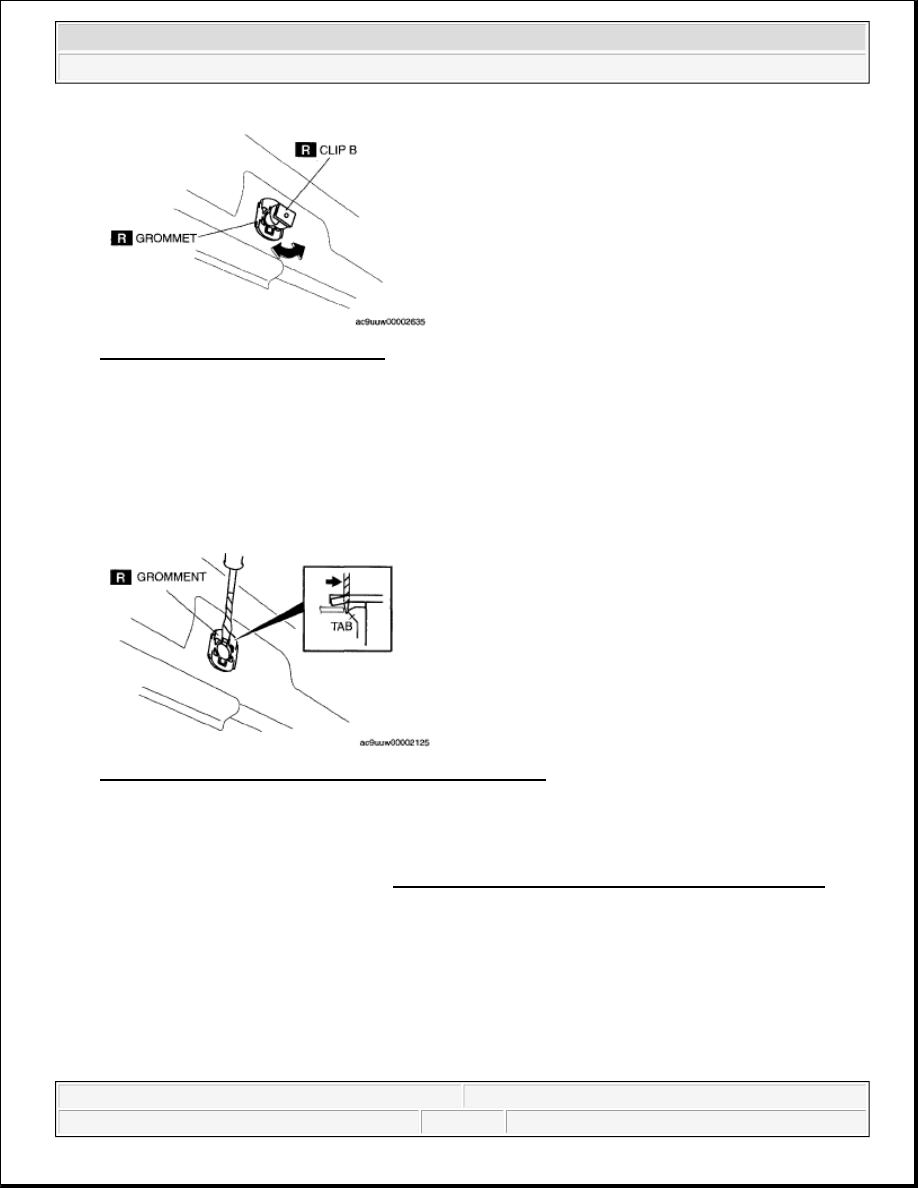
Fig. 43: Identifying Grommet & Clip
Courtesy of MAZDA MOTORS CORP.
6. Insert a tape-wrapped flathead screwdriver between the body and the grommet.
7. Press the tabs and remove the grommet.
8. Install the new grommet to the body.
9. Install the new clip B to the A-pillar trim.
10. Install the A-pillar trim.
Fig. 44: Inserting Screwdriver Between Body & Grommet
Courtesy of MAZDA MOTORS CORP.
FRONT SIDE TRIM REMOVAL/INSTALLATION
1. Remove the front scuff plate inner. (See FRONT SCUFF PLATE REMOVAL/INSTALLATION.)
2. Partially peel back the seaming welt.
3. Remove the nut.
4. Pull the front side trim upward, then detach clip A, pin B.
5. Remove the front side trim.
6. Install in the reverse order of removal.
2008 Mazda CX-9 Grand Touring
2008 BODY & ACCESSORIES Interior Trim - Mazda CX-9
Microsoft
Sunday, November 15, 2009 10:43:26 AM
Page 29
© 2005 Mitchell Repair Information Company, LLC.