Mazda CX-9 Grand Touring. Manual - part 94


  Index      Mazda     Mazda CX-9 Grand Touring - service repair manual 2008 year


Search            


Content   ..  92  93  94  95   ..


Mazda CX-9 Grand Touring. Manual - part 94


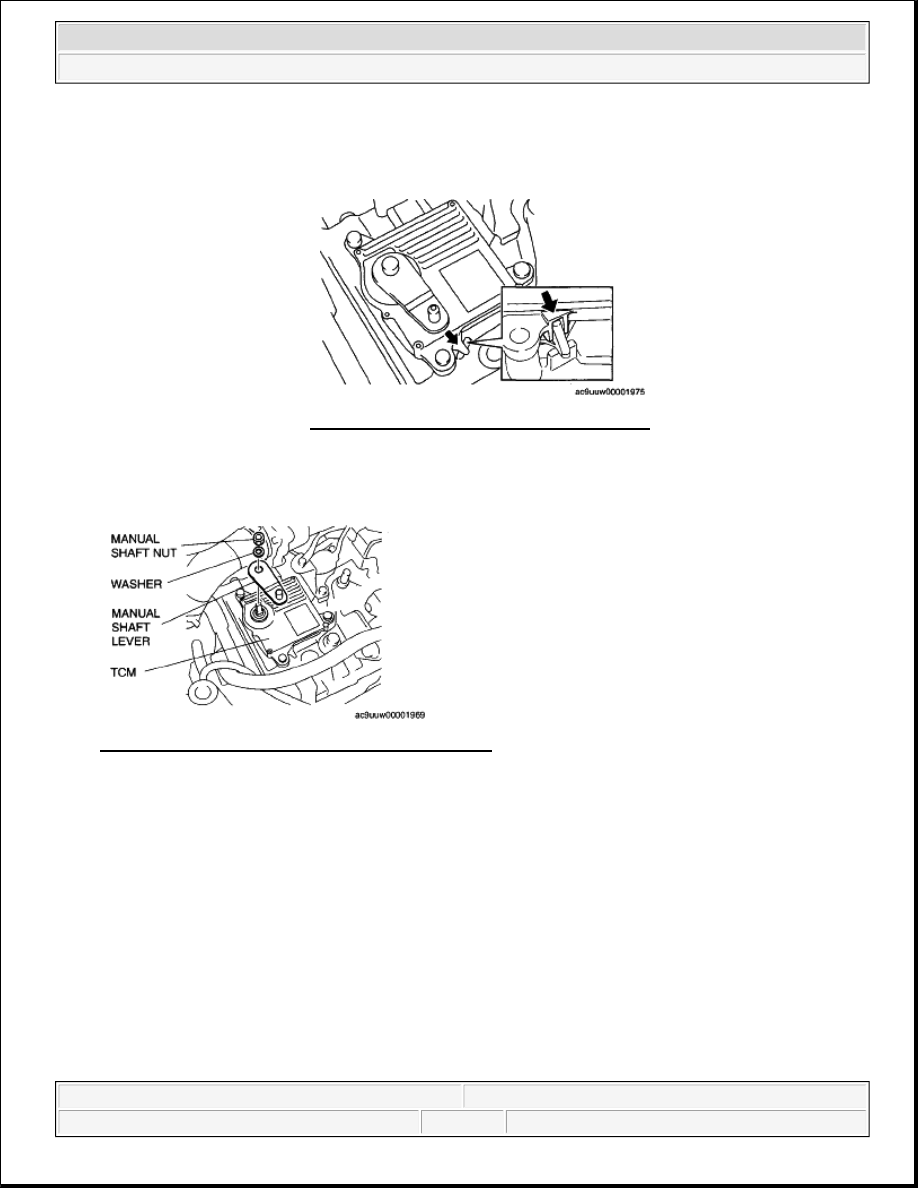
14. Install the manual shaft lever and the washer. 

Fig. 49: Identifying Manual Shaft Lever & Washer 
Courtesy of MAZDA MOTORS CORP. 

15. Set the adjustable wrench as shown in the figure to hold the manual shaft lever, and tighten the manual 

shaft nut. 

Tightening torque  

9.8-14.7 N.m {100-142 kgf.cm, 87-123 in.lbf}

removing the manual shaft nut, or the transaxle may be 
damaged. 

Fig. 48: Identifying TCM Mounting Bolts 
Courtesy of MAZDA MOTORS CORP. 


2008 Mazda CX-9 Grand Touring 

2008 TRANSMISSION Automatic Transaxle (AW6A-EL, AW6AX-EL) - Mazda CX-9


Microsoft 


Sunday, November 15, 2009 10:29:31 AM

Page 45 

© 2005 Mitchell Repair Information Company, LLC. 

Fig. 50: Identifying Manual Shaft Lever 
Courtesy of MAZDA MOTORS CORP. 

16. Install the clip to the selector cable as shown in the figure.  

17. Shift the selector lever to P position.  

18. Turn the manual shaft lever to P position. 

Fig. 51: Identifying Clip To Selector Cable 
Courtesy of MAZDA MOTORS CORP. 

19. Connect the selector cable and install the clip.  

20. Connect the TCM connector.  

21. Install the air cleaner component. (See INTAKE-AIR SYSTEM REMOVAL/INSTALLATION [MZI-

3.7] .)  

22. Connect the negative battery cable. 

23. Perform the neutral position learning. (See NEUTRAL POSITION LEARNING.) 

WARNING:

If you replace the ATX or TCM, be sure to initialize the learned 
values and perform neutral position learning.  


2008 Mazda CX-9 Grand Touring 

2008 TRANSMISSION Automatic Transaxle (AW6A-EL, AW6AX-EL) - Mazda CX-9


Microsoft 


Sunday, November 15, 2009 10:29:31 AM

Page 46 

© 2005 Mitchell Repair Information Company, LLC. 

Fig. 52: Identifying TCM, Manual Shaft Lever & Selector Cable 
Courtesy of MAZDA MOTORS CORP. 

NEUTRAL POSITION LEARNING 

1. Engage the parking brake and use wheel chocks at the front and rear of the wheels.  

2. Connect the M-MDS to the DLC-2.  

3. After the vehicle is identified, select the following items from the initialization screen of the M-MDS. 

When using the IDS (laptop PC) 

1. Select "Power train".  

2. Select "Transmission".  

When using the PDS (Pocket PC) 

1. Select "All Tests and Calibrations".  

4. Then, select the "Transmission Learning".  

5. Perform the N range learning according to the directions on the screen. 

When "Operation Successful" is displayed, shift the selector lever to the P position and turn the 
ignition switch to the LOCK position, then to the ON position after 5 s.  

If "Reinstall TCM properly and then try again" is displayed, perform the following inspection: 

Fig. 53: Identifying DLC-2 Connector 
Courtesy of MAZDA MOTORS CORP. 

Verify that the transaxle manual shaft is in the N position. 


2008 Mazda CX-9 Grand Touring 

2008 TRANSMISSION Automatic Transaxle (AW6A-EL, AW6AX-EL) - Mazda CX-9


Microsoft 


Sunday, November 15, 2009 10:29:31 AM

Page 47 

© 2005 Mitchell Repair Information Company, LLC. 

If the manual shaft is in a position other than N, shaft it to the N position.  

Verify that the selector cable is adjusted properly. 

If the selector cable is not adjusted properly, adjust it. (See SELECTOR CABLE 
ADJUSTMENT
 .)  

Inspect the manual shaft lever for deformation. 

If there is any malfunction, replace the manual shaft lever.  

6. Shift the selector lever from P position to D range, then verify that the positions of the selector lever and 

the indicator are aligned. 

If there is any malfunction, inspect the DTC. (See DTC TABLE [AW6A-EL, AW6AX-EL] .)  

OIL SEAL (MANUAL SHAFT) REPLACEMENT [AW6A-EL, AW6AX-EL] 

1. Disconnect the negative battery cable.  

2. Remove the air cleaner component. (See INTAKE-AIR SYSTEM REMOVAL/INSTALLATION 

[MZI-3.7] .)  

3. Remove the TCM. (See TCM REMOVAL/INSTALLATION [AW6A-EL, AW6AX-EL].) 

4. Remove and discard the oil seal using a tape-wrapped flathead screwdriver. 

5. Using the SST and a hammer, tap a new oil seal so that the specified oil seal position is obtained. 

CAUTION:

Water or foreign material entering the connector can cause a poor 
connection or corrosion. Be sure not to allow water or foreign 
material on the connector when disconnecting.  

CAUTION:

Do not damage the transaxle case.

Do not damage the manual shaft.  

CAUTION:

Do not damage the oil seal. 

Fig. 54: Removing Oil Seal 
Courtesy of MAZDA MOTORS CORP. 


2008 Mazda CX-9 Grand Touring 

2008 TRANSMISSION Automatic Transaxle (AW6A-EL, AW6AX-EL) - Mazda CX-9


Microsoft 


Sunday, November 15, 2009 10:29:31 AM

Page 48 

© 2005 Mitchell Repair Information Company, LLC. 


Content   ..  92  93  94  95   ..