Index Jeep Jeep Wrangler TJ - service repair manual 2005 year
Search
Content .. 457 458 459 460 ..
Jeep Wrangler TJ. Manual - part 459
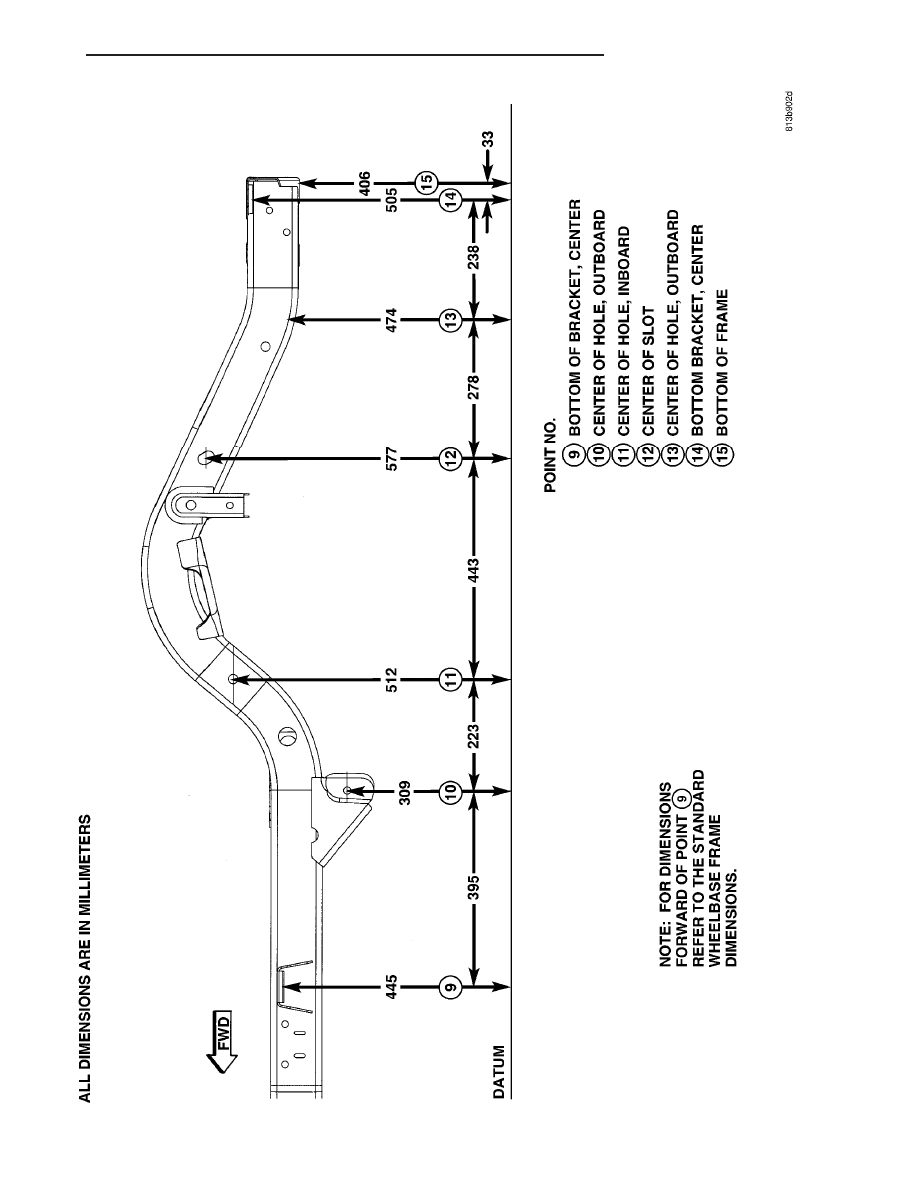
Fig.
8
FRAME
SIDE
VIEW
L
W
B
TJ
FRAME & BUMPERS
13 - 7
FRAME (Continued)