Content .. 1286 1287 1288 1289 ..
Jeep Liberty KJ. Manual - part 1288
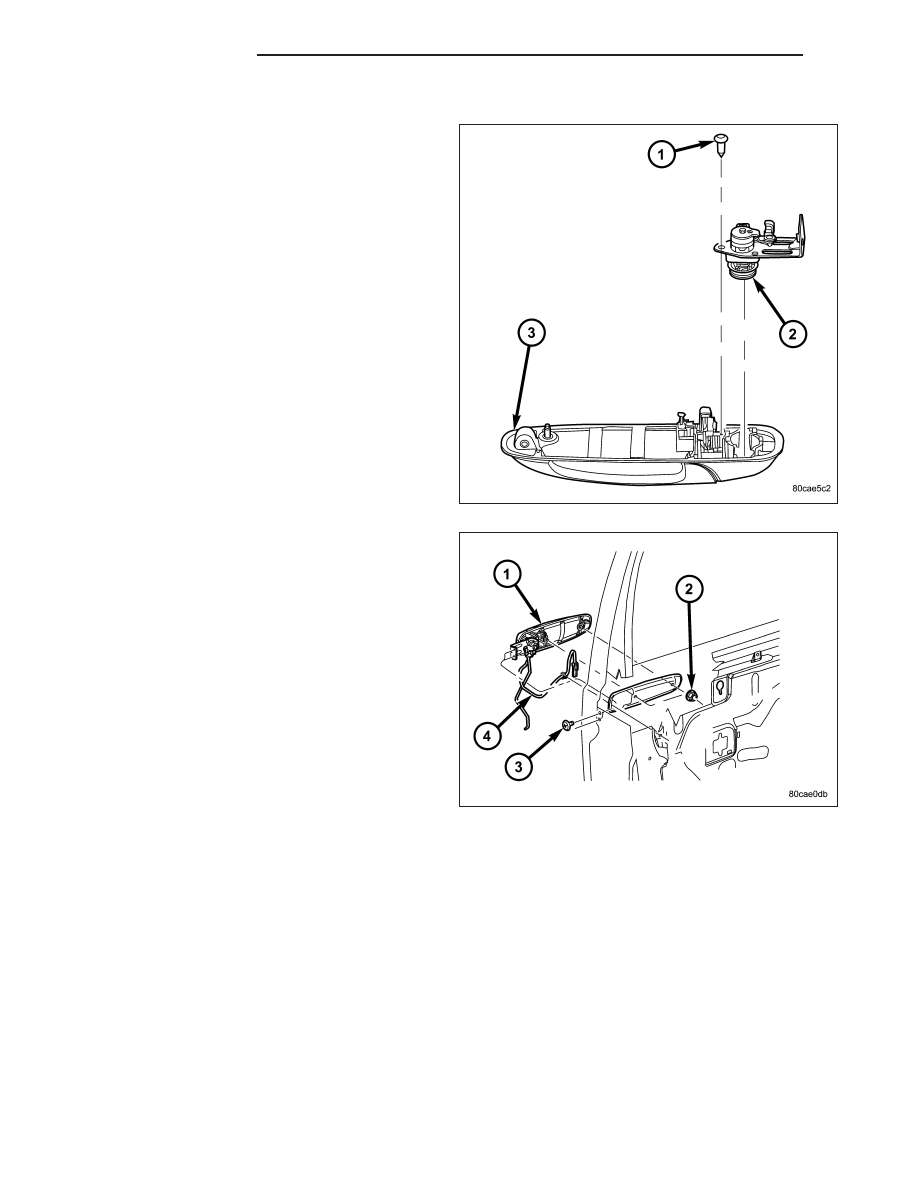
INSTALLATION
1. Install the lock cylinder (2), the retaining screw (1)
and tighten to 6 N·m (55 in. lbs.).
2. Install the exterior handle (1). (Refer to 23 - BODY/
DOOR - FRONT/EXTERIOR HANDLE - INSTALLA-
TION)
23 - 52
DOOR - FRONT
KJ