Jeep Grand Cherokee WJ. Manual - part 541
(3) Connect the wire harnesses and the washer
hose.
(4) Install the trim panel.
(5) Install the prop rods.
(6) Close the liftgate and check for proper latching
and alignment.
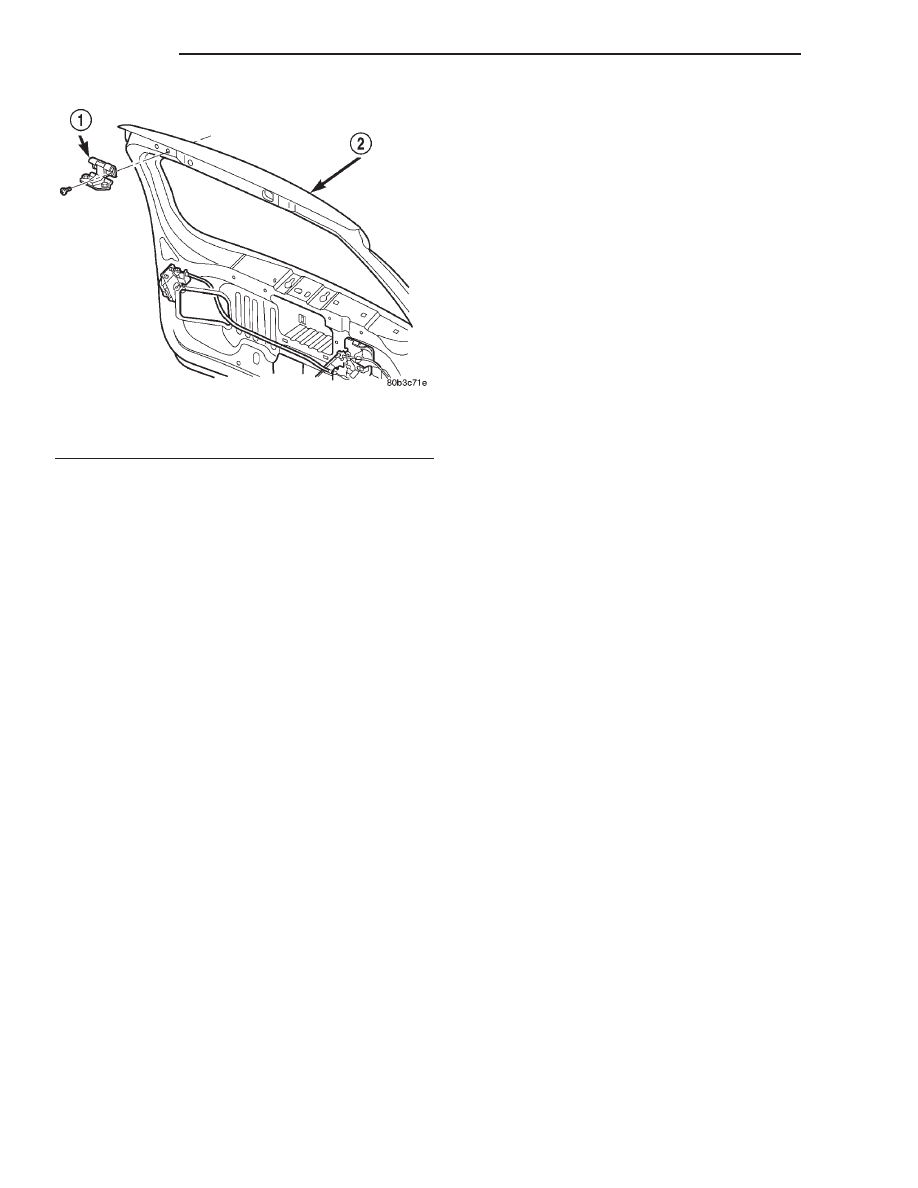
LIFTGATE HINGE
NOTE: It is not necessary to remove the liftgate to
replace one or both hinges. The hinges can be
replaced one at a time.
REMOVAL
(1) Open the liftgate. Support the liftgate for ease
of repair.
(2) Remove the liftgate header trim panel.
(3) Mark the hinge location with a grease pencil or
other suitable device.
(4) Remove the hinge screws (Fig. 75).
(5) Remove hinge.
INSTALLATION
(1) Position the hinge on the roof panel and on the
liftgate. (Use 3M
y Fast and Firm or equivalent on
the hinge to body mating surfaces as a sealant.
(2) Install and tighten hinge screws at roof panel
to 28N·m (21 ft. lbs.).
(3) Install hinge screws at liftgate. Tighten screws
to 28N·m (21 ft. lbs.).
(4) Install liftgate header trim panel.
(5) Check the liftgate for proper alignment and
operation.
LIFTGATE OUTSIDE HANDLE
REMOVAL
(1) Raise the liftgate.
(2) Remove the liftgate trim panel (Refer to lift-
gate trim panel removal and installation in the Body
section of this manual).
(3) Remove the latch, outside handle linkage, and
power lock connector.
(4) Remove the fasteners attaching the outside
handle to the liftgate.
(5) Remove the outside handle from the liftgate.
INSTALLATION
(1) Position the outside handle on the liftgate.
(2) Install the fasteners attaching outside handle
to liftgate.
(3) Connect outside handle link and power lock
connector.
(4) Install liftgate trim panel.
LIFTGATE LATCH
REMOVAL
(1) Raise the liftgate.
(2) Remove the liftgate trim panel (Fig. 76).
(3) Disconnect the power connector.
(4) Disconnect the outside handle link from the
latch.
(5) Remove the latch screws and remove latch.
INSTALLATION
(1) Install the latch into the liftgate and tighten
the screws to 7N·m (5 ft. lbs.).
(2) Connect the outside handle to the liftgate
latch.
(3) Plug in the connector for the power.
(4) Install the liftgate trim panel.
LIFTGATE LATCH STRIKER
REMOVAL
(1) Raise liftgate.
(2) Remove tail lamp.
(3) Remove nuts attaching striker to D-pillar (Fig.
77).
(4) Separate striker from D-pillar.
INSTALLATION
(1) Position striker on D-pillar.
(2) Install
nuts
attaching
striker
to
D-pillar.
Tighten nuts to 10 N·m (7 ft. lbs.) torque.
(3) Install tail lamp.
Fig. 75 Liftgate
1 – HINGE
2 – LIFTGATE
23 - 62
BODY
WJ
REMOVAL AND INSTALLATION (Continued)