Content .. 1040 1041 1042 1043 ..
Isuzu Trooper (1998-2002 year). Manual - part 1042
8F–96
BODY STRUCTURE
607RW005
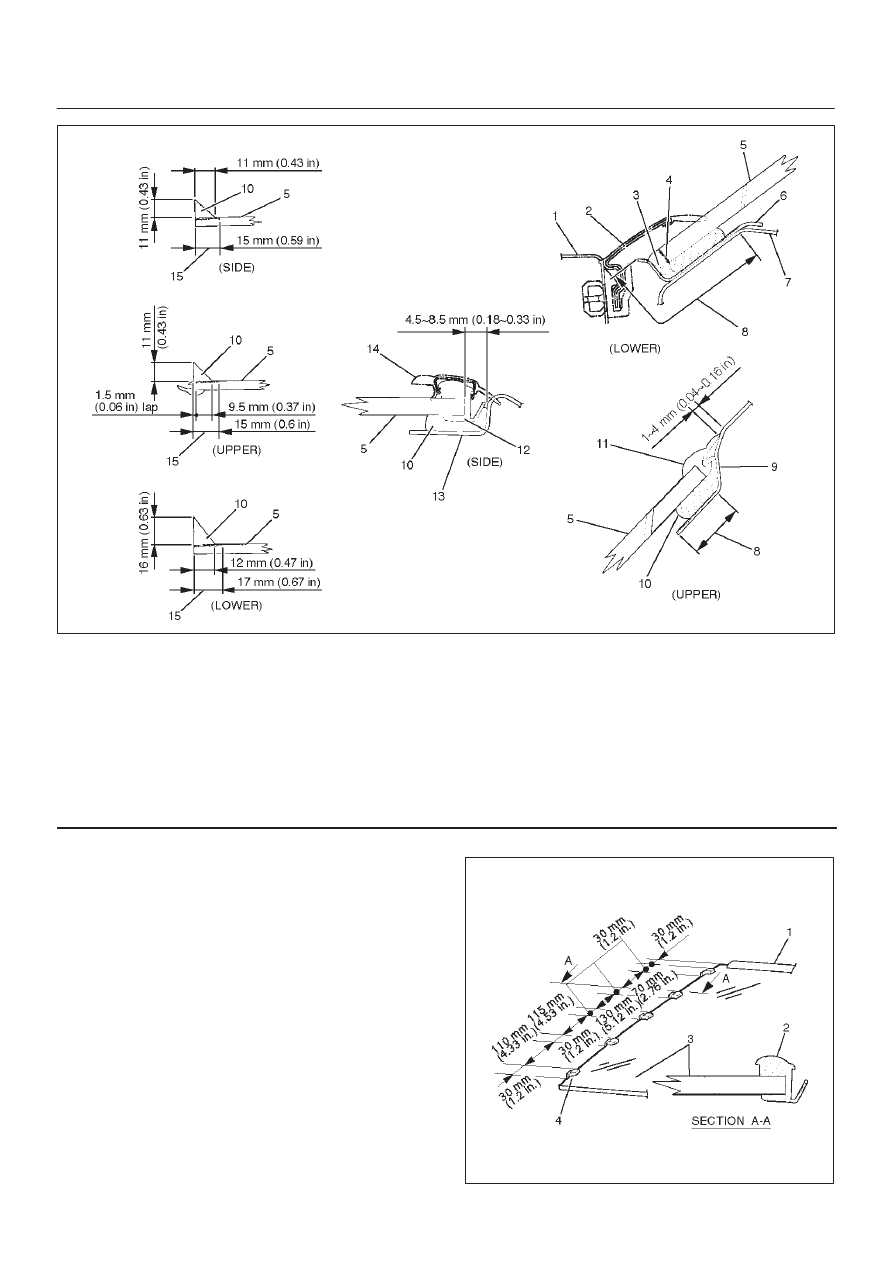
Legend
(1) Front Cowl Cover
(2) Windshield Lower Moulding
(3) The portion of the cowl upper rail flange where
sealing adhesive is additionally filled
(4) Apply primer to the glass and portion where
sealing adhesive is additionally filled
(5) Windshield
(6) Cowl Upper Rail
(7) Cowl Upper Panel
(8) Body Primer
(9) Roof Panel
(10) Sealing Adhesive
(11) Windshield Upper Moulding
(12) Moulding Clip
(13) Front Pillar Outer Panel
(14) Windshield Side Moulding
(15) Sealing Adhesive
2. Install the moulding clip (2).
D
Install new moulding clips to the fixed position of the
windshield (3).
D
Always use new moulding clips (4).
607RS004