Infiniti QX56 (Z62). Manual - part 438
DLK-218
< REMOVAL AND INSTALLATION >
HOOD
• After installation, apply touch-up paint (the body color) onto the head of hood hinge mounting
bolts and nuts.
HOOD HINGE
HOOD HINGE : Removal and Installation
INFOID:0000000006226065
REMOVAL
1.
Remove hood assembly. Refer to
DLK-215, "HOOD ASSEMBLY : Removal and Installation"
2.
Remove front fender cover. Refer to
3.
Remove front fender mounting bolt.
4.
Remove hood hinge mounting bolts, and then remove hood hinge.
INSTALLATION
Note the following items, and install in the reverse order of removal.
CAUTION:
• Before installation of hood hinge, apply anticorrosive agent onto the mounting surface of the vehicle
body.
• After installation, apply touch-up paint (the body color) onto the head of the hinge mounting bolts
and nuts.
• After installation, perform hood fitting adjustment. Refer to
DLK-216, "HOOD ASSEMBLY : Adjust-
HOOD STAY
HOOD STAY : Removal and Installation
INFOID:0000000006226066
REMOVAL
1.
Support hood assembly with a proper material to prevent it from falling.
WARNING:
Bodily injury may occur if no proper material is holding the hood open when removing the hood
stay.
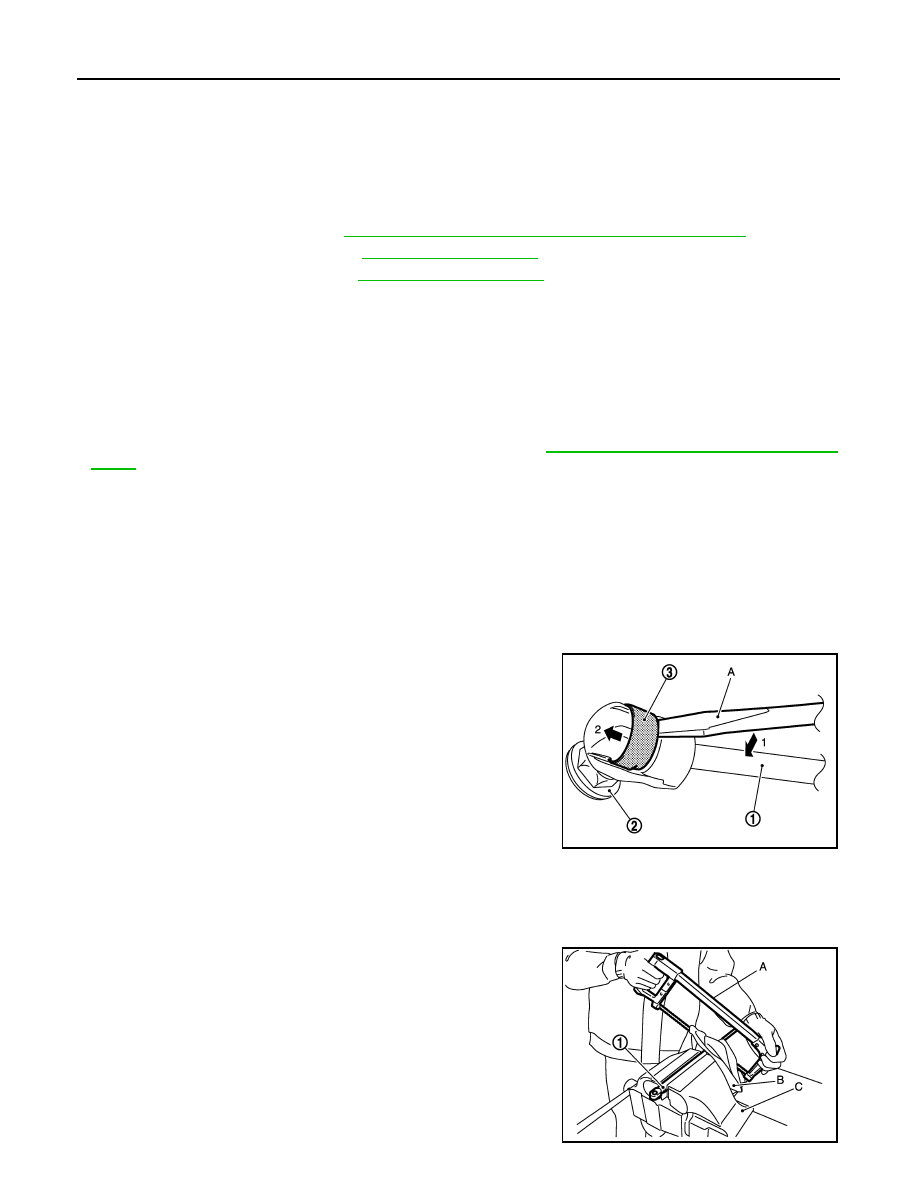
2.
Remove the metal clip (3) located on the connection between
the hood stay (1) and the stud ball (2) (hood side), by using a
flat-bladed screwdriver (A).
3.
Disengage the stud ball from the hood stay (hood side).
4.
Repeat the same operation to disengage the stud ball from the
hood stay (body side), then remove the hood stay.
INSTALLATION
Install in the reverse order of removal.
HOOD STAY : Disposal
INFOID:0000000006226067
1.
Fix hood stay (1) using a vise (C).
2.
Using hacksaw (A) slowly make 2 holes in the hood stay, in
numerical order as shown in the figure.
CAUTION:
• When cutting a hole on hood stay, always cover a hack-
saw using a shop cloth (B) to avoid scattering metal frag-
ments or oil.
• Wear eye protection (safety glasses).
• Wear gloves.
JMKIA2255ZZ
JMKIA3336ZZ