Infiniti M45 (Y34). Manual - part 222
TRUNK LID
BL-113
C
D
E
F
G
H
J
K
L
M
A
B
BL
TRUNK LID
PFP:H4300
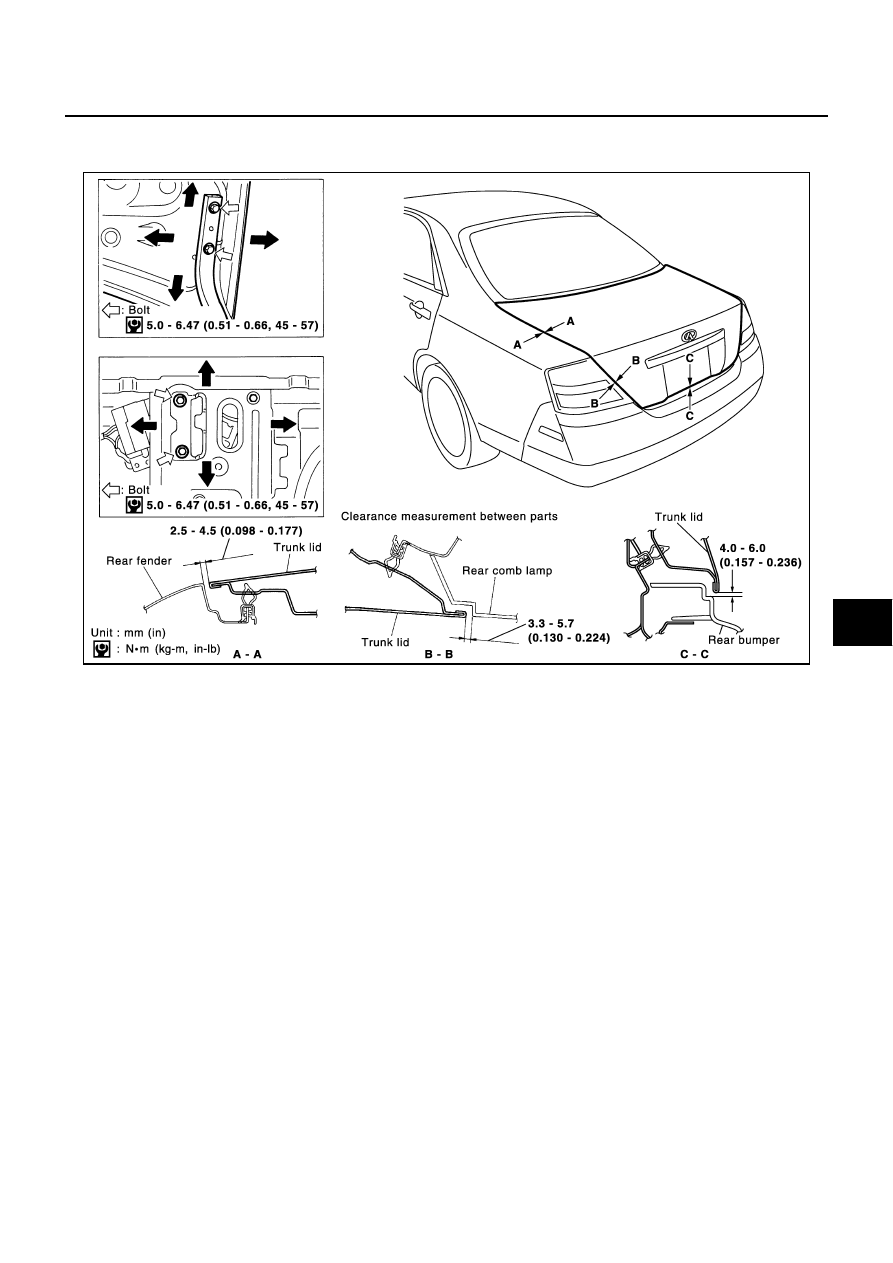
Fitting Adjustment
AIS001EK
LONGITUDINAL AND LATERAL CLEARANCE ADJUSTMENT
1.
With the striker released, loosen the trunk lid hinge mounting bolts to close the trunk lid.
2.
Make the lateral clearance and the clearance to the rear window glass equal, and open the trunk lid to
tighten the mounting bolts to the specified torque.
SURFACE HEIGHT ADJUSTMENT
1.
Loosen the striker mounting bolts. Raise the striker to the top position, and temporarily tighten the upper
mounting bolt at the position.
2.
Close the trunk lid lightly and adjust the surface height, then open the trunk lid to finally tighten the striker
mounting bolts to the specified torque.
PIIA3064E