Infiniti F50. Manual - part 527
HEADLINING
EI-49
C
D
E
F
G
H
J
K
L
M
A
B
EI
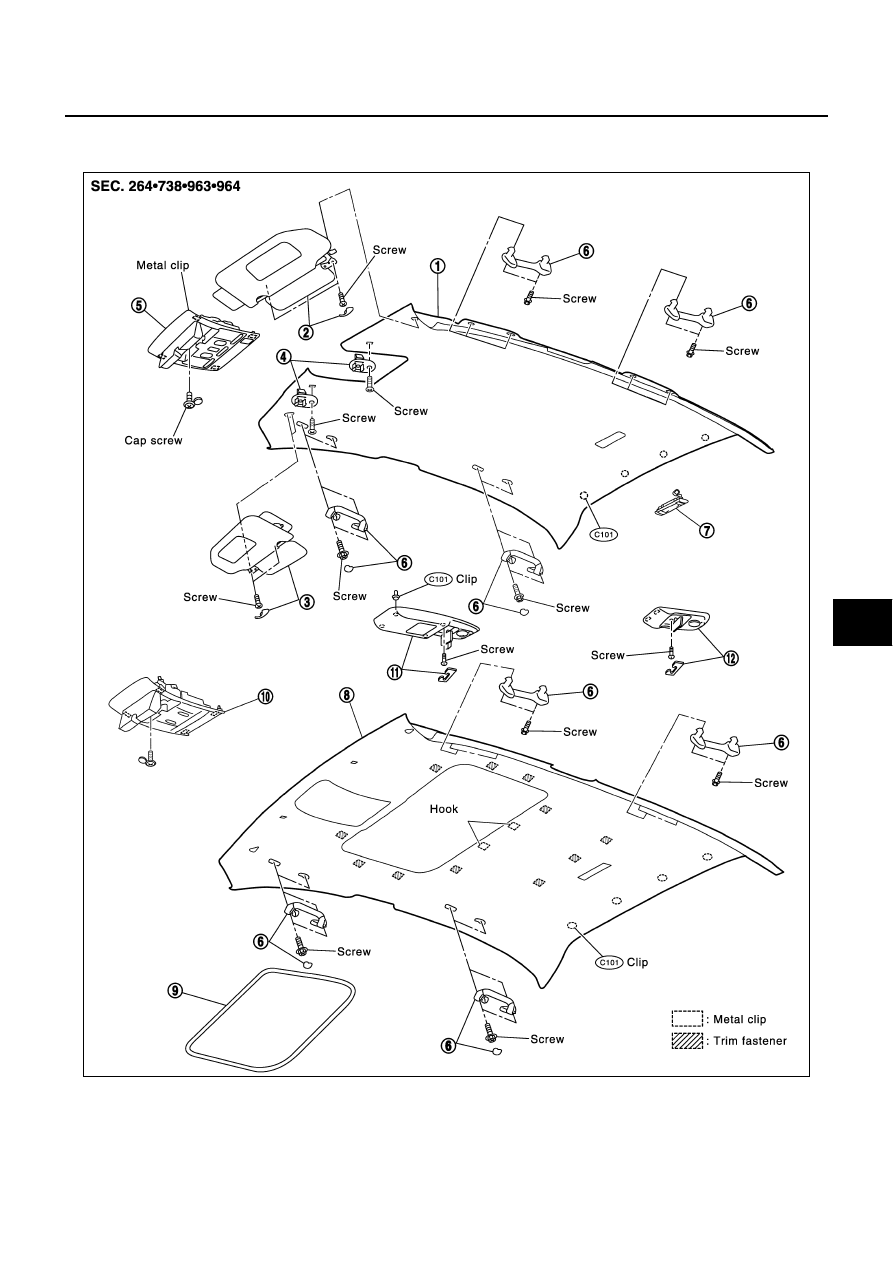
HEADLINING
PFP:73910
Removal and Installation
EIS000DO
PIIA3413E
1.
Headlining (standard)
2.
Sunvisor (left)
3.
Sunvisor (right)
4.
Holder retainer
5.
Map lamp
6.
Assist grip
7
Personal lamp
8.
Headlining (sunroof)
9.
Sunroof welt