Infiniti FX35, FX50 (S51). Manual - part 556
FRONT OIL SEAL
DLN-59
< REMOVAL AND INSTALLATION >
[TRANSFER: ETX13C]
C
E
F
G
H
I
J
K
L
M
A
B
DLN
N
O
P
FRONT OIL SEAL
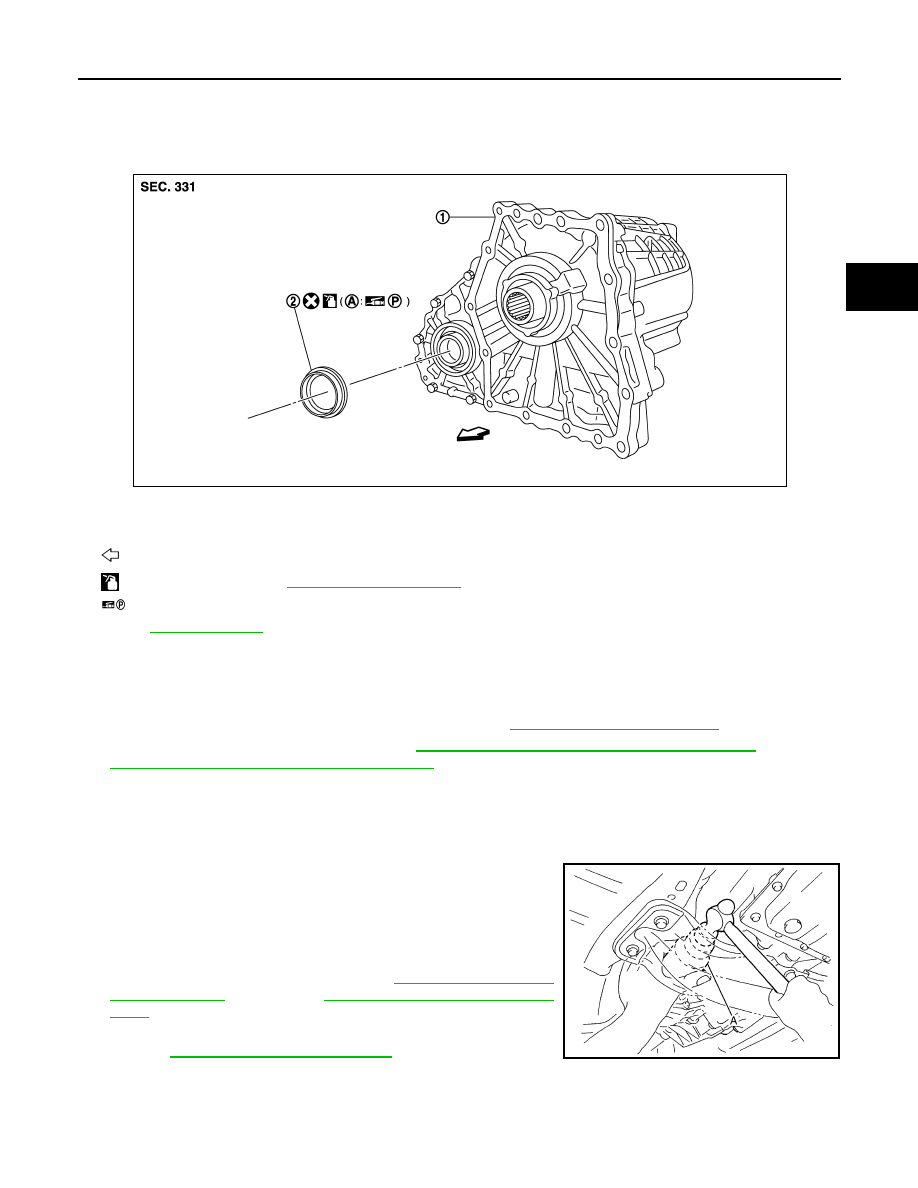
Exploded View
INFOID:0000000005249107
Removal and Installation
INFOID:0000000005249108
REMOVAL
1.
Remove the drain plug to drain the transfer fluid. Refer to
2.
Remove the front propeller shaft. Refer to
DLN-109, "VQ35HR : Removal and Installation"
DLN-111, "VK50VE : Removal and Installation"
(VK50VE).
3.
Remove front oil seal.
CAUTION:
Never damage the front case and front drive shaft.
INSTALLATION
1.
Apply transfer fluid to outside of front oil seal, install it with a drift
(A) [SST: ST27862000 (
—
)] until the end face of front case.
CAUTION:
• Never reuse front oil seal.
• Apply petroleum jelly to oil seal lip.
• When installing, never incline front oil seal.
2.
Install front propeller shaft. Refer to
(VQ35HR),
(VK50VE).
3.
Fill with new transfer fluid, check fluid level and for fluid leakage.
Refer to
1.
Transfer assembly
2.
Front oil seal
A.
Oil seal lip
: Vehicle front
: Apply transfer fluid. Refer to
MA-12, "Fluids and Lubricants"
: Apply petroleum jelly.
Refer to
for symbols not described above.
JPDIE0097ZZ
JPDIE0058ZZ