Honda Crosstour (2015 year). Instruction - part 12
176
uu
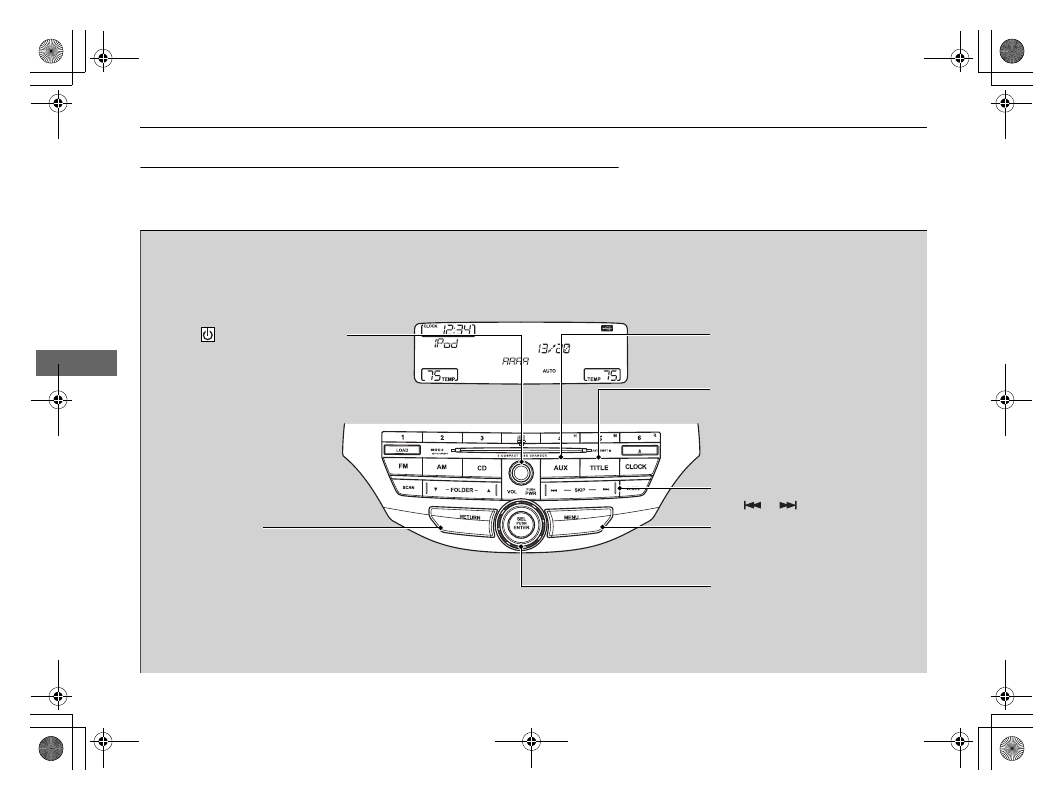
Audio System Basic Operation
u
Playing an iPod
Features
Playing an iPod
Connect the iPod using your dock connector to the USB adapter cable, then press
the AUX button.
VOL/
(Volume/Power) Knob
Press to turn the audio system
on and off.
Turn to adjust the volume.
SKIP Bar
Press
or
to change songs.
Selector Knob
Turn to select a song, file, menu
item, or play mode. Press to set
your selection.
AUX Button
Press to select iPod (if connected).
TITLE Button
Press to display the text data.
RETURN Button
Press to go back to the previous display.
MENU Button
Press to display menu items.