Honda Odyssey 2004. Manual - part 299
*01
S0X4AZ4D14300000000DAAT00
REAR DRUM BRAKE TYPE: ’99-01 models
19-2
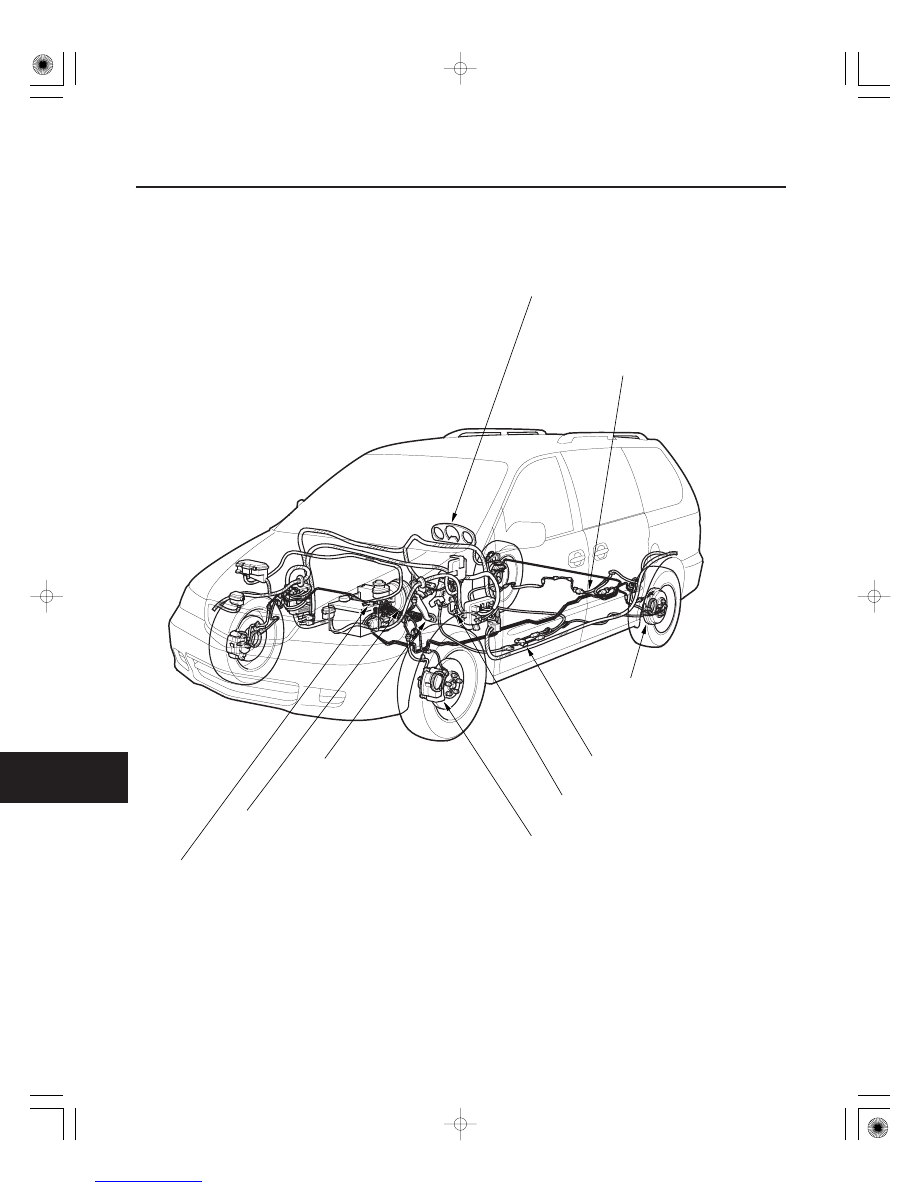
Conventional Brake Components
Component Location Index
INDICATOR
BRAKE BOOSTER
PARKING BRAKE CABLE
REAR BRAKES
BRAKE PEDAL
BRAKE HOSE and LINE
MASTER CYLINDER
FRONT BRAKES
PARKING BRAKE PEDAL
Brake System Indicator Circuit
Diagram, page 19-10
Parking Brake Switch
Test, page 19-11
Brake Fluid Level Switch
Test, page 19-11
Brake Booster Test, page 19-17
Brake Booster Replacement,
page 19-18
Parking Brake Cable
Replacement, page 19-37
Rear Drum Brake
Inspection, page 19-19
Rear Brake Shoe
Replacement, page 19-21
Rear Wheel Cylinder
Replacement, page 19-24
Brake Pedal Height Check and
Brake Pedal Position Switch Adjustment,
page 19-6
Brake Hose and Line
Inspection, page 19-35
Brake Hose Replacement,
page 19-36
Brake System Bleeding, page 19-9
Master Cylinder Replacement,
page 19-16
Master Cylinder Inspection, page 19-16
Front Brake Pad, Inspection and
Replacement, page 19-12
Front Brake Disc
Inspection, page 19-14
Front Brake Caliper
Overhaul, page 19-15
Parking Brake Check and
Adjustment, page 19-7
03/07/29 09:53:42 61S0X050_190_0002