Ford F150 Pickup. Instruction - part 1836


  Index      Ford     Ford F150 Pickup - service and repair instruction 2003 year


Search            copyright infringement  


Content   ..  1834  1835  1836  1837   ..


Ford F150 Pickup. Instruction - part 1836


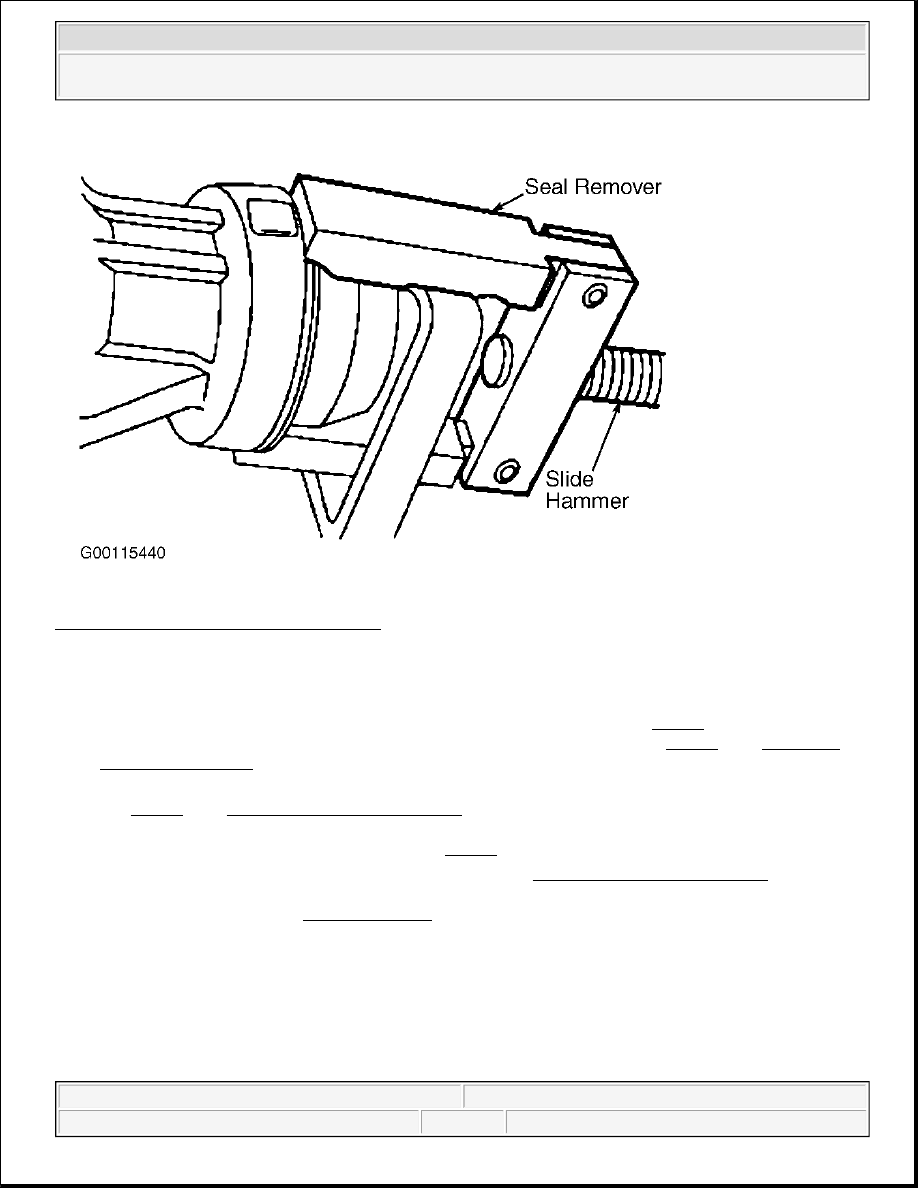
Fig. 22: Removing Extension Housing Seal 
Courtesy of FORD MOTOR CO. 

Installation 

1. Using the Seal Installer (308-002), install a new extension housing seal. See Fig. 23 . Raise and position 

the transmission. Position the transmission crossmember and install bolts. See Fig. 21 . See TORQUE 
SPECIFICATIONS
 .  

2. Remove the high-lift transmission jack. Install the 2 transmission mount nuts and tighten to specification. 

See Fig. 20 . See TORQUE SPECIFICATIONS . Install the driveshaft. See appropriate 
DRIVESHAFTS & UNIVERSAL JOINTS article in DRIVELINE/AXLES. Align the index marks and 
position the driveshaft on the transmission. See Fig. 16 .  

3. Install the 4 retaining bolts and tighten to specification. See TORQUE SPECIFICATIONS . Install the 

transmission fluid pan. Fill the transmission with appropriate fluid to proper level and check for correct 
transmission operation. See LUBRICATION 


2003 Ford Pickup F150 

2003 AUTOMATIC TRANSMISSIONS Servicing - Blackwood, Econoline, Excursion, Expedition, "F" Series Pickup & 

Navigator


Fig. 23: Installing Extension Housing Seal 
Courtesy of FORD MOTOR CO. 

EXTENSION HOUSING SEAL & BUSHING (4R100) 

Removal 

Raise the vehicle on a hoist. Remove the driveshaft. See appropriate DRIVESHAFTS & UNIVERSAL JOINTS 
article in DRIVELINE/AXLES. Using the Slide Hammer (307-048) and Seal Remover (100-001), remove the 
extension housing seal. See Fig. 22 . Do not damage any machined surfaces. Damage may cause the new seal to 
leak. Using the Bushing Remover (307-064), remove the extension housing bushing. See Fig. 24 .


2003 Ford Pickup F150 

2003 AUTOMATIC TRANSMISSIONS Servicing - Blackwood, Econoline, Excursion, Expedition, "F" Series Pickup & 

Navigator


Fig. 24: Removing Extension Housing Bushing 
Courtesy of FORD MOTOR CO. 

Installation 

1. Prior to installing the extension housing bushing, inspect the extension housing counterbore for burrs. If 

necessary, remove the burrs with an oil stone or damage to new bushing may occur.  

2. Align the extension housing bushing in the extension housing so that the slots are in the 2 o'clock and 7 

o'clock positions. See Fig. 25 . Using the Bushing Installer (307-063), install the extension housing 
bushing. See Fig. 26 .  

3. Align the extension housing seal in the extension housing, with the drain hole positioned downward. See 

Fig. 27 . Using the Seal Installer (307-013), seat the extension housing seal. See Fig. 28 . Install the 
driveshaft. See appropriate DRIVESHAFTS & UNIVERSAL JOINTS article in DRIVELINE/AXLES.  

4. Remove the supports and lower the vehicle. Fill the transaxle with appropriate fluid to proper level and 

check for correct transaxle operation. See LUBRICATION 


2003 Ford Pickup F150 

2003 AUTOMATIC TRANSMISSIONS Servicing - Blackwood, Econoline, Excursion, Expedition, "F" Series Pickup & 

Navigator


Fig. 25: Identifying Position Of Bushing Slots 
Courtesy of FORD MOTOR CO. 


2003 Ford Pickup F150 

2003 AUTOMATIC TRANSMISSIONS Servicing - Blackwood, Econoline, Excursion, Expedition, "F" Series Pickup & 

Navigator


Content   ..  1834  1835  1836  1837   ..