Fiat Freemont (2016 year). Manual - part 14


  Index      Fiat     Fiat Freemont (2016 year) - manual in english


Search            


Content      ..     12      13      14      15     ..


Fiat Freemont (2016 year). Manual - part 14


2. Supplemental Side Air Bag Inflatable Curtains

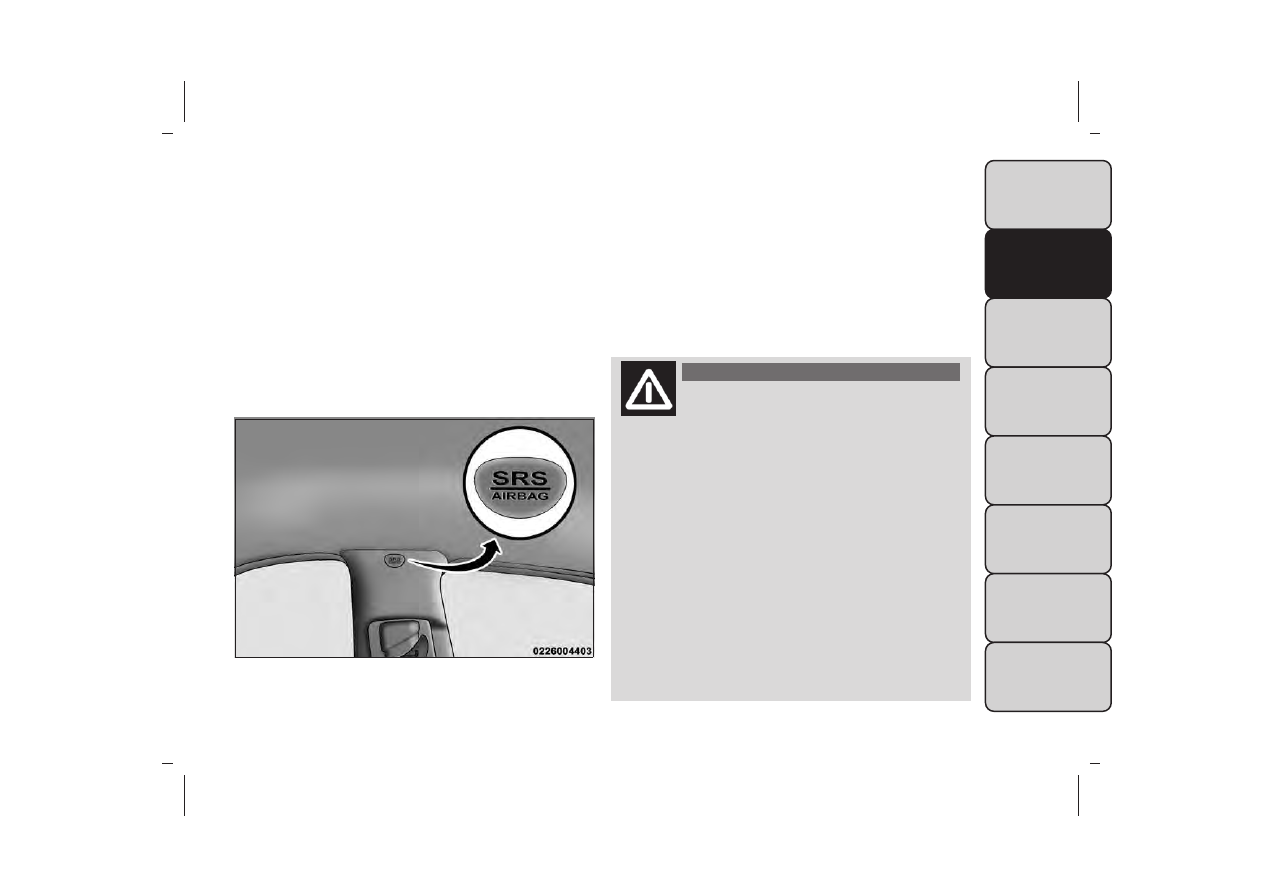
(SABICs): Located above the side windows. The
trim covering the SABICs is labeled SRS AIRBAG or
AIRBAG. (fig. 140)

SABICs may help reduce the risk of head injury to
front and rear seat outboard occupants. SABICs
may reduce the risk of injuries in certain side impact
and vehicle rollover events, in addition to the injury
reduction potential provided by the seat belts and
body structure.

The SABICs deploy downward, covering the side
windows. An inflating SABIC pushes the outside

edge of the trim out of the way and covers the
window. The SABICs inflate with enough force to
injure you if you are not belted and seated properly,
or if items are positioned in the area where the
SABICs inflate. Children are at an even greater risk
of injury from a deploying air bag.

The SABICs may help reduce the risk of partial or
complete ejection of vehicle occupants through side
windows in certain rollover or side impact events.

WARNING!

• Your vehicle is equipped with left and
right Supplemental Side Air Bag Inflat-

able Curtains (SABICs). Do not stack luggage or
other cargo up high enough to block the deploy-
ment of the SABICs.The trim covering above the
side windows where the SABIC and its deploy-
ment path are located should remain free from
any obstructions.
• Your vehicle is equipped with SABICs. In order
for the SABICs to work as intended, do not install
any accessory items in your vehicle which could
alter the roof.Do not add an aftermarket sunroof
to your vehicle. Do not add roof racks that re-
quire permanent attachments (bolts or screws)
for installation on the vehicle roof. Do not drill
into the roof of the vehicle for any reason.

(fig. 140)

Supplemental Side Air Bag Inflatable Curtain (SABIC)

Label Location

209

-------------------------------------------------------------------------------------------------------------------------------------------------------------

The SABICs and SABs (“Side Air Bags”) are designed to
activate in certain side impacts and certain rollover
events. The Occupant Restraint Controller (“ORC”)
determines whether the deployment of the Side Air
Bags in a particular side impact or rollover event is
appropriate, based on the severity and type of collision.
Vehicle damage by itself is not a good indicator of
whether or not Side Air Bags should have deployed.

Side Air Bags are a supplement to the seat belt restraint
system. Side Air Bags deploy in less time than it takes to
blink your eyes. Occupants, including children, who are
up against or very close to Side Air Bags can be
seriously injured or killed. Occupants, including chil-
dren, should never lean on or sleep against the door,
side windows, or area where the Side Air Bags inflate,
even if they are in an infant or child restraint.

Seat belts (and child restraints where appropriate) are
necessary for your protection in all collisions. They also
help keep you in position, away from inflating Side Air
Bags. To get the best protection from the Side Air Bags,
occupants must wear their seat belts properly and sit
upright with their backs against the seats. Children
must be properly restrained in a child restraint or
booster seat that is appropriate for the size of the child.

WARNING!

• Side Air Bags need room to inflate. Do
not lean against the door or window. Sit

upright in the center of the seat.
• Being too close to the Side Air Bags during
deployment could cause you to be severely in-
jured or killed.
• Relying on the Side Air Bags alone could lead to
more severe injuries in a collision. The Side Air
Bags work with your seat belt to restrain you
properly. In some collisions, Side Air Bags won’t
deploy at all. Always wear your seat belt even
though you have Side Air Bags.

NOTE: Air bag covers may not be obvious in the
interior trim, but they will open during air bag deploy-
ment.

Side Impacts

In side impacts, the side impact sensors aid the ORC in
determining the appropriate response to impact
events. The system is calibrated to deploy the Side Air
Bags on the impact side of the vehicle during impacts
that require Side Air Bag occupant protection. In side
impacts, the Side Air Bags deploy independently; a left
side impact deploys the left Side Air Bags only and a
right side impact deploys the right Side Air Bags only.

210

-------------------------------------------------------------------------------------------------------------------------------------------------------------

The Side Air Bags will not deploy in all side collisions,
including some collisions at certain angles, or some
side collisions that do not impact the area of the
passenger compartment. The Side Air Bags may deploy
during angled or offset frontal collisions where the
Advanced Front Air Bags deploy.

Rollover Events

Side Air Bags are designed to activate in certain roll-
over events. The ORC determines whether the de-
ployment of the Side Air Bags in a particular rollover
event is appropriate, based on the severity and type of
collision. Vehicle damage by itself is not a good indica-
tor of whether or not Side Air Bags should have
deployed.

The Side Air Bags will not deploy in all rollover events.
The rollover sensing-system determines if a rollover
event may be in progress and whether deployment is
appropriate. A slower-developing event may deploy the
seat belt pretensioners on both sides of the vehicle. A
faster-developing event may deploy the seat belt pre-
tensioners as well as the SABs and SABICs on both
sides of the vehicle. The rollover sensing-system may
also deploy the seat belt pretensioners, with or with-
out the SABs and SABICs, on both sides of the vehicle
if the vehicle experiences a near rollover event.

IF A DEPLOYMENT OCCURS

The Advanced Front Air Bags are designed to deflate
immediately after deployment.

NOTE: Front and/or side air bags will not deploy in all
collisions. This does not mean something is wrong with
the air bag system.

If you do have a collision, which deploys the air bags,
any or all of the following may occur:

• The air bag material may sometimes cause abrasions

and/or skin reddening to the occupants as the air
bags deploy and unfold. The abrasions are similar to
friction rope burns or those you might get sliding
along a carpet or gymnasium floor. They are not
caused by contact with chemicals. They are not
permanent and normally heal quickly. However, if you
haven’t healed significantly within a few days, or if you
have any blistering, see your doctor immediately.

• As the air bags deflate, you may see some smoke-like

particles. The particles are a normal by-product of
the process that generates the non-toxic gas used for
air bag inflation. These airborne particles may irritate
the skin, eyes, nose, or throat. If you have skin or eye
irritation, rinse the area with cool water. For nose or
throat irritation, move to fresh air. If the irritation
continues, see your doctor. If these particles settle
on your clothing, follow the garment manufacturer’s
instructions for cleaning.

211

-------------------------------------------------------------------------------------------------------------------------------------------------------------

Do not drive your vehicle after the air bags have
deployed. If you are involved in another collision, the
air bags will not be in place to protect you.

WARNING!

Deployed air bags and seat belt preten-
sioners cannot protect you in another

collision. Have the air bags, seat belt pretension-
ers, and the seat belt retractor assemblies re-
placed by an authorized dealer immediately.
Also, have the Occupant Restraint Controller Sys-
tem serviced as well.

NOTE:

• Air bag covers may not be obvious in the interior

trim, but they will open during air bag deployment.

• After any collision, the vehicle should be taken to an

authorized dealer immediately.

ENHANCED ACCIDENT RESPONSE
SYSTEM

In the event of an impact, if the communication net-
work remains intact, and the power remains intact,
depending on the nature of the event, the ORC will
determine whether to have the Enhanced Accident
Response System perform the following functions:

• Cut off fuel to the engine.

• Flash hazard lights as long as the battery has power

or until the ignition switch is turned to the “OFF”
position.

• Turn on the interior lights, which remain on as long

as the battery has power or until the ignition switch
is turned to the “OFF” position.

• Unlock the doors automatically.

SYSTEM RESET PROCEDURE

In order to reset the Enhanced Accident Response
System functions after an event, the ignition switch
must be changed from ignition START or ON/RUN to
ignition OFF.

212

-------------------------------------------------------------------------------------------------------------------------------------------------------------

AIR BAG WARNING LIGHT

The air bags must be ready to inflate for your
protection in a collision. The Occupant Re-
straint Controller (ORC) monitors the inter-
nal circuits and interconnecting wiring asso-

ciated with air bag system electrical components.

The ORC monitors the readiness of the electronic
parts of the air bag system whenever the ignition
switch is in the START or ON/RUN position. If the
ignition switch is in the OFF position or in the ACC
position, the air bag system is not on and the air bags
will not inflate

The ORC contains a backup power supply system that
may deploy the air bags even if the battery loses power
or it becomes disconnected prior to deployment.

The ORC turns on the Air Bag Warning Light

in the

instrument panel for approximately four to eight sec-
onds for a self-check when the ignition switch is first
turned to the ON/RUN position. After the self-check,
the Air Bag Warning Light will turn off. If the ORC
detects a malfunction in any part of the system, it turns
on the Air Bag Warning Light, either momentarily or
continuously. A single chime will sound to alert you if
the light comes on again after initial startup.

The ORC also includes diagnostics that will illuminate
the instrument panel Air Bag Warning Light if a mal-
function is detected that could affect the air bag sys-
tem. The diagnostics also record the nature of the
malfunction. While the air bag system is designed to be
maintenance free, if any of the following occurs, have an
authorized dealer service the air bag system immedi-
ately.

• The Air Bag Warning Light does not come on during

the four to eight seconds when the ignition switch is
first turned to the ON/RUN position.

• The Air Bag Warning Light remains on after the four

to eight-second interval.

• The Air Bag Warning Light comes on intermittently

or remains on while driving.

NOTE: If the speedometer, tachometer, or any engine
related gauges are not working, the Occupant Re-
straint Controller (ORC) may also be disabled. In this
condition the air bags may not be ready to inflate for
your protection. Have an authorized dealer service the
air bag system immediately.

213

-------------------------------------------------------------------------------------------------------------------------------------------------------------

WARNING!

Ignoring the Air Bag Warning Light in
your instrument panel could mean you

won’t have the air bags to protect you in a
collision. If the light does not come on as a bulb
check when the ignition is first turned on, stays
on after you start the vehicle, or if it comes on as
you drive, have an authorized dealer service the
air bag system immediately.

MAINTAINING YOUR AIR BAG SYSTEM

WARNING!

• Modifications to any part of the air
bag system could cause it to fail when

you need it. You could be injured if the air bag
system is not there to protect you. Do not modify
the components or wiring, including adding any
kind of badges or stickers to the steering wheel
hub trim cover or the upper right side of the
instrument panel. Do not modify the front bum-
per, vehicle body structure, or add aftermarket
side steps or running boards.

(Continued)

WARNING! (Continued)

• It is dangerous to try to repair any part of the
air bag system yourself. Be sure to tell anyone
who works on your vehicle that it has an air bag
system.
• Do not attempt to modify any part of your air
bag system.The air bag may inflate accidentally
or may not function properly if modifications are
made.Take your vehicle to an authorized dealer
for any air bag system service. If your seat, includ-
ing your trim cover and cushion, needs to be
serviced in any way (including removal or
loosening/tightening of seat attachment bolts),
take the vehicle to your authorized dealer. Only
manufacturer approved seat accessories may be
used. If it is necessary to modify the air bag
system for persons with disabilities, contact your
authorized dealer.

214

-------------------------------------------------------------------------------------------------------------------------------------------------------------

EVENT DATA RECORDER (EDR)

This vehicle is equipped with an event data recorder
(EDR). The main purpose of an EDR is to record, in
certain crash or near crash-like situations, such as an
air bag deployment or hitting a road obstacle, data that
will assist in understanding how a vehicle’s systems
performed. The EDR is designed to record data related
to vehicle dynamics and safety systems for a short
period of time, typically 30 seconds or less. The EDR in
this vehicle is designed to record such data as:

• How various systems in your vehicle were operating;

• Whether or not the driver and passenger safety belts

were buckled/fastened;

• How far (if at all) the driver was depressing the

accelerator and/or brake pedal; and,

• How fast the vehicle was traveling.

These data can help provide a better understanding of
the circumstances in which crashes and injuries occur.

NOTE: EDR data are recorded by your vehicle only if
a non-trivial crash situation occurs; no data are re-
corded by the EDR under normal driving conditions
and no personal data (e.g., name, gender, age, and crash
location) are recorded. However, other parties, such as
law enforcement, could combine the EDR data with
the type of personally identifying data routinely ac-
quired during a crash investigation.

To read data recorded by an EDR, special equipment is
required, and access to the vehicle or the EDR is
needed. In addition to the vehicle manufacturer, other
parties, such as law enforcement, that have the special
equipment, can read the information if they have access
to the vehicle or the EDR.

215

-------------------------------------------------------------------------------------------------------------------------------------------------------------

CHILD RESTRAINTS - CARRYING
CHILDREN SAFELY

(fig. 141)

Everyone in your vehicle needs to be buckled up at all
times, including babies and children. EC directive 2003/
20/EC requires proper use of restraints in all EC
countries.

Children less than 1.5 meters tall and 12 years or
younger should ride properly buckled up in a rear seat,
if available. According to crash statistics, children are
safer when properly restrained in the rear seats rather
than in the front.

WARNING!

In a collision, an unrestrained child can
become a projectile inside the vehicle.

The force required to hold even an infant on your
lap could become so great that you could not
hold the child, no matter how strong you are.The
child and others could be badly injured.Any child
riding in your vehicle should be in a proper re-
straint for the child's size.

There are different sizes and types of restraints for
children from newborn size to the child almost large
enough for an adult safety belt. Children should ride
rearward facing as long as possible; this is the most
protected position for a child in the event of a crash.
Always check the child seat Owner’s Manual to make
sure you have the correct seat for your child. Carefully
read and follow all the instructions and warnings in the
child restraint Owner’s Manual and on all the labels
attached to the child restraint.

(fig. 141)

216

-------------------------------------------------------------------------------------------------------------------------------------------------------------

In Europe, children restraint systems are defined by
regulation ECE-R44, which divides them into five
weight groups:

Restraint Group

Weight Group

Group 0

up to 10 kg

Group 0+

up to 13 kg

Group 1

9-18 kg

Group 2

15-25 kg

Group 3

22-36 kg

Check the label of your child restraint. All approved
child restraints must include type-approval data and
the control mark on its label. The label must be
permanently secured to the child restraint system. You
should not remove this label from the child restraint.

WARNING!

Extreme Hazard! Do not place rearward
facing infant seat in front of an active air

bag. Refer to visor and door shut face mounted
labels for information. Deployment of the air bag
in an accident could cause fatal injuries to the
baby regardless of the severity of the collision. It
is advisable to always carry children in a child
restraint system on the rear seat, which is the
most protected position in the event of a colli-
sion.

“UNIVERSAL” CHILD RESTRAINT
SYSTEMS

The figures in the following sections are examples of
each type of universal child restraint system. Typical
installations are shown. Always install your child re-
straint system according to the child restraint manu-
facturer’s instructions, which must be included with
this type of restraint system.

217

-------------------------------------------------------------------------------------------------------------------------------------------------------------

Group 0 And 0+

(fig. 142)

Safety experts recommend that children ride rearward
facing in the vehicle as long as possible . Infants up to
13 kg must be restrained in a rear-facing seat like the
child seat shown in fig. A. This type of child restraint
supports the child’s head and does not induce stress on
the neck in the event of sudden decelerations or a
crash.

The rear-facing child restraint is restrained by the
vehicle’s seat belts, as shown in fig. A. The child seat
restrains the child with its own harness.

WARNING!

• Never place a rear-facing child re-
straint in front of an air bag.A deploying

passenger Advanced Front Air Bag can cause
death or serious injury to a child 12 years or
younger, including a child in a rear-facing child
restraint.
• Only use a rear-facing child restraint in a ve-
hicle with a rear seat.

(fig. 142)

fig.A

218

-------------------------------------------------------------------------------------------------------------------------------------------------------------

Group 1

(fig. 143)

Children who weigh between 9 kg and 18 kg may be
carried in a Group 1, forward facing seat like the one in
fig. B. This type of child restraint is for older children
who are too big for a Group 0 or 0+ child restraint.

Group 2

(fig. 144)

Children who weigh between 15 kg and 25 kg and who
are too big for the Group 1 child restraint may use a
Group 2 child restraint system.

As shown in fig. C, the Group 2 child restraint system
positions the child correctly with respect to the seat
belt so that the shoulder belt crosses the child’s chest
and not the neck, and the lap belt is snug on the pelvis
and not the abdomen.

(fig. 143)

fig. B

(fig. 144)

fig. C

219

-------------------------------------------------------------------------------------------------------------------------------------------------------------

Group 3

(fig. 145)

Children who weigh between 22 kg and 36 kg and who
are tall enough to use the adult shoulder belt may use
a Group 3 child restraint. Group 3 child restraints
position the lap belt on the child’s pelvis. The child
must be tall enough that the shoulder belt crosses the
child’s chest and not their neck.

fig. D shows an example of a Group 3 child restraint
system correctly positioning the child on the rear seat.

WARNING!

• Improper installation can lead to fail-
ure of an infant or child restraint. It

could come loose in a collision.The child could be
badly injured or killed. Follow the child restraint
manufacturer’s directions exactly when install-
ing an infant or child restraint.
• After a child restraint is installed in the vehicle,
do not move the vehicle seat forward or rearward
because it can loosen the child restraint attach-
ments. Remove the child restraint before adjust-
ing the vehicle seat position. When the vehicle
seat has been adjusted, reinstall the child re-
straint.
• When your child restraint is not in use, secure it
in the vehicle with the seat belt or ISOFIX an-
chorages, or remove it from the vehicle. Do not
leave it loose in the vehicle. In a sudden stop or
accident, it could strike the occupants or seat-
backs and cause serious personal injury.

(fig. 145)

fig. D

220

-------------------------------------------------------------------------------------------------------------------------------------------------------------

INTEGRATED CHILD BOOSTER SEAT (for
versions/markets, where provided)

The Integrated Child Booster Seat is located in each
outboard second-row passenger seat. The Booster
Seat is designed for children weighing between 22 and
39 kg and between 119 cm and 145 cm tall.

To position a child into the Integrated Child Booster
Seat follow these steps:

1. Slide the second row seat to the full rear position to

use the Integrated Child Booster Seat. NOTE: The
second row bench with Integrated Child Booster
Seat must remain in the full rear position during use.

2. Pull the release loop forward to release the latch

and seat cushion. (fig. 146)

3. Lift the seat cushion up and push back to lock it in

the booster seat position. (fig. 147)

4. Place the child upright in the seat with their back

firmly against the seatback.

5. Grasp the latch plate and pull out the seat belt.

6. Slide the latch plate up the webbing as far as neces-

sary to allow the seat belt to go around the child’s
lap. NOTE: The lap portion of the seat belt should
be low on the hips and as snug as possible.

(fig. 146)

Release Loop

(fig. 147)

Booster Seat

221

-------------------------------------------------------------------------------------------------------------------------------------------------------------

7. Once the seat belt is long enough to fit properly,

insert the latch plate into the buckle until you hear
a “click.” (fig. 148)

8. To remove the slack from the lap belt, pull upward

on the shoulder portion of the seat belt.

9. To release the seat belt, push the red button on the

buckle.

WARNING!

Securely lock the seat cushion into posi-
tion before using the seat. Otherwise,

the seat will not provide the proper stability for
child seats and/or passengers. An improperly
latched seat cushion could cause serious injury.

(fig. 148)

Proper Belt Use

222

-------------------------------------------------------------------------------------------------------------------------------------------------------------

SUITABILITY OF PASSENGER SEATS FOR
UNIVERSAL CHILD RESTRAINT SYSTEM
USE

According to the European Directive 2000/3/EC, the
suitability of each passenger seat position for the instal-
lation of Universal Child Restraint Systems is shown in
the following table:

Mass Group

Seating Position (or other site)

Front

Passenger

Rear

Outboard

Rear Center

Intermediate

Outboard

Intermediate

Center

Group 0 — up to

10 kg

X

U

N/A

U

U

Group 0+ — up

to 13 kg

X

U

N/A

U

U

Group 1 – 9 to

18 kg

X

U

N/A

U

U

Group II – 15 to

25 kg

X

U

N/A

U

U

Group III — 22

to 36 kg

X

U

N/A

U

U

Key of letters used in the table above

U = Suitable for “universal” category restraints ap-
proved for use in this mass group

X = Seat position no suitable for children in this mass
group

223

-------------------------------------------------------------------------------------------------------------------------------------------------------------

Seat Belts For Older Children

Children over 1.50 m in height can wear seat belts
instead of using child restraints.

Use this simple 5-step test to decide whether the seat
belt properly fits the child or if they should still use a
Group 2 or Group 3 child restraint to improve the fit of
the seat belt:

1. Can the child sit all the way back against the back of

the vehicle seat?

2. Do the child’s knees bend comfortably over the

front of the vehicle seat – while they are still sitting
all the way back?

3. Does the shoulder belt cross the child’s shoulder

between their neck and arm?

4. Is the lap part of the belt as low as possible, touching

the child’s thighs and not their stomach?

5. Can the child stay seated like this for the whole trip?

If the answer to any of these questions was “no,” then
the child still needs to use a Group 2 or 3 child restraint
in this vehicle. If the child is using the lap/shoulder belt,
check belt fit periodically and make sure the seat belt
buckle is latched. A child’s squirming or slouching can
move the belt out of position. If the shoulder belt
contacts the face or neck, move the child closer to the
center of the vehicle, or use a booster seat to position
the seat belt on the child correctly.

WARNING!

Never allow a child to put the shoulder
belt under an arm or behind their back.

In a crash, the shoulder belt will not protect a
child properly, which may result in serious injury
or death. A child must always wear both the lap
and shoulder portions of the seat belt correctly.

224

-------------------------------------------------------------------------------------------------------------------------------------------------------------


Content      ..     12      13      14      15     ..