Content .. 1360 1361 1362 1363 ..
Dodge Caliber. Manual - part 1362
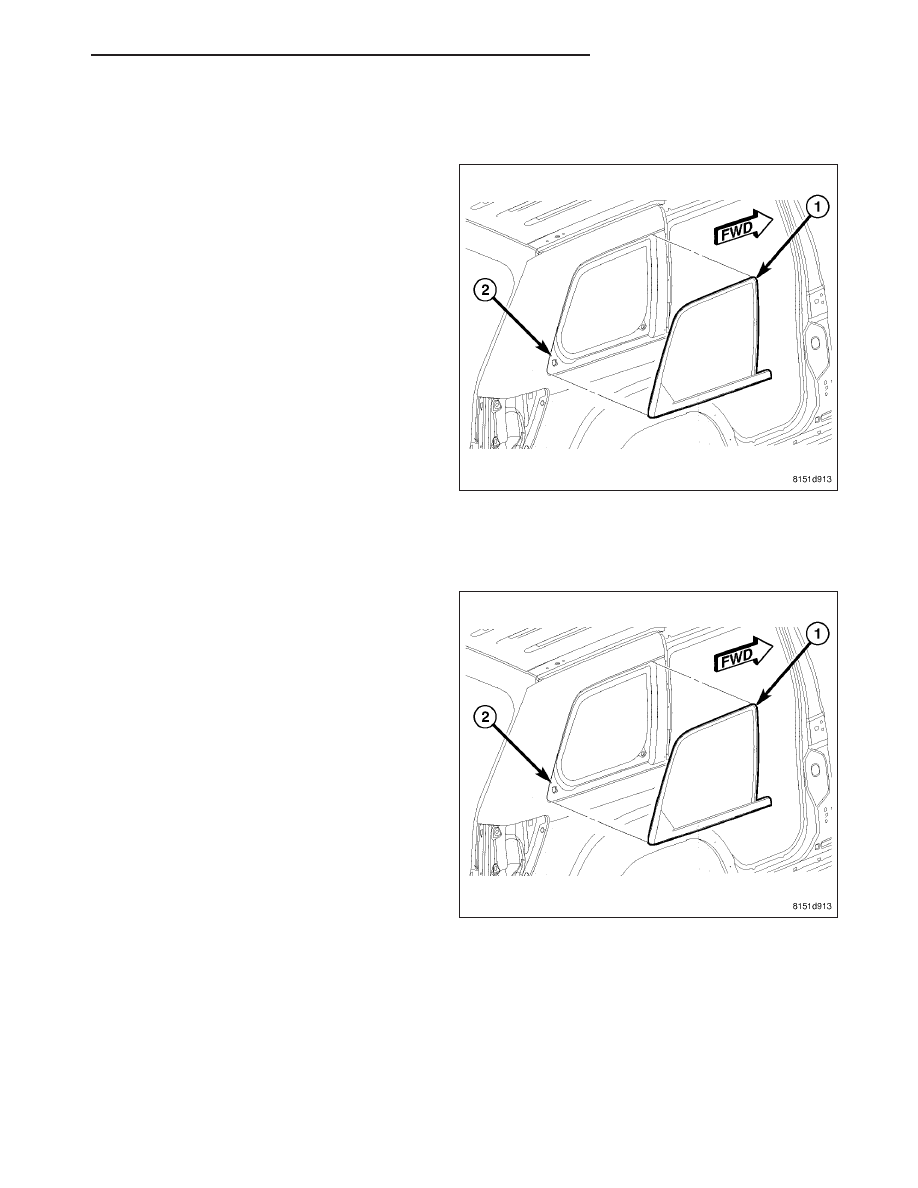
QUARTER GLASS
REMOVAL
1. Before proceeding with the following repair proce-
dure, review all warnings and cautions (Refer to 23
- BODY/STATIONARY GLASS - WARNING).
2. Remove the quarter panel trim from the side of the
vehicle being serviced (Refer to 23 - BODY/INTE-
RIOR/QUARTER PANEL TRIM - REMOVAL).
CAUTION: Be careful not to damage painted sur-
faces when removing moldings or cutting ure-
thane around the windshield.
3. Using razor knife, cut the urethane adhesive that
secures the quarter glass (1) to window fence (2).
4. Carefully push the quarter window glass from the
opening.
INSTALLATION
NOTE: Grand Cherokee shown, Caliber similar.
WARNING: Do not operate the vehicle within 24
hours of quarter glass installation. It takes at least
24 hours for urethane adhesive to cure. If it is not
cured, the quarter glass may not perform properly
if the vehicle is in an accident.
CAUTION: To help prevent water leaks, partially
roll down the left and right door glass before
installing the quarter glass. This avoids pressuriz-
ing the passenger compartment if a door is
slammed before the urethane is cured.
CAUTION: Protect all painted and trimmed sur-
faces from coming in contact with urethane or
primers.
NOTE: To prevent corrosion, do not damage paint
on the quarter glass fence when removing original urethane.
NOTE: The quarter glass fence should be cleaned of most of its old urethane adhesive. A small amount of
old urethane, approximately 1 mm (.04 in.) in height should remain on the fence. Do not completely remove
all old urethane from the fence, the paint finish and bonding strength will be adversely affected.
1. Using a razor knife, level the original bead of urethane on the fence to a thickness of approximately 1 mm (0.04
in.).
2. If the quarter glass is being reused, remove as much of the original urethane as possible from the glass surface
using a razor knife.
PM
STATIONARY GLASS
23 - 185