Daewoo Korando. Manual - part 125


  Index      Daewoo     Daewoo Korando - service repair manual


Search            


Content   ..  123  124  125  126   ..


Daewoo Korando. Manual - part 125


M161 ENGINE COOLING  1D2-7

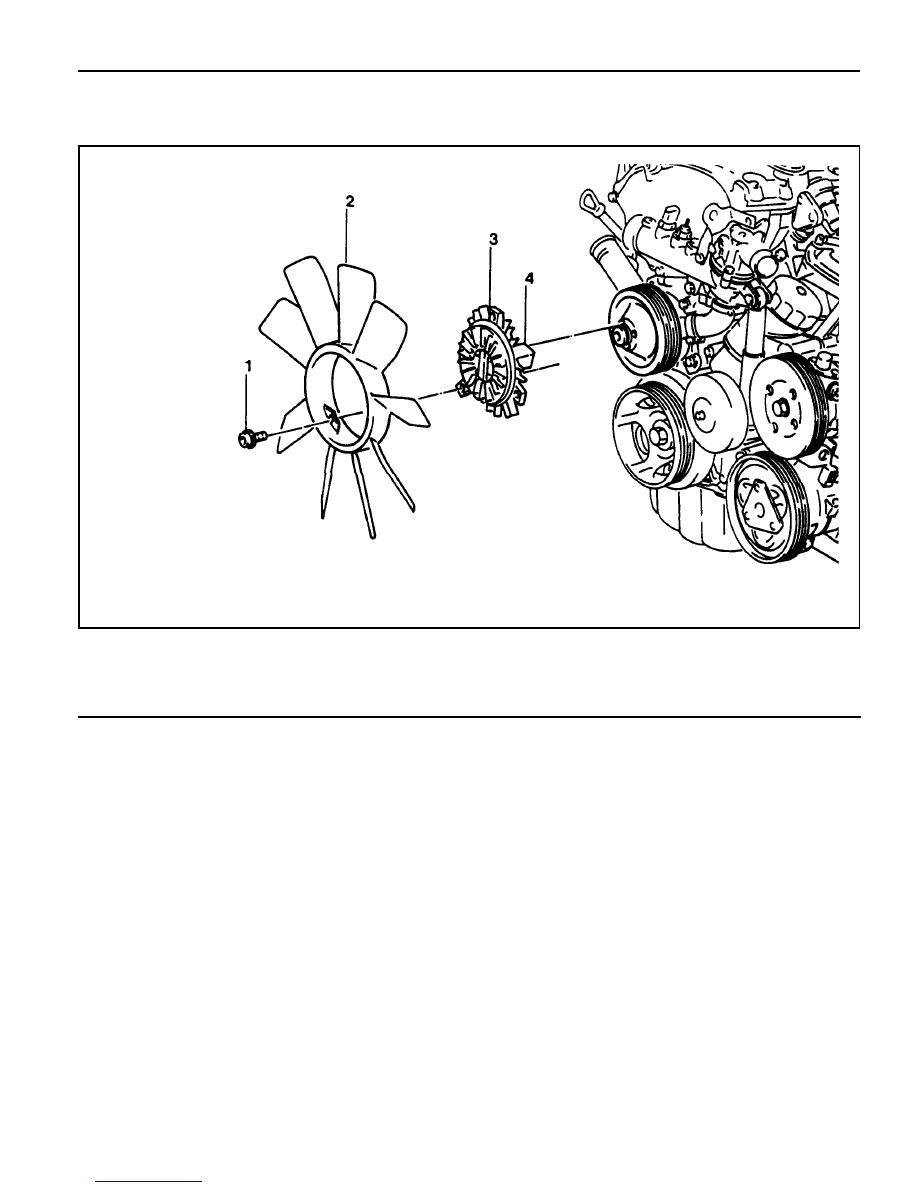
COOLING FAN AND VISCOUS CLUTCH

1 Bolt (M6 X 14, 3 piece) ........................... 9-11 Nm
2 Cooling Fan

3 Viscous Clutch
4 Union Nut (Left Threaded Screw) ... 40.5-49.5 Nm

1D2-8  M161 ENGINE COOLING

Tools Required

111 589 02 01 00  Open End Wrench

111 589 00 40 00  Open End Wrench

Removal & Installation Procedure

1. Install the holder (special tool : 111 589 00 40 00) to the bolt

at the pulley as shown in the right figure to hold the pulley.

2. Remove the viscous clutch using an open end wrench

(special tool : 111 589 02 01 00).

Installation Notice

Notice

The union nut is left threaded screw.

3. Remove the 3 bolts (1) from the viscous clutch and remove

the cooling fan and the viscous clutch.

Installation Notice

Tightening  Torque

40.5 - 49.5 Nm

Tightening  Torque

9 - 11 Nm

Notice

You may change the procedure (2) and (3) if necessary.

4. Installation should follow the removal procedure in the

reverse order.

M161 ENGINE COOLING  1D2-9

COOLANT PUMP

Preceding Work : Removal of viscous clutch

1 Bolt (M6 X 45, 1 piece) ........................... 9-11 Nm
2 Bolt (M6 X 95, 1 piece) ........................... 9-11 Nm
3 Bolt (M6 X 25, 4 piece) ........................... 9-11 Nm
4 Bolt (M8 X 85, 2 piece) ................... 20.5-20.5 Nm
5 Coolant Pump Housing
6 Bolt (M6 X 16, 4 piece) ........................... 9-11 Nm

7 Coolant Pump Pulley
8 Coolant Inlet Hose
9 Heater Hose

10 Coolant Bypass Hose

11 Gasket

1D2-10  M161 ENGINE COOLING

Tools Required

124 589 15 21 00  Tester

Removal & Installation Procedure

1. Drain the coolant.

2. Disconnect the coolant hoses (8, 9, 10).

3. Tak off the drive belt.

4. Unscrew the four bolts (6) from coolant pump pulley and

remove the pulley (7).

Installation Notice

Tightening Torque

  9 - 11 Nm

   22.5 - 27.5 Nm

  (1, 2, 3)

  (4)

Notice

Hold the pulley with special tool (603 589 00 40 00) while
removing the pulley.

Tightening  Torque

9 - 11 Nm

5. Unscrew the bolts (1, 2, 3, 4) from coolant pump housing

(5) and remove the coolant pump.

Installation Notice

6. Clean the sealing surface.

7. Replace the gasket with new one.

Notice

Apply the sealant when the sealing surface of coolant pump
housing and coolant mounting area is clean.

8. Installation should follow the removal procedure in the

reverse order.

9. Check for leaks by starting the engine.


Content   ..  123  124  125  126   ..