DAF CF65, CF75, CF85 Series . Manual - part 265


  Index      DAF     DAF CF65, CF75, CF85 Series - service repair manual


Search            


Content   ..  263  264  265  266   ..


DAF CF65, CF75, CF85 Series . Manual - part 265


©

 200324

5-1

Removal and installation

XE ENGINE COOLING SYSTEM

CF65/75/85 series

2

9

5. REMOVAL AND INSTALLATION

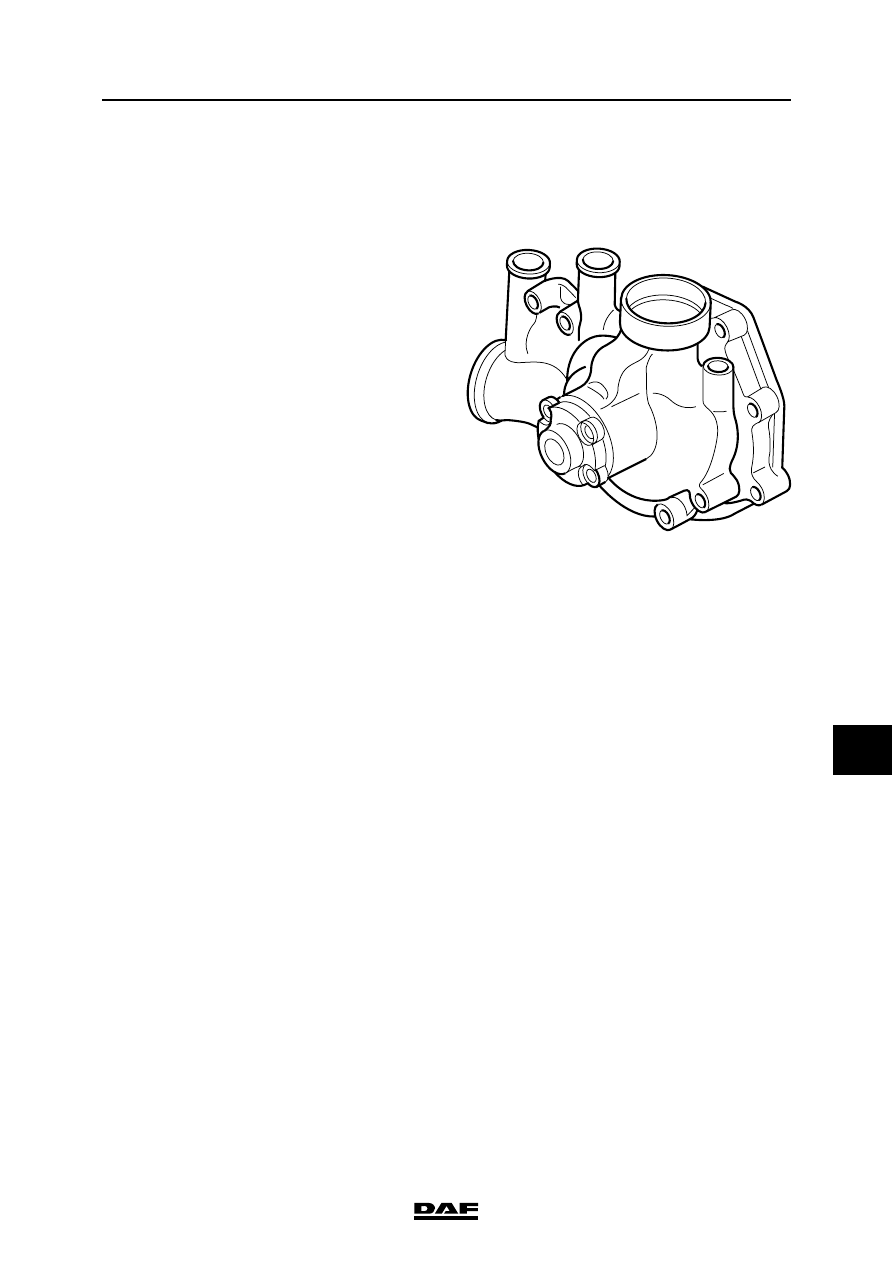
5.1 REMOVAL AND INSTALLATION, COOLANT PUMP

Removal, coolant pump
1.

Remove the front engine encapsulation.

2.

Drain the coolant. See "Draining and filling".

3.

Remove the torque rod between the engine 

and the radiator.

4.

Remove the bolts from the guide ring 

brackets, and remove the guide ring.

5.

Remove the attachment nuts of the viscous 

fan clutch on the fan pulley and place the 

viscous fan clutch and fan as far forward as 

possible in the wind tunnel.

6.

Remove the poly-V-belt from the alternator 

and the V-belt from the air-conditioning 

compressor.

7.

Remove the attachment bolts from the 

thermostat housing on the coolant pipe and 

remove the thermostat housing and 

connection piece.

8.

Disconnect all coolant hoses connected to 

the coolant pump.

9.

Disconnect the pipe from the coolant pump 

to the coolant filter.

10. Remove the attachment bolts from the 

coolant pump.

11. Remove the coolant pump.

Installation, coolant pump
1.

Thoroughly clean and check the sealing 

surfaces of the coolant pump, the thermostat 

housing and the cylinder block.

2.

Install the coolant pump, using a new gasket. 

Fit the attachment bolts. Tighten the 

attachment bolts to the specified torque. See 

"Technical data".

3.

Install the connection piece with new O-rings 

onto the coolant pump.

4.

Fit a new O-ring to the thermostat housing 

and fit it to the coolant pipe.

5.

Connect the pipe from the coolant pump to 

the coolant filter.

M200596

XE ENGINE COOLING SYSTEM

5-2

©

 200324

Removal and installation

9

CF65/75/85 series

2

6.

Fit all coolant hoses connected to the coolant 

pump.

7.

Fit the V-belts from the alternator and the air-

conditioning compressor.

8.

Fit the viscous fan clutch with the fan.

9.

Fit the guide ring brackets and the guide ring.

10. Fit the torque rod between the radiator and 

the engine.

11. Fill the cooling system. See "Draining and 

filling".

12. Fit the front engine encapsulation.

5.2 REMOVAL AND INSTALLATION, COOLANT FILTER

}

When the coolant is hot, there is an 

overpressure in the cooling system. 

Carefully remove the filler cap to 

release the overpressure.

Do not remove the filler cap when the 

engine is running.

Coolant is a toxic fluid. Contact with 

the skin should therefore be 

avoided.

In the event of contact with the skin: 

remove the liquid with paper or a 

cloth, wash with soap and water. If 

irritation persists, consult a doctor.

If swallowed: DO NOT induce 

vomiting. Rinse mouth, drink two 

glasses of water and consult a 

doctor.

In the event of inhalation: get fresh 

air and rest.

In order to avoid damaging the 

cylinder block, do not top up a warm 

engine with coolant.

©

 200324

5-3

Removal and installation

XE ENGINE COOLING SYSTEM

CF65/75/85 series

2

9

Removing the coolant filter
1.

Place a tray beneath the coolant filter to 

collect any escaping coolant.

2.

Remove the filler cap from the expansion 

tank.

3.

Turn the shut-off valve (1) clockwise to the 

"C" position.

4.

Remove the coolant filter by turning it 

counter-clockwise.

Installing the coolant filter
1.

Clean the sealing face of the coolant filter. 

2.

Apply a small amount of coolant to the 

sealing ring of the coolant filter.

3.

Fit the coolant filter so that the sealing ring 

makes contact. Then tighten the filter by 

hand ½ to ¾ of a turn.

4.

Turn shut-off valve (1) anti-clockwise to the 

"O" position.

5.

Fit the filler cap on the expansion tank.

6.

Run the engine and check that the coolant 

filter seals correctly.

7.

Check the coolant level.

O

1

C

M200372

XE ENGINE COOLING SYSTEM

5-4

©

 200324

Removal and installation

9

CF65/75/85 series

2

5.3 REMOVAL AND INSTALLATION, THERMOSTAT

Removing the thermostat
1.

Partially drain the radiator. See "Draining 

and filling".

2.

Remove the filler cap.

3.

Disconnect the hose.

4.

Remove the thermostat housing attachment 

bolts. Remove the thermostat housing and the 

connecting piece from the coolant pump and 

the O-ring (A) from the thermostat housing.

Removing the thermostat oil seal
1.

Remove the oil seal (B) from the thermostat 

housing, using a commercially available 

internal puller.

Removing the thermostat seat
1.

Remove the thermostat seat (C) at the 

bottom of the thermostat housing, using a 

commercially available internal puller.

M200594

A

B

C

A

B

C


Content   ..  263  264  265  266   ..