DAF CF65, CF75, CF85 Series . Manual - part 255


  Index      DAF     DAF CF65, CF75, CF85 Series - service repair manual


Search            


Content   ..  253  254  255  256   ..


DAF CF65, CF75, CF85 Series . Manual - part 255


©

 200324

4-23

Removal and installation

XE ENGINE

CF65/75/85 series

2

8

4.17 REMOVAL AND INSTALLATION, STARTER RING GEAR

Removing the starter ring gear
1.

Remove the flywheel.

2.

Remove the starter ring gear by tapping it off 

the flywheel, using a blunt chisel. If this is not 

possible, cut the starter ring gear between 

two teeth, using a sharp chisel.

Installing the starter ring gear
1.

Clean the flywheel and the starter ring gear. 

Ensure that the contact areas are free of 

grease.

2.

Heat the new starter ring gear evenly in an 

oven. See "Technical data".

3.

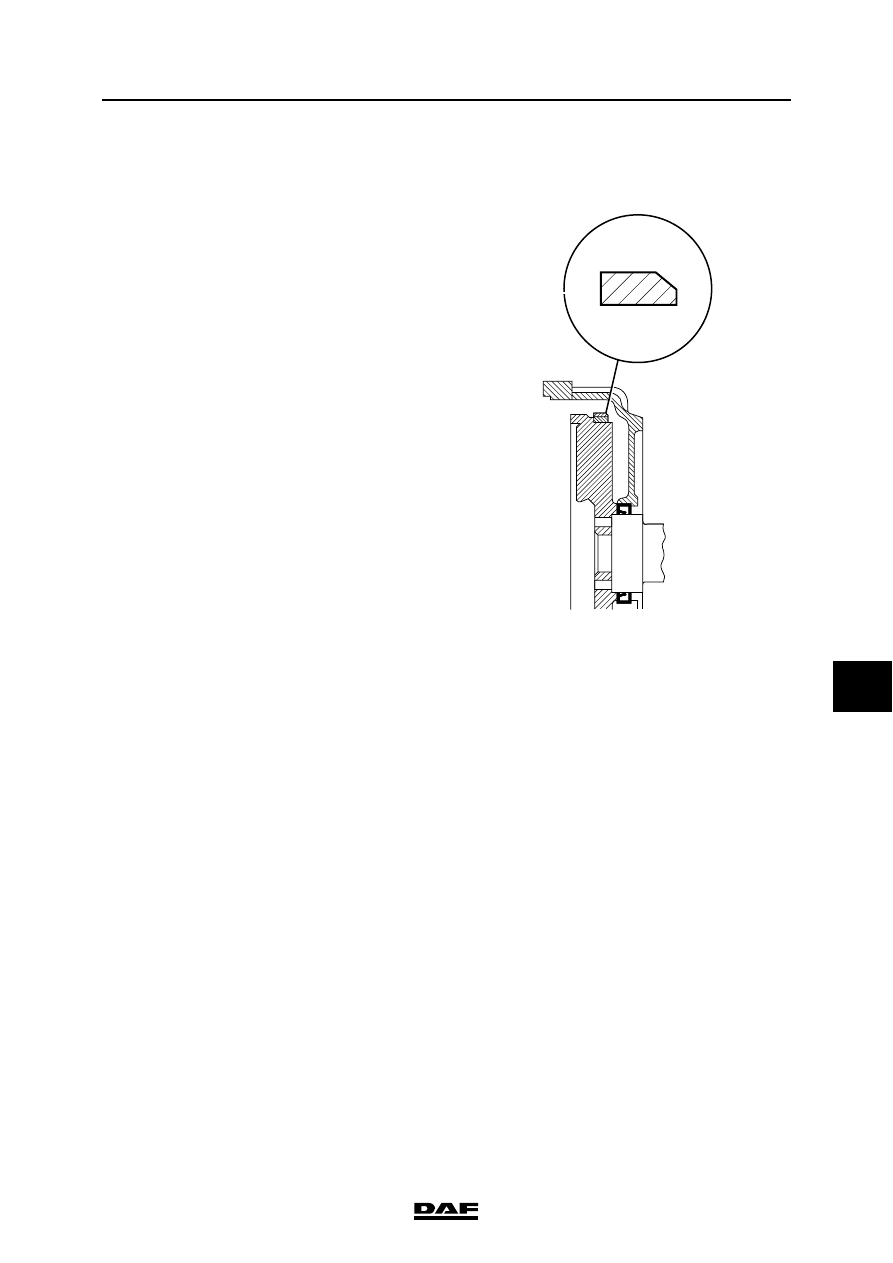
Tap the starter ring gear onto the flywheel so 

that the bevelled sides of the teeth point 

towards the starter motor. Ensure that the 

starter ring gear is properly fitted to the 

flywheel.

4.

Fit the flywheel.

M2 00 035

XE ENGINE

4-24

©

 200324

Removal and installation

8

CF65/75/85 series

2

4.18 REMOVAL AND INSTALLATION, FLYWHEEL HOUSING SEAL

Note:

A new oil seal is fitted on a plastic mounting ring. 

The oil seal must not be removed from the 

mounting ring until the oil seal ring has been 

pressed into the flywheel housing by hand.

Removing the flywheel housing seal
1.

Remove the flywheel.

2.

Drill two small holes into the oil seal and pull 

the latter out of the flywheel housing using 

the special tool (DAF no. 0484899 en 

0694928).

Installing the flywheel housing seal
1.

Thoroughly clean the oil seal recess and 

inspect for damage. Even the slightest 

damage can cause a leak.

2.

Clean the crankshaft flange.

Note:

If a shim was fitted in the seal recess, it must 

be re-fitted.

3.

Fit the plastic mounting ring (1), with the oil 

seal dry, to the crankshaft flange.

4.

Press the oil seal (2) as far as possible into 

the recess by hand and then carefully 

remove the plastic mounting ring (1).

5.

Fit the base plate (A) of the special tool 

(DAF no. 0535598) on the crankshaft flange.

6.

Place the thrust washer (B) over the base 

plate (A) and gradually tighten the nut (C) 

until the resistance increases.

7.

Remove the nut (C) and thrust washer (B).

8.

Make sure that the entire oil seal is 

positioned evenly in the recess. If not, fit the 

thrust washer (B) again and tighten the oil 

seal a little further with the nut (C).

9.

Remove the base plate (A).

10. Fit the flywheel and tighten the bolts to the 

specified torque. See "Technical data".

1

2

A

B

C

M2 00 036

©

 200324

4-25

Removal and installation

XE ENGINE

CF65/75/85 series

2

8

4.19 REMOVAL AND INSTALLATION, FLYWHEEL HOUSING

Removing the flywheel housing
1.

Remove the flywheel.

2.

Disconnect the earth lead from the flywheel 

housing.

3.

Remove the starter motor.

4.

Remove the crankshaft position sensor.

5.

Suspend the engine securely in the hoist.

6.

Remove the two bolts attaching the oil sump 

to the flywheel housing.

7.

Slacken the other oil sump attachment bolts 

until the oil sump is free from the flywheel 

housing.

8.

Remove the central engine mounting 

attachment bolts at the rear of the engine.

9.

Remove the flywheel housing attachment 

bolts.

10. Remove the flywheel housing.

Installing the flywheel housing
1.

Remove the oil seal from the flywheel 

housing by carefully tapping or pushing it out 

of the housing.

2.

Remove any gasket remnants from the 

contact areas.

3.

Check the sealing surfaces for damage.

4.

Check the flywheel housing for cracks.

5.

Apply a locking compound to the sealing 

surface of the cylinder block. See "Technical 

data". Spread the sealing compound with a 

roller or brush across the entire sealing 

surface.

6.

Fit the flywheel housing. Tighten the 

attachment bolts to the specified torque. See 

"Technical data".

XE ENGINE

4-26

©

 200324

Removal and installation

8

CF65/75/85 series

2

7.

Fit the central engine mounting attachment 

bolts at the rear of the engine. Tighten the 

attachment bolts to the specified torque. See 

"Technical data".

8.

Fit the oil seal.

9.

Fit the flywheel.

10. Fit the starter motor.

11. Fit the crankshaft position sensor.

12. Clean the contact surface of the earth lead 

and connect it to the flywheel housing.

13. Fit the oil sump attachment bolts. Tighten all 

attachment bolts to the specified torque. See 

"Technical data".


Content   ..  253  254  255  256   ..