DAF CF65, CF75, CF85 Series . Manual - part 1157


  Index      DAF     DAF CF65, CF75, CF85 Series - service repair manual


Search            


Content   ..  1155  1156  1157  1158   ..


DAF CF65, CF75, CF85 Series . Manual - part 1157


©

 200423

3-11

Inspection and adjustment

EXPLANATORY NOTES ON THE MAINTENANCE ACTIVITIES

ΧΦ75 series

5

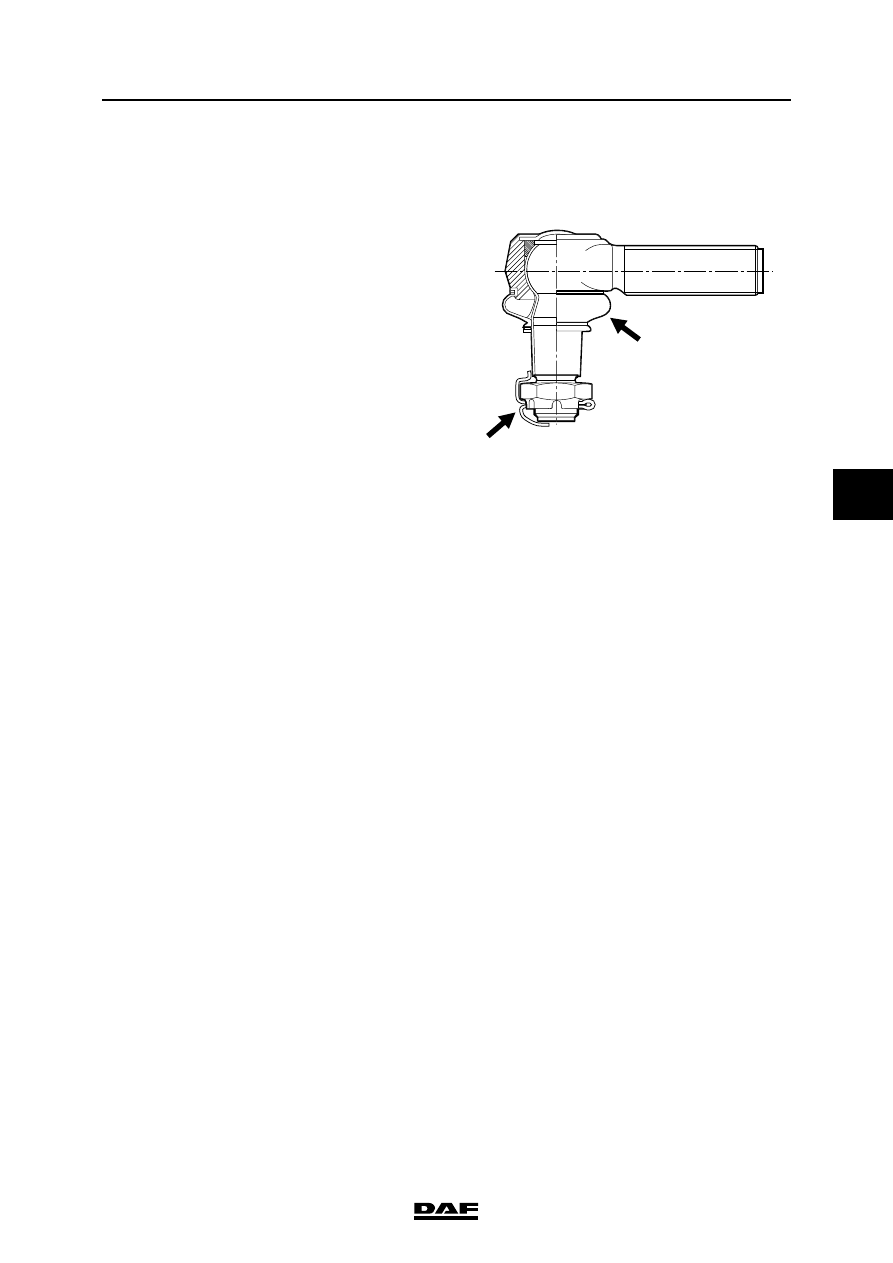
3.17 CHECKING THE STEERING BALL JOINT SLEEVE FOR DAMAGE

Inspection, locking devices and dust cover
1.

Check that the steering ball joint dust cover 

or seal is not damaged. Replace the steering 

ball joint if damaged.

2.

If a castle nut is fitted, check that the locking 

devices are present and undamaged.

S7 00 592

EXPLANATORY NOTES ON THE MAINTENANCE ACTIVITIES

3-12

©

 200423

Inspection and adjustment

5

ΧΦ75 series

3.18 CHECKING THE STEERING BALL JOINTS

Checking axial steering ball joint play
1.

Check the axial steering-ball joint play using 

special tool (DAF no. 1329426)

2.

First jack up the axle until the wheels come 

off the ground and put the axle on stands.

3.

Make sure that the castle nut split pin (if 

fitted) at the nut does not come into contact 

with the head of the threaded end.

4.

Screw the thrust washer (8) on to the 

threaded spindle.

5.

Fit the spring retainer (3), spring (4) and 

pressure sleeve (6) into bracket (1). Fit the 

locking screw (5). It should be possible to 

move the pressure sleeve (6) freely.

Note:

Fit the correct pressure sleeve (6).

The pressure sleeve (6) must abut the outer 

edge of the steering ball joint (7).

6.

Loosen thrust bolt (2) until the pressure 

sleeve (6) with the flange abuts the bracket 

(A = 0 mm).

7.

Fit the special tool over the steering ball joint 

(7) and turn the threaded spindle (9) by hand 

until the special tool is tight around the 

steering ball joint (7).

8.

Tighten thrust bolt (2) until its head abuts 

bracket (1).

9.

Measure play "A" between the pressure 

sleeve and the bracket using a feeler gauge. 

Compare the reading with the maximum 

permissible steering ball joint play, see 

"Technical data". 

If necessary, replace the steering ball joint.

9

8

7

6

5

4

3

2

A

1

S700426

©

 200423

3-13

Inspection and adjustment

EXPLANATORY NOTES ON THE MAINTENANCE ACTIVITIES

ΧΦ75 series

5

3.19 CHECKING THE STEERING OIL LEVEL

1.

Check the steering oil level when the engine 

is not running.

2.

Clean the dipstick and its immediate 

surroundings to prevent any oil from entering 

the reservoir.

3.

Check the fluid level in the reservoir using 

the dipstick.

4.

The fluid level should be between the marks 

when the steering oil is "cold".

Note:

When the steering oil is at operating 

temperature, the level may be above the top 

mark on the dipstick.

S7 00 676

EXPLANATORY NOTES ON THE MAINTENANCE ACTIVITIES

3-14

©

 200423

Inspection and adjustment

5

ΧΦ75 series

3.20 CHECKING THE STEERING GEAR LINES AND CONNECTIONS

1.

Condition of the pipes

-

Check all pipes for tightness and wear. 

Where supply pipes are subject to 

negative pressure, it is particularly likely 

that porous pipes will give rise to 

problems (air in the system).

-

If in doubt, always replace the line. 

2.

Pipe connections

-

Check every pipe connection for leaks.

3.

Line route

-

Pipes must not be twisted during 

assembly. To facilitate checking this, a 

mark may have been provided on the 

hose (sometimes in the form of text).

-

Pipes should not touch other parts (to 

prevent chafing).

-

The course pipes follow should not 

include any sharp bends; this applies 

especially to the flexible suction and 

return pipes.

-

Pipes should not be pinched off by other 

components.


Content   ..  1155  1156  1157  1158   ..