Chrysler 300/300 Touring/300C, Dodge Magnum. Manual - part 2161


  Index      Chrysler     Chrysler 300/300 Touring/300C, Dodge Magnum - service repair manual


Search            


Content   ..  2159  2160  2161  2162   ..


Chrysler 300/300 Touring/300C, Dodge Magnum. Manual - part 2161


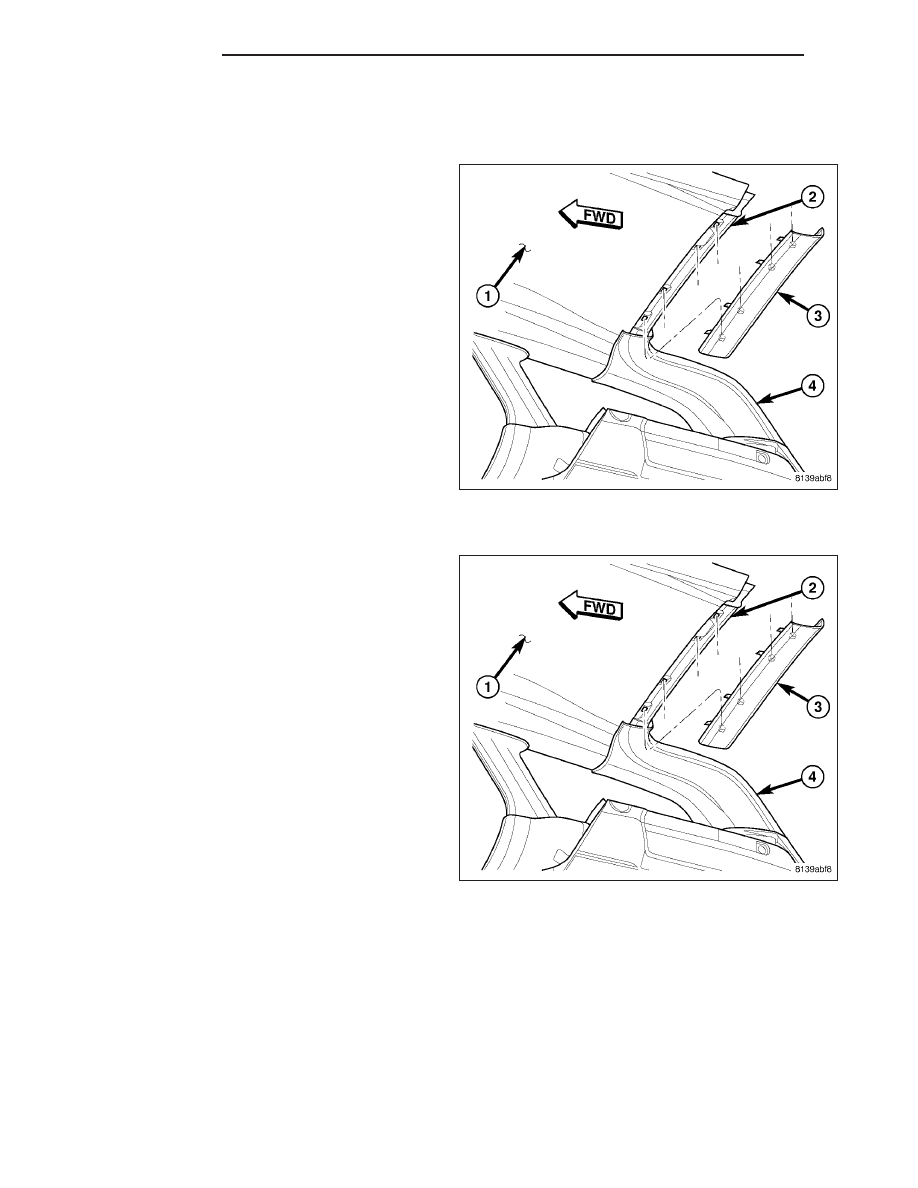
LIFTGATE OPENING UPPER TRIM

REMOVAL

1. Using a trim stick or another suitable wide flat-

bladed tool, carefully pry the rear edge of the trim
plate (3) down from the upper liftgate opening
header (2) far enough to disengage the four spring
clip retainers from the slots in the header.

2. Pull the trim plate rearward to disengage it from the

rear edge of the headliner (1).

3. Remove the trim plate from the vehicle.

INSTALLATION

1. Fit the forward edge of the liftgate opening header

trim plate (3) to the rear edge of the headliner (1).

2. Align the four spring clip retainers on the trim plate

to the slots in the upper liftgate opening header (2).

3. Using hand pressure, press firmly and evenly

upward on the trim plate over each of the retainer
locations until they snap into place.

4. Be certain that ends of the trim plate are properly

engaged over the inboard edges of the right and
left upper D-pillar trim.

23 - 192

INTERIOR

LX

LIFTGATE SCUFF PLATE

REMOVAL

1. Remove the two screws (2) that secure the tie-

down loops (1) and the scuff plate trim panel (5) to
the top of the liftgate opening lower panel (4).

2. Remove the two screws (6) that secure the scuff

plate trim panel to the inside of the liftgate opening
lower panel.

3. Remove the scuff plate trim panel from the vehicle.

INSTALLATION

1. Check to be certain that two spring nuts (3) are

properly installed and in good condition in the top
of the liftgate opening lower panel (4).

2. Position the scuff plate trim panel (5) to the inside

of the liftgate opening lower panel. Ensure that the
trim edge is located into the seal crack.

3. Position the two tie-down loops (1) to the top of the

trim panel.

4. Install and tighten the two screws that secure the

tie-down loops and the scuff plate trim panel to the
top of the liftgate opening lower panel. Tighten the
screws to 11 N·m (8 ft. lbs.).

5. Install and tighten the two screws (6) that secure

the trim panel to the inside of the liftgate opening
lower panel. Tighten the screws to 11 N·m (8 ft.
lbs.).

LX

INTERIOR

23 - 193

QUARTER TRIM PANEL

REMOVAL

1. Disconnect and isolate the battery negative cable.

2. Remove the rear seat cushion from the vehicle. (Refer to 23 - BODY/SEATS/SEAT CUSHION COVER -

REMOVAL).

3. Remove the rear seat back side bolster from the quarter inner panel (1). (Refer to 23 - BODY/SEATS/SEAT

BACK CUSHION/COVER - REMOVAL).

4. Remove the screw that secures the outboard rear seat belt lower anchor to the quarter inner panel.

5. Remove the trim from the upper D-pillar. (Refer to 23 - BODY/INTERIOR/D-PILLAR TRIM - REMOVAL).

6. Remove the speaker bezel from the quarter trim panel. (Refer to 23 - BODY/INTERIOR/SPEAKER BOX TRIM

COVER - REMOVAL).

7. Remove the two screws (2) that secure the quarter trim panel (5) to the speaker bracket above the rear wheel

house.

8. Remove the screw that secures the tie-down loop, the liftgate scuff plate trim panel and the rear extension of the

quarter trim panel to the top of the liftgate opening lower panel.

9. Remove the three screws (3) that secure the tie-down loop (6) and the quarter trim panel to the quarter inner

panel.

10. Using a trim stick or another suitable wide flat-bladed tool, carefully pry the quarter trim panel away from the

side of the liftgate opening far enough to disengage the three spring clip retainers that secure the trim to the
slots in the quarter inner panel behind the rear wheel house.

11. Move the back of the quarter trim panel away from the base of the upper D-pillar trim far enough to access and

disconnect the body wire harness connector from the back of the auxiliary power outlet, if equipped.

12. Using a trim stick or another suitable wide flat-bladed tool, carefully pry the quarter trim panel away from the

base of the upper C-pillar trim far enough to disengage the spring clip retainer that secures the trim to the slot
in the quarter inner panel.

23 - 194

INTERIOR

LX

13. Lift the quarter trim panel up and over the outboard rear seat belt retractor on the top of the rear wheel house

while feeding the loose belt webbing and lower anchor through the retractor clearance hole in the top of the
panel.

14. Remove the quarter trim panel from the vehicle through the liftgate opening.

INSTALLATION

1. Check to be certain that the three spring nuts (3) are properly installed and in good condition on the quarter inner

panel (1). Replace a spring nut if any damage is evident.

2. Position the quarter trim panel (5) into the vehicle through the liftgate opening.

3. Lift the quarter trim panel up and over the outboard rear seat belt retractor on the top of the rear wheel house

while pulling the loose belt webbing and lower anchor through the retractor clearance hole in the top of the
panel.

4. Align the spring clip retainer on the back of the quarter trim panel with the slot in the quarter inner panel at the

base of the upper C-pillar trim.

5. Using hand pressure, press firmly and evenly on the trim over the spring clip location until the retainer snaps into

place.

6. Move the rear of the quarter trim panel away from the base of the upper D-pillar trim far enough to access and

reconnect the body wire harness connector to the back of the auxiliary power outlet, if equipped.

7. Align the three spring clip retainers on the back of the quarter trim panel with the slots in the quarter inner panel

behind the rear wheel house.

8. Using hand pressure, press firmly and evenly on the trim over the spring clip locations until the retainers snap

into place.

9. Position the rear extension of the quarter trim panel onto the top of the liftgate opening lower panel with the

extension sequenced under the end of the liftgate scuff plate.

10. Install and tighten the three screws (4) that secure the tie-down loop (6) and the quarter trim panel to the quar-

ter inner panel. Tighten the screws to 11 N·m (8 ft. lbs.).

11. Install and tighten the screw that secures the tie-down loop, the liftgate scuff plate and the rear extension of the

quarter trim panel to the top of the liftgate opening lower panel. Tighten the screw to 11 N·m (8 ft. lbs.).

LX

INTERIOR

23 - 195


Content   ..  2159  2160  2161  2162   ..