Content .. 2137 2138 2139 2140 ..
Chrysler 300/300 Touring/300C, Dodge Magnum. Manual - part 2139
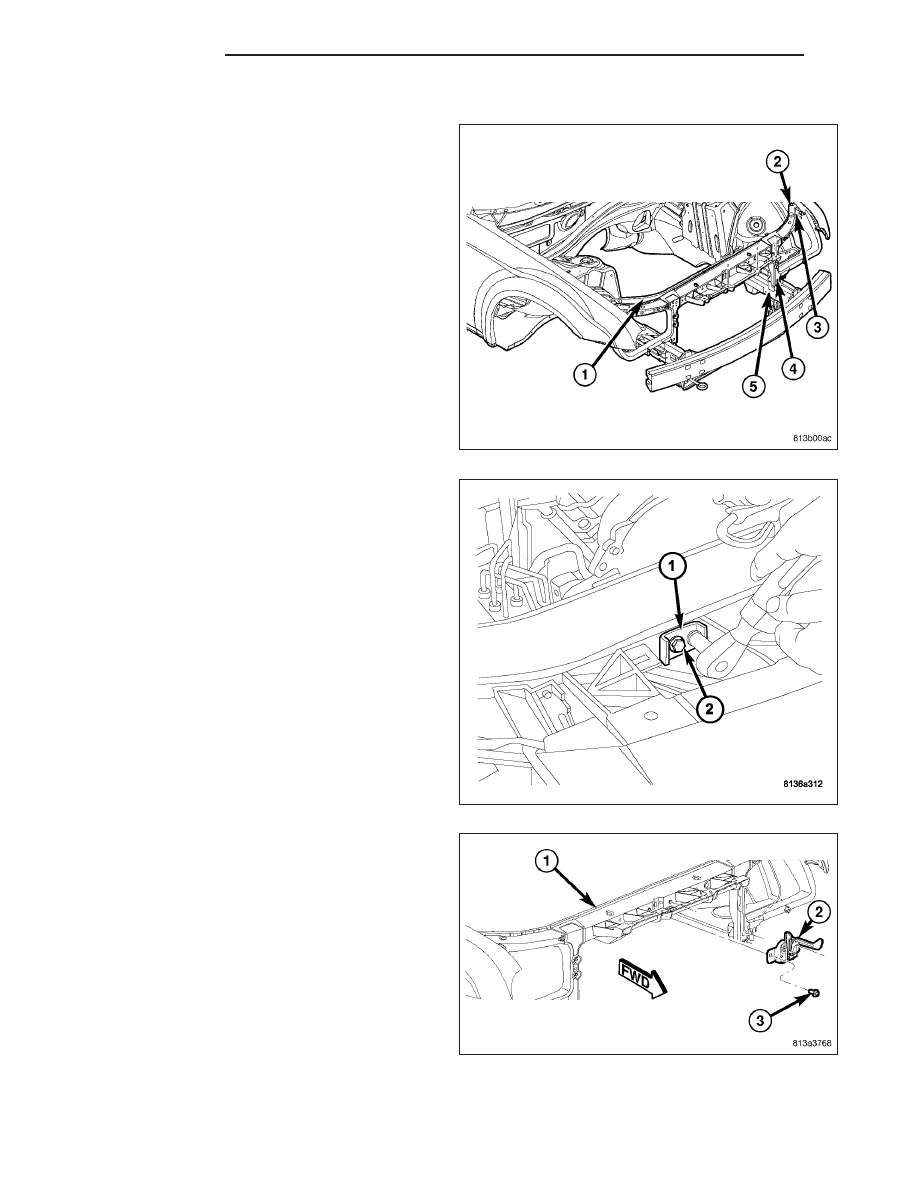
INSTALLATION
1. Position the headlamp mounting crossmember (1)
into the engine compartment.
2. Loosely install the bolts (2 and 3) that secure the
headlamp mounting crossmember to the front fend-
ers.
3. Loosely install the bolts (4) that secure the head-
lamp mounting crossmember to the front frame
rails (5).
4. Align the headlamp mounting crossmember using
the alignment marks previously indicated and
tighten all of the retaining bolts to 28 N·m (21 ft.
lbs.).
5. Install the bolts (2) that secure the radiator mount-
ing bracket (1) to the headlamp mounting cross-
member. Tighten the bolts to 5 N·m (45 in. lbs.).
6. Position the latch (2) to the front of the crossmem-
ber (1).
7. Loosely install the two bolts (3) that secure the
hood latch to the headlamp mounting crossmem-
ber.
8. Align the hood latch using the alignment marks
previously indicated and tighten the hood latch
bolts to 28 N·m (21 ft. lbs. ).
23 - 104
EXTERIOR
LX