Content .. 2129 2130 2131 2132 ..
Chrysler 300/300 Touring/300C, Dodge Magnum. Manual - part 2131
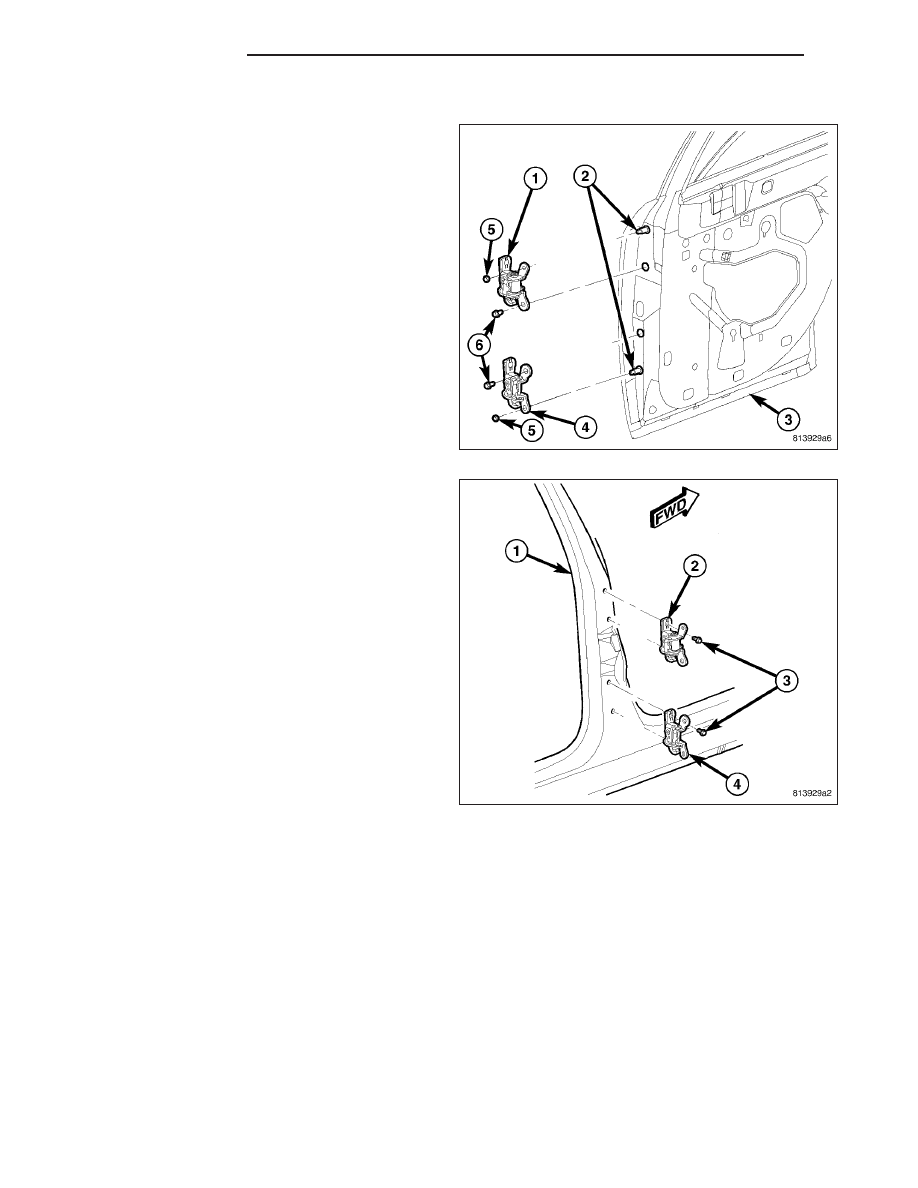
INSTALLATION
1. Position the upper (1) or lower (4) hinge to the
hinge face of the rear door (3).
2. Install and tighten the nut (5) that secures the
hinge to the stud (2) on the door. Tighten the nut to
28 N·m (21 ft. lbs.).
3. Install and tighten the screw (6) that secures the
hinge to the door. Tighten the screw to 28 N·m (21
ft. lbs.).
4. Position the upper (2) or lower (4) hinge bracket
onto the outside of the lower B-pillar (1).
5. Install and tighten the two screws (3) that secure
the hinge bracket to the outside of the lower B-pil-
lar. Tighten the screws to 30 N·m (22 ft. lbs.).
6. Reinstall the rear door onto the vehicle. (Refer to
23
-
BODY/DOOR
-
REAR/DOOR
-
INSTALLATION).
23 - 72
DOOR - REAR
LX