Content .. 1717 1718 1719 1720 ..
Chrysler 300/300 Touring/300C, Dodge Magnum. Manual - part 1719
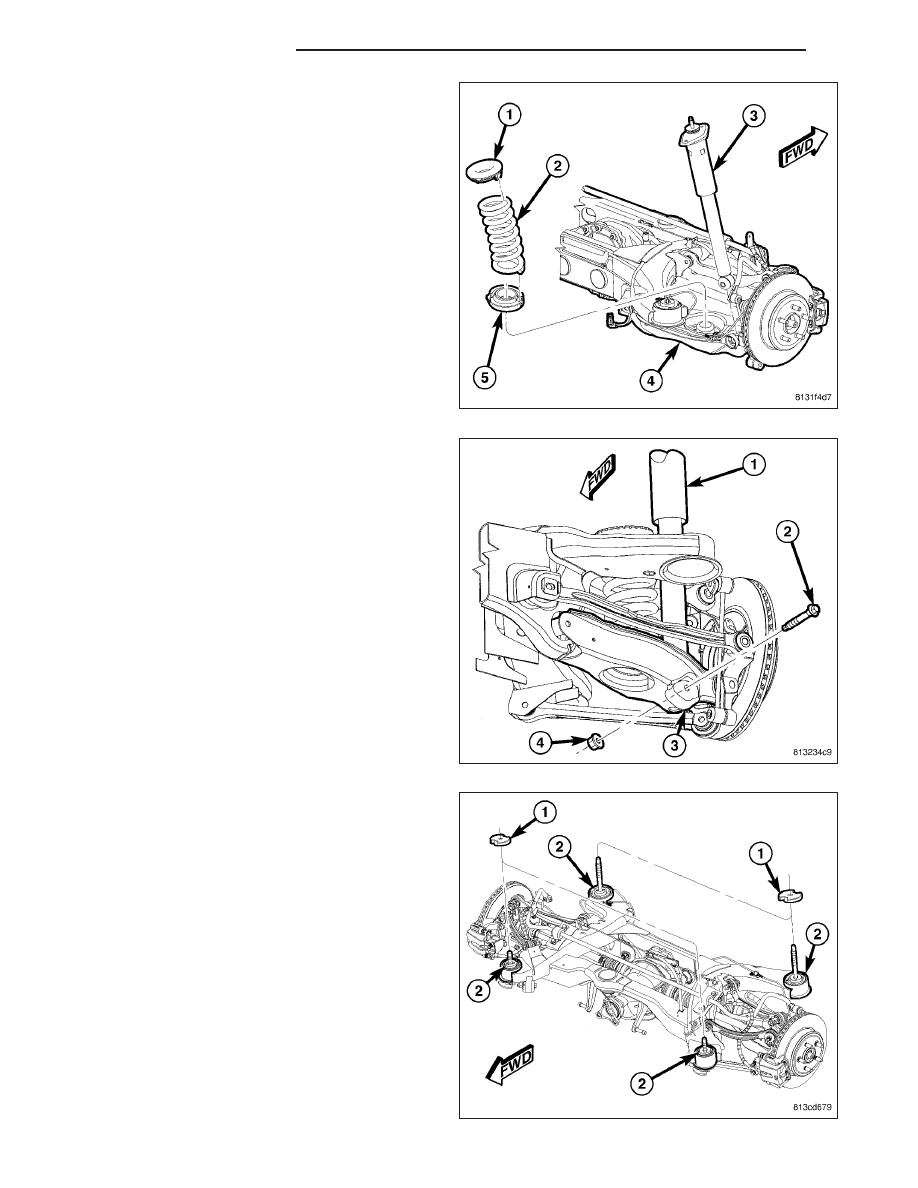
CAUTION: To avoid damaging other components
of vehicle, do not lower crossmember any further
than necessary to install coil spring (2).
8. Slowly lower jack allowing right side of crossmem-
ber to drop. Do not lower jack at a fast rate.
Lower jack just enough to allow spring (2) Installa-
tion. Do not lower jack any further than neces-
sary.
NOTE: Before installing coil spring, make sure iso-
lators (1 and 5) are completely installed on ends of
spring.
9. Install coil spring (2) with isolators into spring
pocket of spring link fitting the lower isolator to the
shape of the pocket, then align top of spring with
body mount.
10. Carefully raise jack, guiding coil spring and lower
end of shock absorber (1) into mounted positions.
Once shock absorber (1) lower mounting hole
lines up with hole in spring link (3), stop jacking.
11. Install lower shock mounting bolt (2) and nut (4).
Do not tighten at this time.
12. If vehicle is equipped with AWD, insert spacers (1)
on top of right crossmember mount bushings (2)
before crossmember is raised into place.
13 - 76
FRAME & BUMPERS
LX