Chrysler 300/300 Touring/300C, Dodge Magnum. Manual - part 1675


  Index      Chrysler     Chrysler 300/300 Touring/300C, Dodge Magnum - service repair manual


Search            


Content   ..  1673  1674  1675  1676   ..


Chrysler 300/300 Touring/300C, Dodge Magnum. Manual - part 1675


5. Remove #9102 crankshaft lock (1).

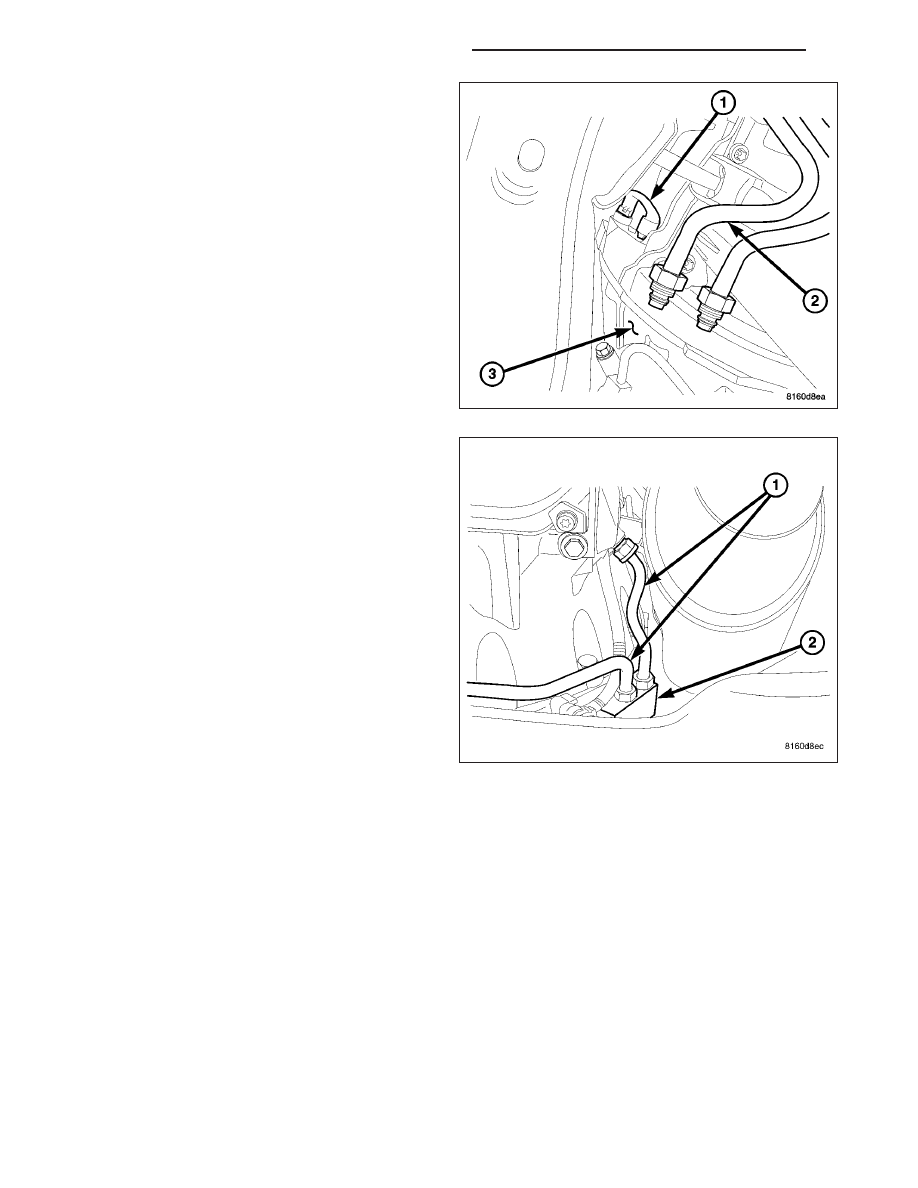
6. Install the transmission thermal bypass valve (2)

and transmission cooler lines (1).

7. Install the intermediate and front underbody splash

shields.

8. Lower the vehicle.

9. Connect negative battery cable.

9 - 2724

ENGINE - 3.0L TD SERVICE INFORMATION

LX

CRANKSHAFT OIL SEAL - REAR

DESCRIPTION

The rear main seal carrier (1) is located behind the
flex plate. The rear main seal carrier is bolted to the
cylinder block and oil pan. The rear main seal (2) is
molded to the carrier and is not serviceable. The rear
main seal carrier must be replaced if an oil leak or
seepage occurs.

REMOVAL

1. Remove the transmission. (Refer to 21 - TRANS-

MISSION/AUTOMATIC - NAG1 - REMOVAL)

2. Remove the bolts holding the driveplate to the

crankshaft (3).

3. Remove the driveplate.

4. Remove the bolts holding the rear main seal carrier

(1) to the engine block and oil pan.

5. Remove the rear main seal carrier (1) from the

engine block and oil pan.

6. Clean sealant residue from the engine block and oil

pan.

LX

ENGINE - 3.0L TD SERVICE INFORMATION

9 - 2725

INSTALLATION

1. Apply sealant 1.5 mm (.059 in) wide, MOPAR

Engine Sealant / RTV Silicone Rubber Adhesive (2)
to the rear main seal carrier (1).

2. Install the rear main seal carrier (1) to the engine

block and oil pan.

3. Install the bolts holding the rear main seal carrier

(1) to the engine block and oil pan. Torque the
bolts to 9 N·m (7 ft. lbs.).

4. Install the driveplate. Torque bolts to 45 N·m (33 ft.

lbs.) plus an addition 90°.

5. Install the transmission. (Refer to 21 - TRANSMIS-

SION/AUTOMATIC - NAG1 - INSTALLATION).

9 - 2726

ENGINE - 3.0L TD SERVICE INFORMATION

LX

FLEX PLATE

REMOVAL

1. Remove the transmission (Refer to 21 - TRANS-

MISSION/AUTOMATIC - NAG1 - REMOVAL).

2. Paint mark the flex plate hub to flex plate relation.

3. Remove the flex plate bolts and flex plate.

4. Inspect flex plate for damage.

INSTALLATION

NOTE: Do Not lubricate new bolts as they are already coated with an anti-scuff treatment. Align the flex
plate to hub paint marks, where applicable.

1. Install the flex plate hub and hand tighten the fasteners.

2. Tighten each flex plate hub fastener to 50 N·m (37 lbs. ft.) in a clockwise cross sequence.

3. At this point, loosen one flex plate adaptor fastener, and with a torque wrench and angle gauge, tighten the

fastener to 25 N·m (19 lbs. ft.), plus 60°.

4. Perform the above procedure for the remaining flex plate adaptor bolts in a clockwise cross sequence.

5. Install the flex plate locating pin.

6. Install the flex plate to the hub and install the fasteners. Tighten the flex plate fasteners in a cross sequence to

44 N·m (32.5 ft. lbs.).

7. Install the transmission (Refer to 21 - TRANSMISSION/AUTOMATIC - NAG1 - REMOVAL).

LX

ENGINE - 3.0L TD SERVICE INFORMATION

9 - 2727


Content   ..  1673  1674  1675  1676   ..