Chrysler 300/300 Touring/300C, Dodge Magnum. Manual - part 1660


  Index      Chrysler     Chrysler 300/300 Touring/300C, Dodge Magnum - service repair manual


Search            


Content   ..  1658  1659  1660  1661   ..


Chrysler 300/300 Touring/300C, Dodge Magnum. Manual - part 1660


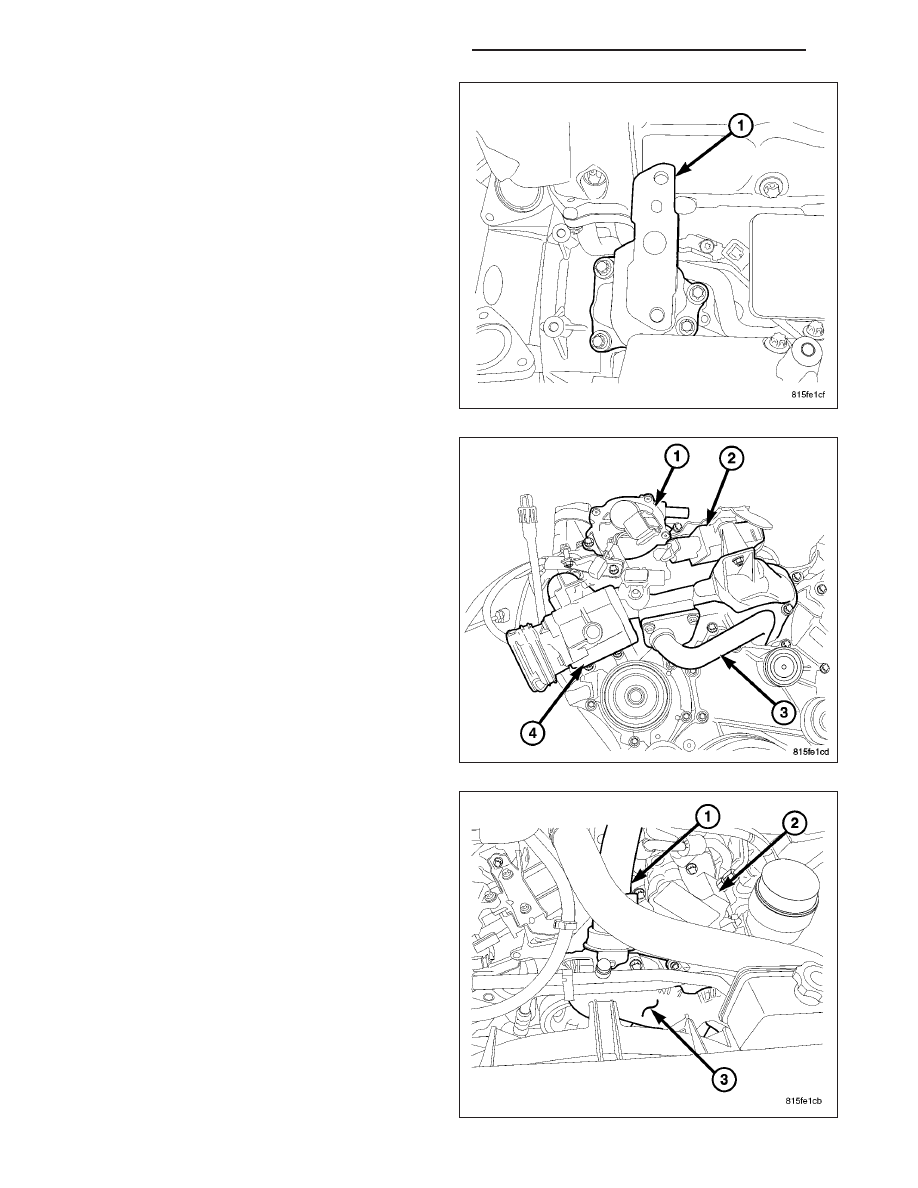
CAUTION: Care must be taken when installing the
turbocharger oil housing adaptor (1). The gasket
MUST be aligned properly with the oil housing
passages or immediate damage to the turbo-
charger will occur.

42. Install the turbocharger oil housing adaptor (1)

with the gasket tabs secured to the adaptor (1)
Tighten bolts to 12 N·m (9 ft. lbs.).

43. Install the turbocharger (Refer to 11 - EXHAUST

SYSTEM/TURBOCHARGER

SYSTEM/TURBO-

CHARGER - INSTALLATION).

44. Install the air control valve and resonator.

45. Install the charge air cooler inlet pipe and

resonator.

9 - 2664

ENGINE - 3.0L TD SERVICE INFORMATION

LX

46. Install the cooling fan module.

47. Install the heater hose bracket and secure hoses.

48. Connect the vacuum pump supply hose.

49. Raise and support the vehicle.

50. Remove #9102 crankshaft lock (2).

51. Install the starter blank.

52. Connect the cooling fan hydraulic lines.

53. Lower the vehicle.

54. Fill the cooling system.

55. Fill power steering system.

56. Connect the negative battery cable.

57. Start engine, allow to warm, turn engine off and

inspect for leaks (Refer to 14 - FUEL SYSTEM -
WARNING).

58. Purge the air from the power steering system

using the scan tool.

59. Install the engine cover brackets and engine

cover (1).

LX

ENGINE - 3.0L TD SERVICE INFORMATION

9 - 2665

RIGHT

1. Clean and inspect gasket mating surfaces.

2. Position head gasket on engine block. Be sure the

coolant passages align (part number should be fac-
ing up).

3. Place cylinder head on engine block.

CAUTION: Inspect and measure all cylinder head
bolt lengths. If out of specification, replace as nec-
essary (Refer to 9 - ENGINE/CYLINDER HEAD -
STANDARD PROCEDURE). Do Not lubricate new
cylinder head bolts. They already are coated with
an anti scuff treatment.

4. Tighten cylinder head bolts following procedure

below.

a. Tighten M12 cylinder head bolts 1 through 8, in
the sequence shown to 60 N·m (44 ft. lbs.).

b. Tighten bolts 9 and 10 to 20 N·m ( 177 in. lbs.).

c. Tighten 12 mm cylinder head bolts, 1 through 8,
in sequence shown, an additional 90 degrees.

d. Recheck and tighten M8 bolts 9 and 10 to 20 N·m ( 177 in. lbs.).

e. And then again, tighten M12 cylinder head bolts, 1 through 8, in sequence an additional 90°.

NOTE: Followers and tappets assemblies must be
installed in same location as removed.

5. Install the followers (2) and tappets (2) into their

original positions.

6. Install the glow plugs (1). Tighten glow plugs to

12.5 N·m (100 in. lbs.).

9 - 2666

ENGINE - 3.0L TD SERVICE INFORMATION

LX

7. Install the right exhaust camshaft. Tighten the

retaining fasteners to 8 N·m (71 in. lbs.).

8. Install the right intake camshaft. Tighten the retain-

ing fasteners to 8 N·m (71 in. lbs.).

NOTE: Care must be taken to assure the proper
exhaust camshaft to intake camshaft alignment.

9. Align the camshaft marks so the alignment marks

are facing each other.

10. Insert the timing chain, through the cylinder head,

and on to the camshaft drive gear.

11. Align the balance shaft with the scribe or paint

mark.

12. Once the camshaft drive gear is mated with the

timing chain, install the camshaft drive gear on to
the camshaft and assure the balance shaft is
aligned properly.

LX

ENGINE - 3.0L TD SERVICE INFORMATION

9 - 2667


Content   ..  1658  1659  1660  1661   ..