Chrysler 300/300 Touring/300C, Dodge Magnum. Manual - part 1545


  Index      Chrysler     Chrysler 300/300 Touring/300C, Dodge Magnum - service repair manual


Search            


Content   ..  1543  1544  1545  1546   ..


Chrysler 300/300 Touring/300C, Dodge Magnum. Manual - part 1545


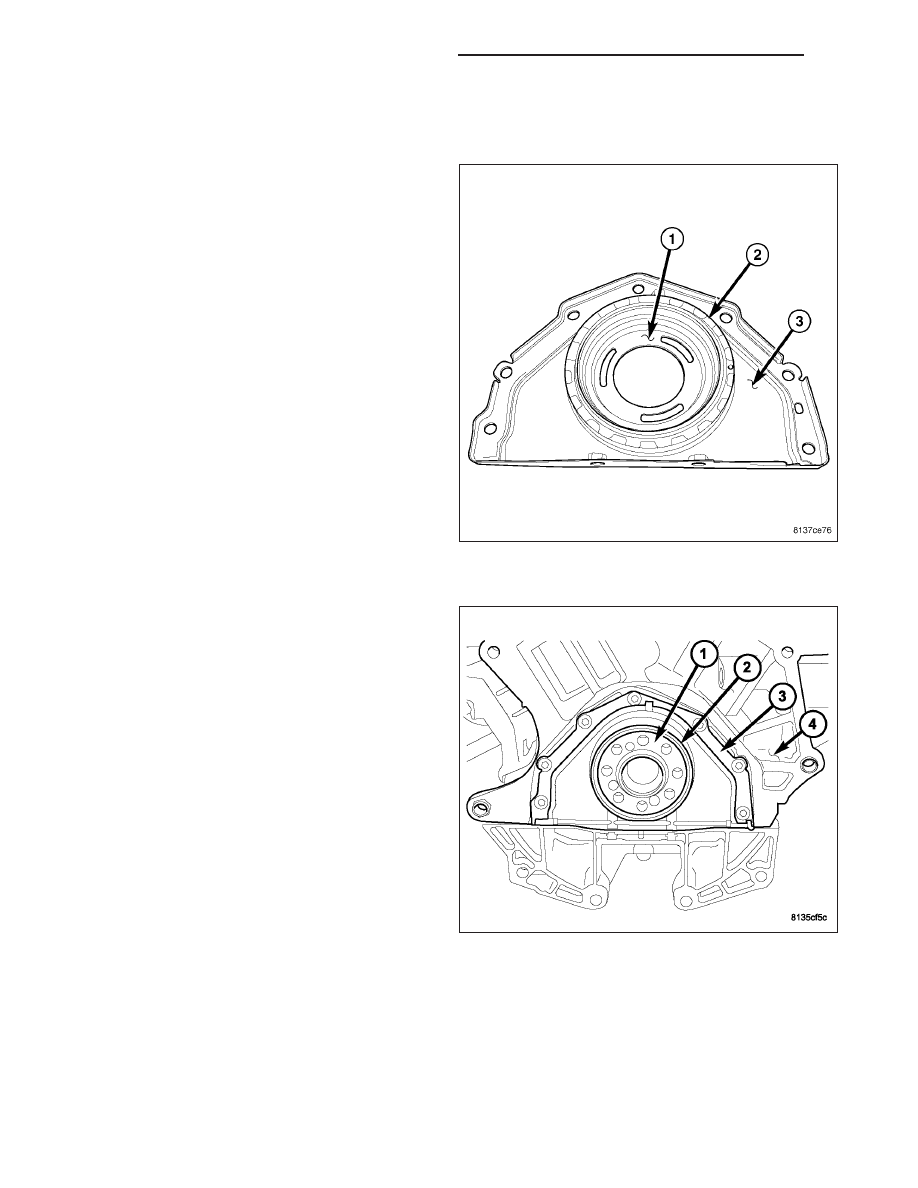
SEAL - CRANKSHAFT OIL REAR

DESCRIPTION

The rear crankshaft oil seal (1) and retainer (3) are
molded and serviced as an assembly. This assembly
also includes a separate rear crankshaft seal protector
(1) that should not be removed before the seal is
installed on the engine block. Once the seal protector
(1) is separated from the assembly it can not be re-in-
stalled on the assembly or reused.

REMOVAL

1. Remove the engine oil pan (Refer to 9 - ENGINE/

LUBRICATION/OIL PAN - REMOVAL).

2. Lower the weight of the engine back onto the

engine mounts.

3. Remove transmission from vehicle. (Refer to 21 -

TRANSMISSION/TRANSAXLE/AUTOMATIC

-

42LE - REMOVAL)

4. Remove the flex plate.

5. Remove the rear crankshaft oil seal retainer bolts.

6. Remove the crankshaft oil seal and clean all mat-

ing surfaces.

9 - 2204

ENGINE - 3.5L - SERVICE INFORMATION

LX

INSTALLATION

NOTE: The seal lip (2) must always uniformly curl
inward toward the engine on the crankshaft (1).

CAUTION: If a burr or scratch is present on the
crankshaft edge (chamfer), clean surface using
400 grit sand paper to prevent seal damage during
installation.

NOTE: The rear crankshaft oil seal and retainer are
an assembly. DO NOT separate the seal protector
from the rear crankshaft oil seal before installation
on engine. Damage to the seal lip will occur if the
seal protector is removed and installed prior to
installation on engine.

1. Apply engine oil to crankshaft seal surface.

2. Carefully position the oil seal, retainer and seal

protector on crankshaft and push firmly into place
on engine block (the seal protector will be removed
from the rear oil seal assembly as a result of
installing the rear oil seal). Hand tighten the rear oil
seal fasteners.

LX

ENGINE - 3.5L - SERVICE INFORMATION

9 - 2205

NOTE: The following steps must be performed to
prevent oil leaks at sealing joints.

3. Attach Special Tools 8225 (1) to pan rail using the

oil pan fasteners.

NOTE: Special Tools 8225 (1), are use to assist
with the fit of the flush mount rear main seal
retainer. The notch on tool should be located away
the seal retainer.

4. While applying firm pressure to the seal retainer

against Special Tools 8225 (1), tighten seal retainer
screws to 12 N·m (105 in. lbs.).

5. Remove special tool #8225 (1).

NOTE: Make sure that the seal flange is flush with
the block oil pan sealing surface.

6. Install oil pan. Tighten the 6mm fasteners to 12N·m

(105 in.lbs.) and the 8mm fasteners to 28N·m (250
in.lbs.).

7. Install the flex plate and transmission.

9 - 2206

ENGINE - 3.5L - SERVICE INFORMATION

LX

PLATE - FLEX

REMOVAL

1. Remove the transmission.

2. Remove flex plate attaching bolts (2).

3. Remove the flex plate (1).

INSTALLATION

1. Position flex plate (1) with backing plate (3) on the

crankshaft.

2. Apply Mopar

T

Lock & Seal Adhesive to the flex

plate bolts (2).

3. Install flex plate bolts (2). Tighten bolts to 95 N·m

(70 ft. lbs.).

4. Install the transmission.

LX

ENGINE - 3.5L - SERVICE INFORMATION

9 - 2207


Content   ..  1543  1544  1545  1546   ..