Chevrolet Silverado / GMC Sierra. Manual - part 431
4. Remove the positive crankcase ventilation (PCV) cover screws.
5. Remove the PCV cover, diaphragm, and spring.
6. Clean and inspect the cover, diaphragm and spring.
7. Discard the diaphragm if damage is found.
Installation Procedure
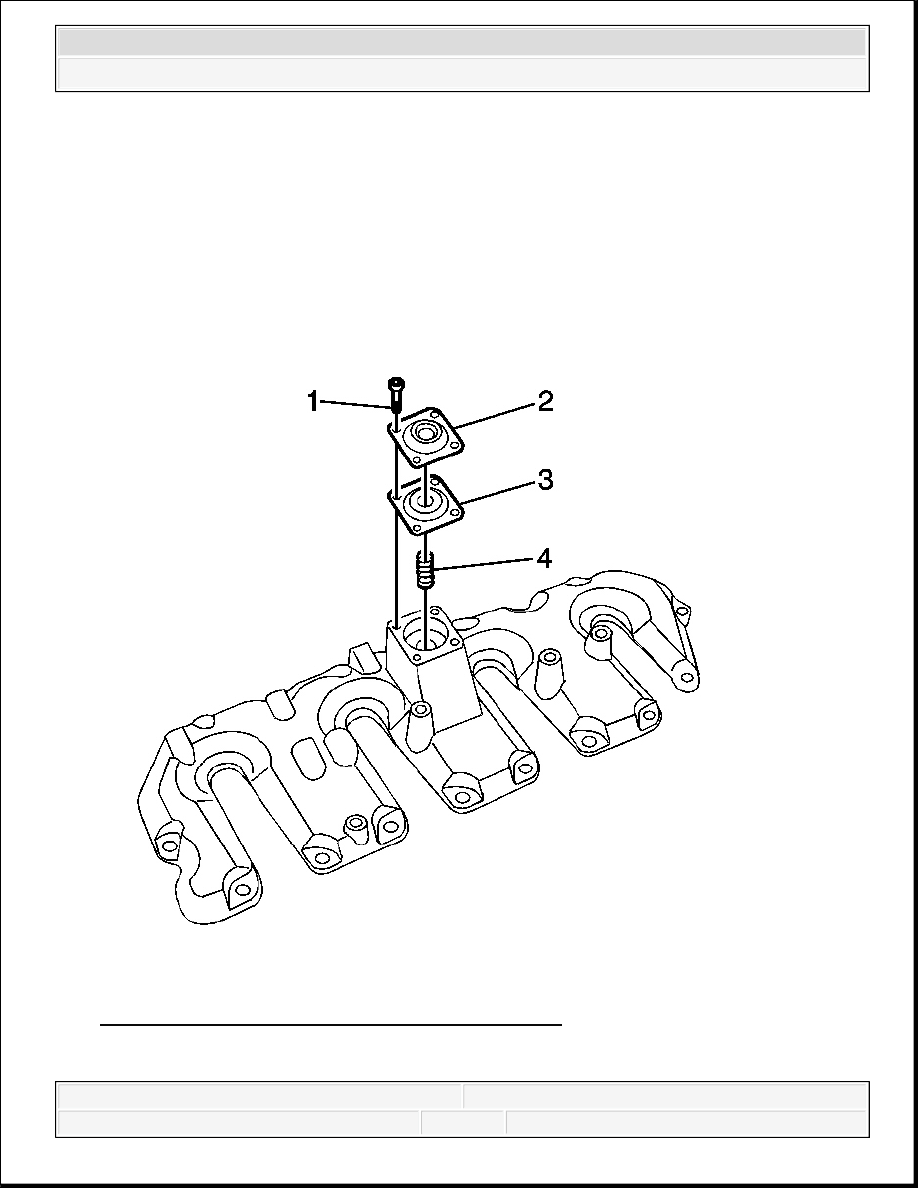
Fig. 53: View Of PCV Cover, Diaphragm & Spring
Courtesy of GENERAL MOTORS CORP.
2008 Chevrolet Silverado 1500
2008 ENGINE Engine Mechanical - 6.6L - Cab & Chassis Sierra, Cab & Chassis Silverado, Sierra & Silverado

1. Install the spring, diaphragm and cover.
2. Install the PCV cover screws.
Tighten: Tighten the screws to 4 N.m (35 lb in).
Fig. 54: Identifying Fuel Filter Bracket Bolts
Courtesy of GENERAL MOTORS CORP.
3. Position the fuel filter assembly to the engine.
NOTE:
Refer to Fastener Notice .
2008 Chevrolet Silverado 1500
2008 ENGINE Engine Mechanical - 6.6L - Cab & Chassis Sierra, Cab & Chassis Silverado, Sierra & Silverado

4. Install the fuel filter bracket bolts.
Tighten: Tighten the bolts to 21 N.m (15 lb ft).
5. Install the air cleaner outlet duct. Refer to Air Cleaner Assembly Replacement .
POSITIVE CRANKCASE VENTILATION HOSE/PIPE/TUBE REPLACEMENT
Removal Procedure
Fig. 55: View Of Turbocharger Clamp & Charged Air Cooler Inlet Duct Connector
Courtesy of GENERAL MOTORS CORP.
2008 Chevrolet Silverado 1500
2008 ENGINE Engine Mechanical - 6.6L - Cab & Chassis Sierra, Cab & Chassis Silverado, Sierra & Silverado
1. Remove the intake manifold cover. Refer to Intake Manifold Cover Replacement.
2. Loosen the charged air cooler inlet duct connector to turbocharger clamp (1).
3. Remove the charged air cooler inlet duct connector (4) from the turbocharger.
4. Remove the air cleaner outlet duct. Refer to Air Cleaner Outlet Duct Replacement .
IMPORTANT: After removing the charged air cooler duct, cover the
turbocharger opening with tape in order to prevent entry of
objects.
IMPORTANT: Do not use a screwdriver or other tool to pry the hose loose.
The hose can be torn or damaged. Loosen the hose by
twisting.
2008 Chevrolet Silverado 1500
2008 ENGINE Engine Mechanical - 6.6L - Cab & Chassis Sierra, Cab & Chassis Silverado, Sierra & Silverado