Chevrolet Silverado / GMC Sierra. Manual - part 430
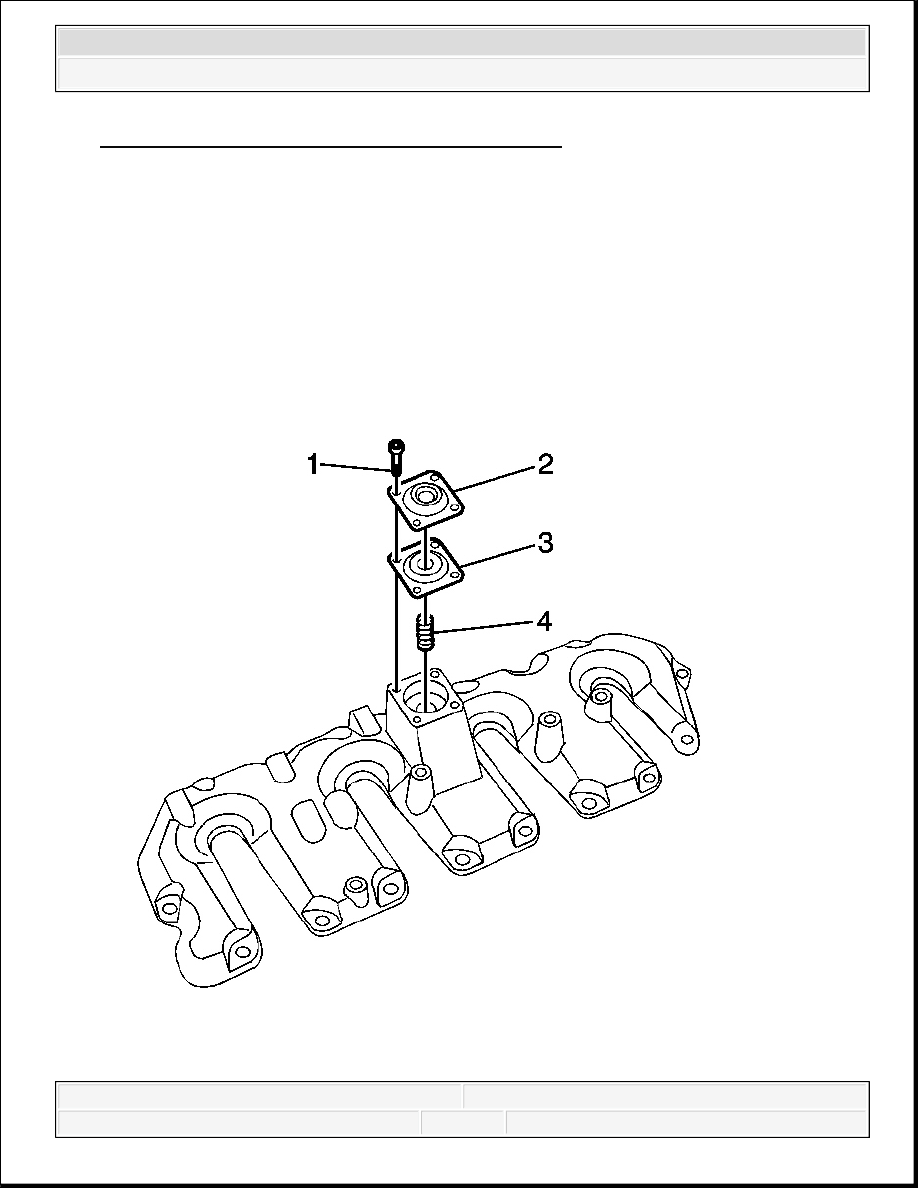
Fig. 48: View Of PCV Cover, Diaphragm & Spring
Courtesy of GENERAL MOTORS CORP.
3. Remove the positive crankcase ventilation (PCV) cover screws.
4. Remove the PCV cover, diaphragm, and spring.
5. Clean and inspect the cover, diaphragm, and spring.
6. Discard the diaphragm if damage is found.
Installation Procedure
2008 Chevrolet Silverado 1500
2008 ENGINE Engine Mechanical - 6.6L - Cab & Chassis Sierra, Cab & Chassis Silverado, Sierra & Silverado
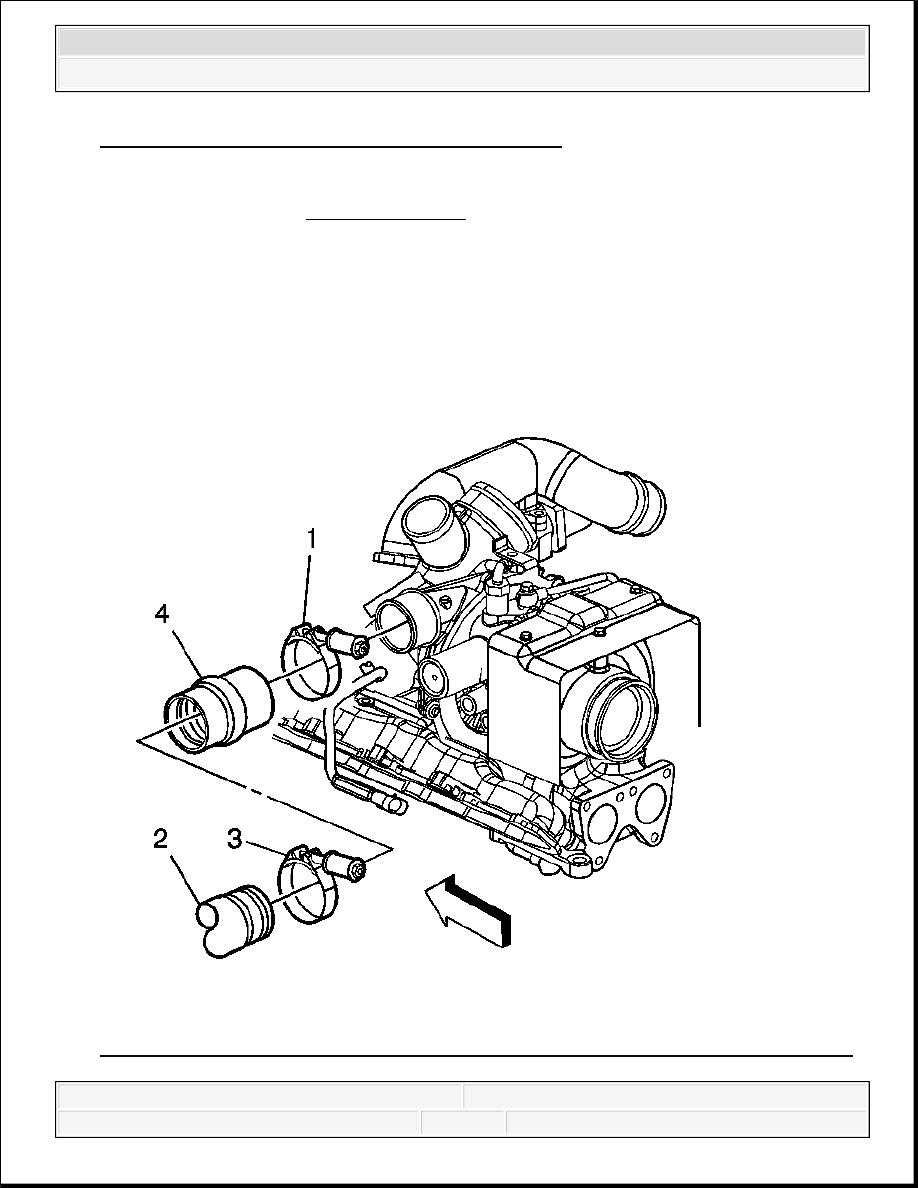
Fig. 49: View Of PCV Cover, Diaphragm & Spring
Courtesy of GENERAL MOTORS CORP.
1. Install the spring, diaphragm, and cover.
2. Install the PCV cover screws.
Tighten: Tighten the screws to 4 N.m (35 lb in).
Fig. 50: View Of Turbocharger Clamp & Charged Air Cooler Inlet Duct Connector
Courtesy of GENERAL MOTORS CORP.
NOTE:
Refer to Fastener Notice .
2008 Chevrolet Silverado 1500
2008 ENGINE Engine Mechanical - 6.6L - Cab & Chassis Sierra, Cab & Chassis Silverado, Sierra & Silverado

3. Remove the tape from the turbocharger openings.
4. Install the charged air cooler inlet duct connector (4) to the turbocharger.
5. Tighten the charged air cooler inlet duct connector to turbocharger clamp (1).
Tighten: Tighten the clamp to 6 N.m (53 lb in).
POSITIVE CRANKCASE VENTILATION VALVE REPLACEMENT (PASSENGER SIDE)
Removal Procedure
IMPORTANT: Lubricate the end of the duct prior to installation.
2008 Chevrolet Silverado 1500
2008 ENGINE Engine Mechanical - 6.6L - Cab & Chassis Sierra, Cab & Chassis Silverado, Sierra & Silverado
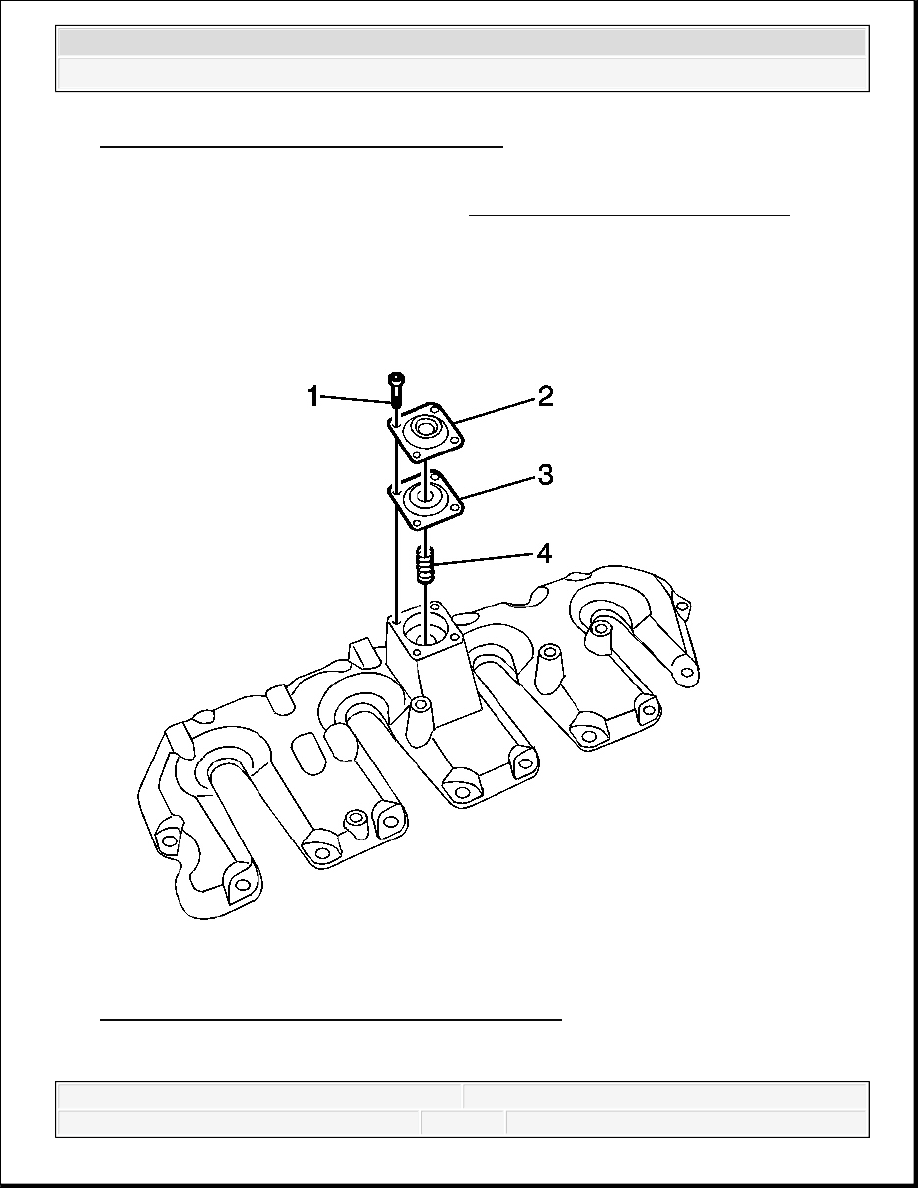
Fig. 51: Identifying Fuel Filter Bracket Bolts
Courtesy of GENERAL MOTORS CORP.
1. Remove the air cleaner outlet duct. Refer to Air Cleaner Assembly Replacement .
2. Remove the fuel filter bracket bolts.
3. Position the fuel filter assembly out of the way.
Fig. 52: View Of PCV Cover, Diaphragm & Spring
Courtesy of GENERAL MOTORS CORP.
2008 Chevrolet Silverado 1500
2008 ENGINE Engine Mechanical - 6.6L - Cab & Chassis Sierra, Cab & Chassis Silverado, Sierra & Silverado