Content .. 2413 2414 2415 2416 ..
Chevrolet Silverado / GMC Sierra. Manual - part 2415
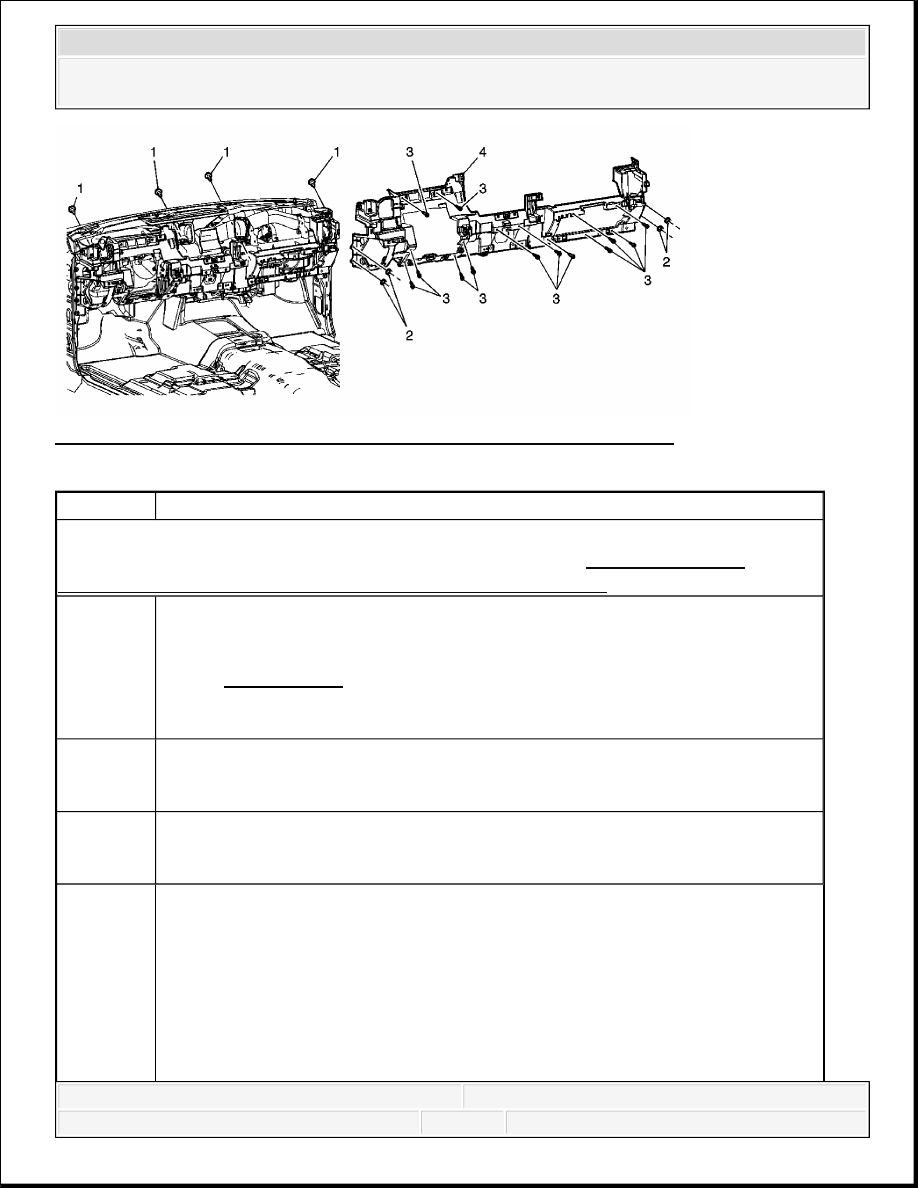
Fig. 67: View Of Instrument Panel Carrier Assembly & Components
Courtesy of GENERAL MOTORS CORP.
Callout
Component Name
Preliminary Procedure:
Remove the instrument Panel Compartment Assembly. Refer to Instrument Panel
Compartment Door Assembly Replacement (with RPO SLT).
1
Instrument Panel Carrier to HVAC Screw (Qty: 4)
Tighten: 2 N.m (18 lb in)
NOTE:
Refer to Fastener Notice .
2
Instrument Panel Carrier to Body Nut (Qty: 4)
Tighten: 9 N.m (80 lb in)
3
Instrument Panel Carrier Bolt (Qty: 7)
Tighten: 2.5 N.m (22 lb in)
4
Instrument Panel Carrier Assembly
Procedure
1. Note location and routing of the instrument panel wiring harness prior to
removal of the instrument panel carrier assembly to ensure proper
reinstallation.
2. Disconnect the wiring harness from the instrument panel carrier assembly.
2008 Chevrolet Silverado 1500
2008 ACCESSORIES & EQUIPMENT Instrument Panel and Console Trim - Cab & Chassis Sierra, Cab & Chassis
Silverado, Sierra & Silverado
INSTRUMENT PANEL CARRIER SUPPORT REPLACEMENT (WITH RPO SLT)
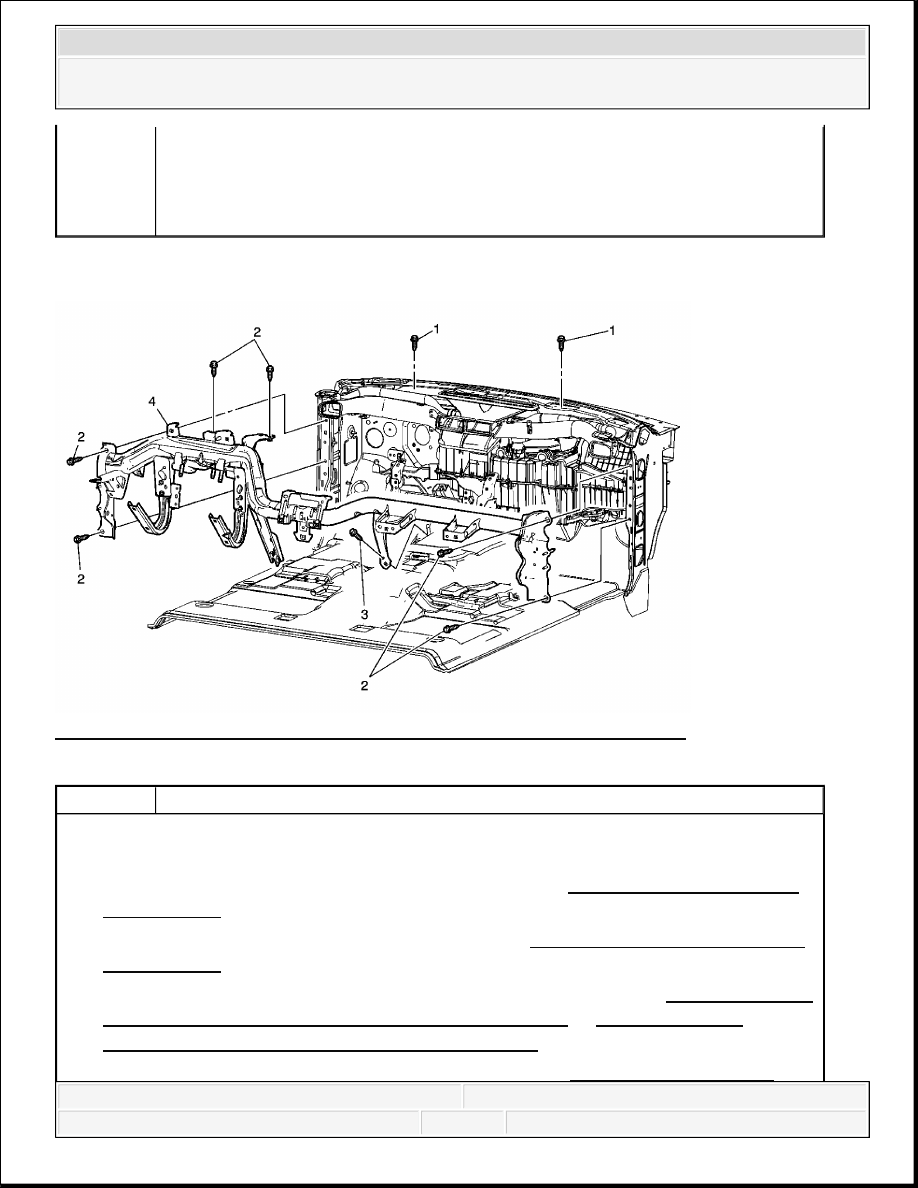
Fig. 68: View Of Instrument Panel Carrier Support Assembly & Bolts
Courtesy of GENERAL MOTORS CORP.
3. With the aid of an assistant, remove the instrument panel carrier assembly
from the vehicle.
4. If replacing the instrument panel carrier assembly, transfer all necessary
components.
Callout
Component Name
Preliminary Procedure
1. Remove the instrument panel carrier assembly. Refer to Instrument Panel Carrier
Replacement.
2. Remove the body control module bracket. Refer to Body Control Module Bracket
Replacement .
3. Remove the communication interface module, if equipped. Refer to Communication
Interface Module Replacement (without RPO SLT) or Communication
Interface Module Replacement (with RPO SLT) .
4. Remove the digital radio receiver, if equipped. Refer to Digital Radio Receiver
2008 Chevrolet Silverado 1500
2008 ACCESSORIES & EQUIPMENT Instrument Panel and Console Trim - Cab & Chassis Sierra, Cab & Chassis
Silverado, Sierra & Silverado
INSTRUMENT PANEL CARRIER SUPPORT REPLACEMENT (WITHOUT RPO SLT)
Replacement .
1
Instrument Panel Carrier to HVAC Duct Screws (Qty 2)
Tighten: 2 N.m (18 lb in)
NOTE:
Refer to Fastener Notice .
2
Instrument Panel Carrier Support Assembly Bolt (Qty: 1)
Tighten: 9 N.m (80 lb in)
3
Instrument Panel Carrier Support Assembly Bolts (Qty: 4)
Tighten: 22 N.m (16 lb ft)
4
Instrument Panel Carrier Support Assembly
Procedure
1. Note location and routing of the instrument panel wiring harness prior to
removal of the instrument panel carrier support assembly to ensure proper
reinstallation.
2. Disconnect the wiring harness from the instrument panel carrier support
assembly.
3. With the aid of an assistant, remove the instrument panel carrier support
assembly from the vehicle.
4. If replacing the instrument panel carrier support assembly, transfer all
necessary components.
2008 Chevrolet Silverado 1500
2008 ACCESSORIES & EQUIPMENT Instrument Panel and Console Trim - Cab & Chassis Sierra, Cab & Chassis
Silverado, Sierra & Silverado
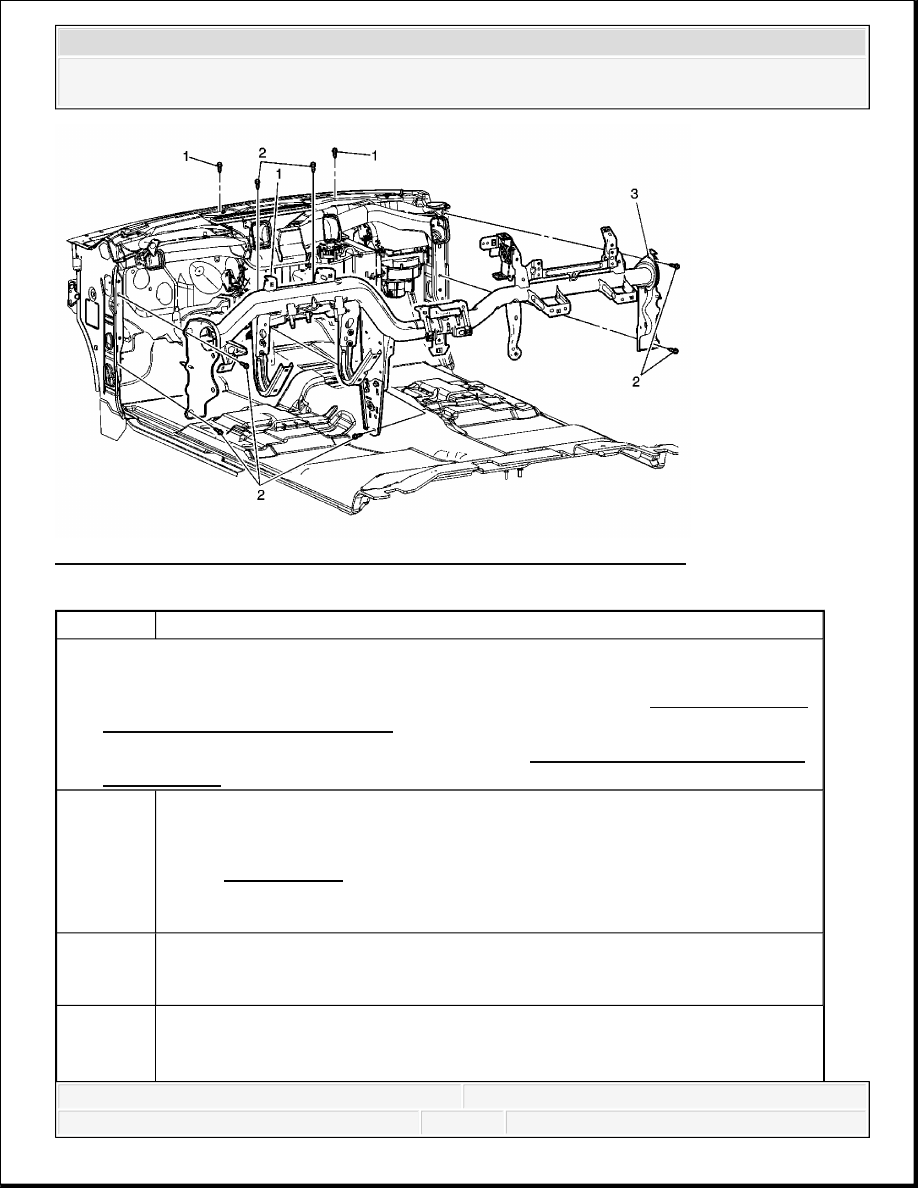
Fig. 69: View Of Instrument Panel Carrier Support Assembly & Bolts
Courtesy of GENERAL MOTORS CORP.
Callout
Component Name
Preliminary Procedures
1. Remove the instrument panel lower trim panel assembly. Refer to Instrument Panel
Lower Trim Panel Replacement.
2. Remove the body control module bracket. Refer to Body Control Module Bracket
Replacement .
1
Instrument Panel Carrier to HVAC Duct Screws (Qty 2)
Tighten: 2 N.m (18 lb in)
NOTE:
Refer to Fastener Notice .
2
Instrument Panel Carrier Support Bolt (Qty: 7)
Tighten: 22 N.m (16 lb ft)
Instrument Panel Carrier Support Assembly
Procedure
2008 Chevrolet Silverado 1500
2008 ACCESSORIES & EQUIPMENT Instrument Panel and Console Trim - Cab & Chassis Sierra, Cab & Chassis
Silverado, Sierra & Silverado
Content .. 2413 2414 2415 2416 ..