Content .. 2318 2319 2320 2321 ..
Chevrolet Silverado / GMC Sierra. Manual - part 2320
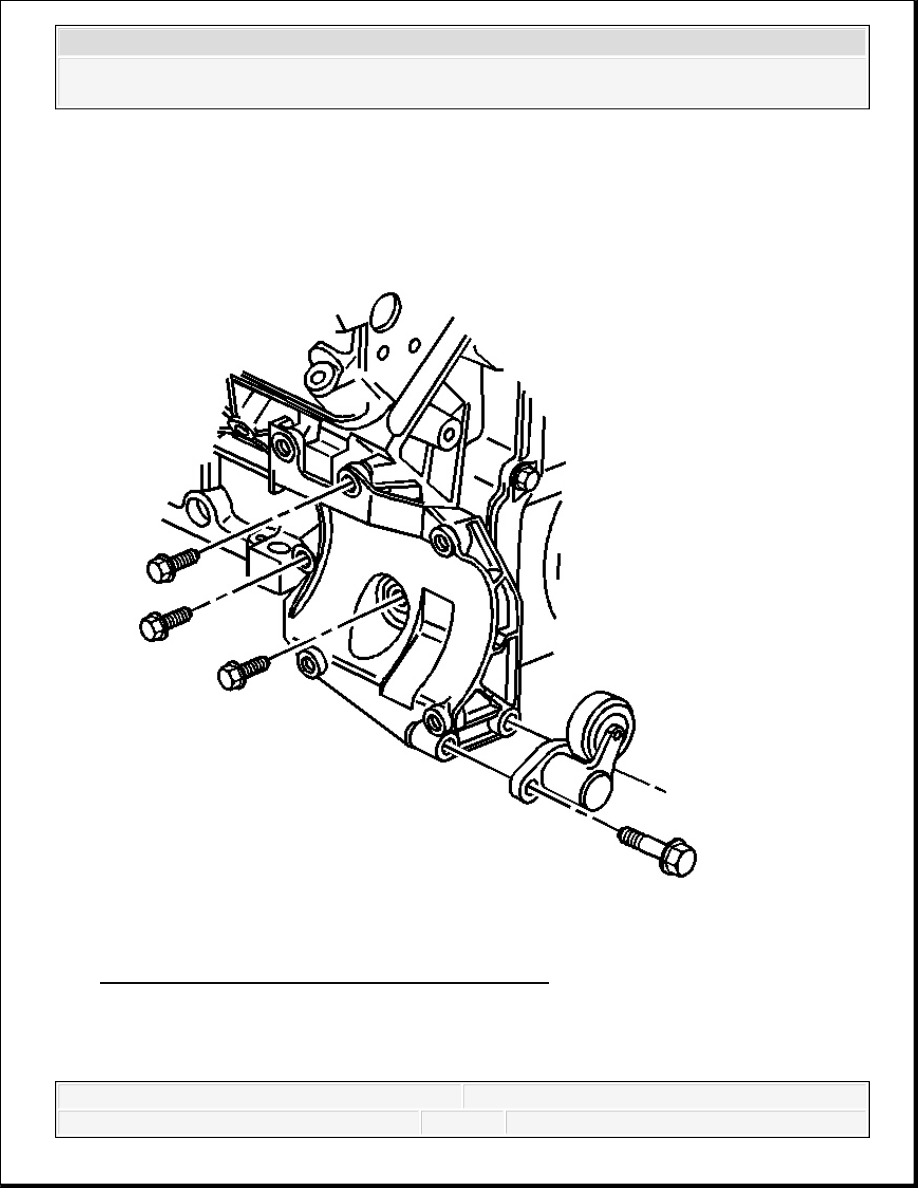
5. Remove the A/C compressor bracket.
Installation Procedure
Fig. 35: A/C Compressor Bracket Mounting Bolts
Courtesy of GENERAL MOTORS CORP.
1. Install the A/C compressor bracket.
2008 Chevrolet Silverado 1500
2008 HVAC Heating, Ventilation, and Air Conditioning - Cab & Chassis Sierra, Cab & Chassis Silverado, Sierra &
Silverado
2. Install the A/C compressor bracket mounting bolts.
Tighten: Tighten the bolts to 50 N.m (37 lb ft).
3. Install the A/C belt tensioner.
4. Install the A/C belt tensioner bolts.
Tighten: Tighten the bolts to 50 N.m (37 lb ft).
5. Install the A/C compressor. Refer to Air Conditioning Compressor Replacement (LY2,
LY5, LH6, L76, L92 and LMG) or Air Conditioning Compressor Replacement
(LLY/LMM) or Air Conditioning Compressor Replacement (LU3).
SEALING WASHER REPLACEMENT
Removal Procedure
NOTE:
Refer to Fastener Notice .
2008 Chevrolet Silverado 1500
2008 HVAC Heating, Ventilation, and Air Conditioning - Cab & Chassis Sierra, Cab & Chassis Silverado, Sierra &
Silverado

Fig. 36: Identifying Good And Bad Sealing Washer Positions
Courtesy of GENERAL MOTORS CORP.
1. Remove the seal washer from the A/C refrigerant component.
2. Inspect the seal washer for signs of damage to help determine the root cause of the failure.
3. Inspect the A/C refrigerant components for damage or burrs. Repair if necessary.
IMPORTANT: Cap or tape the open A/C refrigerant components
immediately to prevent system contamination.
2008 Chevrolet Silverado 1500
2008 HVAC Heating, Ventilation, and Air Conditioning - Cab & Chassis Sierra, Cab & Chassis Silverado, Sierra &
Silverado
4. Discard the sealing washer.
Installation Procedure
1. Inspect the new seal washer for any signs of cracks, cuts, or damage.
Do not use a damaged seal washer.
2. Remove the cap or tape from the A/C refrigerant components.
IMPORTANT: DO NOT reuse sealing washer.
IMPORTANT: Flat washer type seals do not require lubrication.
2008 Chevrolet Silverado 1500
2008 HVAC Heating, Ventilation, and Air Conditioning - Cab & Chassis Sierra, Cab & Chassis Silverado, Sierra &
Silverado
Content .. 2318 2319 2320 2321 ..