Content .. 2158 2159 2160 2161 ..
Chevrolet Silverado / GMC Sierra. Manual - part 2160

Fig. 158: View Of Tap Upper & Lower Marks, Fixture Plate & Bushing
Courtesy of GENERAL MOTORS CORP.
6. Using a tap wrench, tap the threads of the drilled hole.
In order to tap the new threads to the proper depth, rotate the tap into the hole until the
mark on the tap aligns with the top of the bushing.
For the deeper main cap holes 1-10, rotate the tap until the upper mark (4) on the tap aligns
2008 Chevrolet Silverado 1500
2008 ENGINE Engine Mechanical - 4.8L, 5.3L, 6.0L, 6.2L, or 7.0L - Cab & Chassis Sierra, Cab & Chassis Silverado,
Sierra & Silverado
with the top of the bushing (3).
For the shallower main cap holes 11-20, rotate the tap until the lower mark (1) on the tap
aligns with top of the bushing (3).
7. Using compressed air, clean out any chips.
8. Spray cleaner GM P/N 12346139 (Canadian P/N 10953463), or equivalent, into the hole.
9. Using compressed air, clean any cutting oil and chips out of the hole.
Fig. 159: Lubricating Installer Tool Using Driver Oil
Courtesy of GENERAL MOTORS CORP.
2008 Chevrolet Silverado 1500
2008 ENGINE Engine Mechanical - 4.8L, 5.3L, 6.0L, 6.2L, or 7.0L - Cab & Chassis Sierra, Cab & Chassis Silverado,
Sierra & Silverado
10. Lubricate the threads of the installer tool (2) with the driver oil (1).
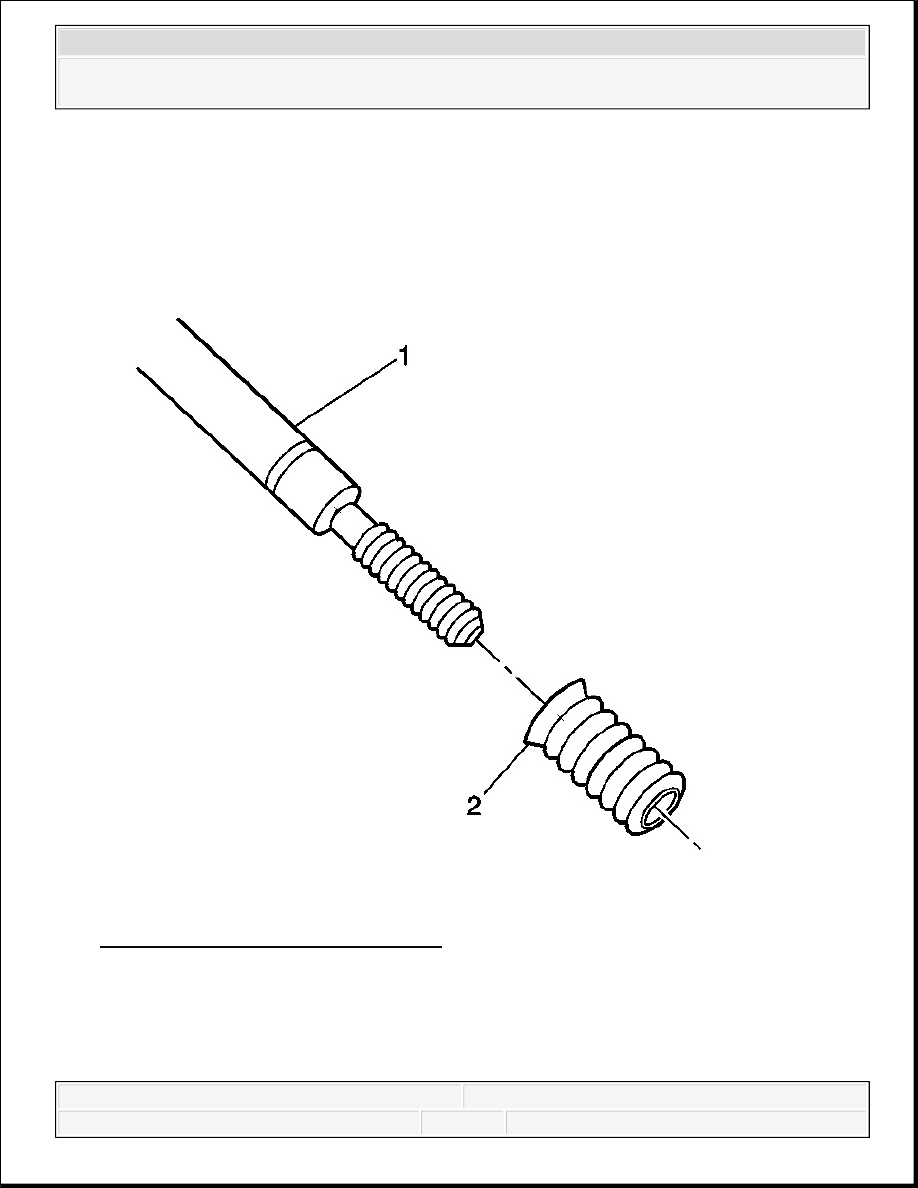
Fig. 160: View of Bushing Type Insert
Courtesy of GENERAL MOTORS CORP.
11. Install the insert (2) onto the driver tool (1).
IMPORTANT: Do not allow oil or foreign material to contact the OD of the
insert.
2008 Chevrolet Silverado 1500
2008 ENGINE Engine Mechanical - 4.8L, 5.3L, 6.0L, 6.2L, or 7.0L - Cab & Chassis Sierra, Cab & Chassis Silverado,
Sierra & Silverado

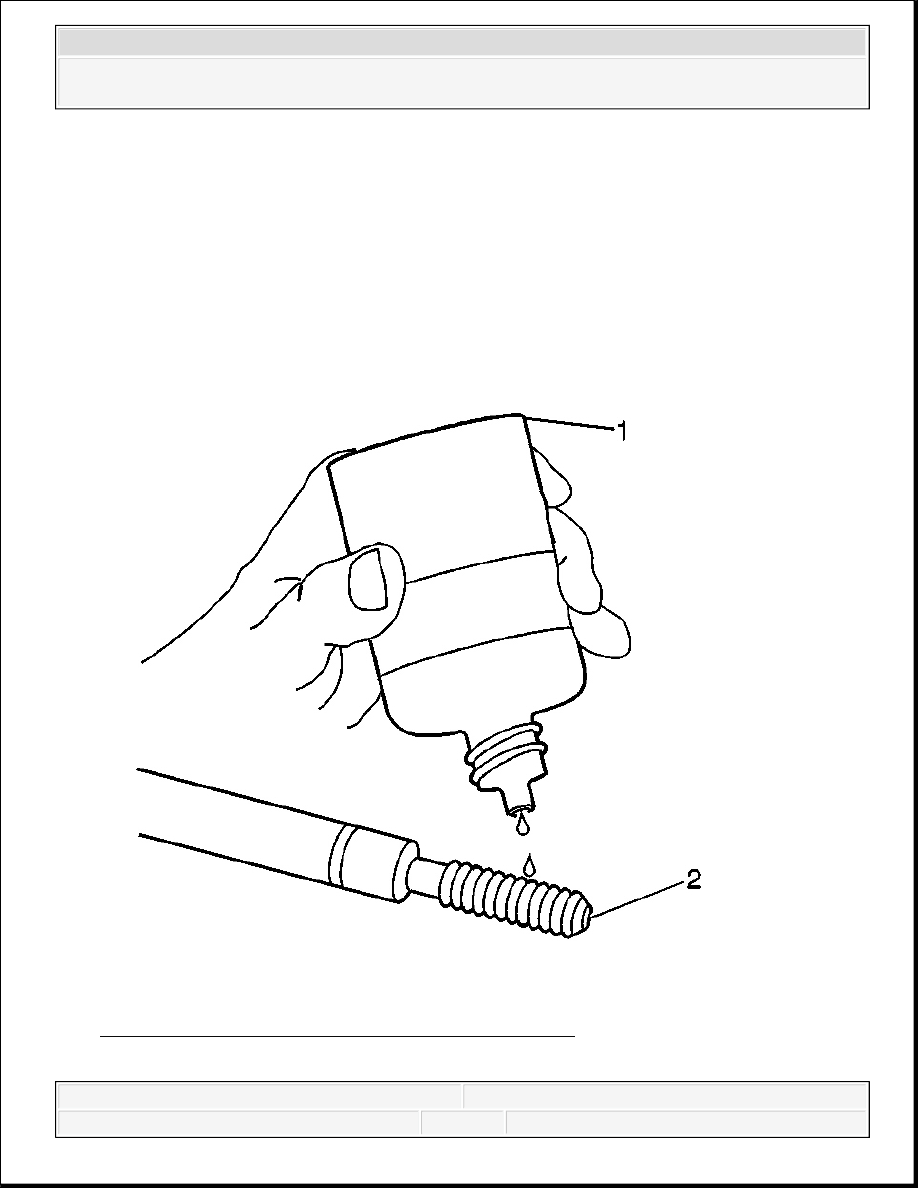
Fig. 161: Applying Threadlock To Insert
Courtesy of GENERAL MOTORS CORP.
12. Apply threadlock LOCTITE™ 277, J 42385-109 (1), or equivalent, to the insert OD
threads (2).
2008 Chevrolet Silverado 1500
2008 ENGINE Engine Mechanical - 4.8L, 5.3L, 6.0L, 6.2L, or 7.0L - Cab & Chassis Sierra, Cab & Chassis Silverado,
Sierra & Silverado
Content .. 2158 2159 2160 2161 ..