Content .. 1613 1614 1615 1616 ..
Chevrolet Silverado / GMC Sierra. Manual - part 1615
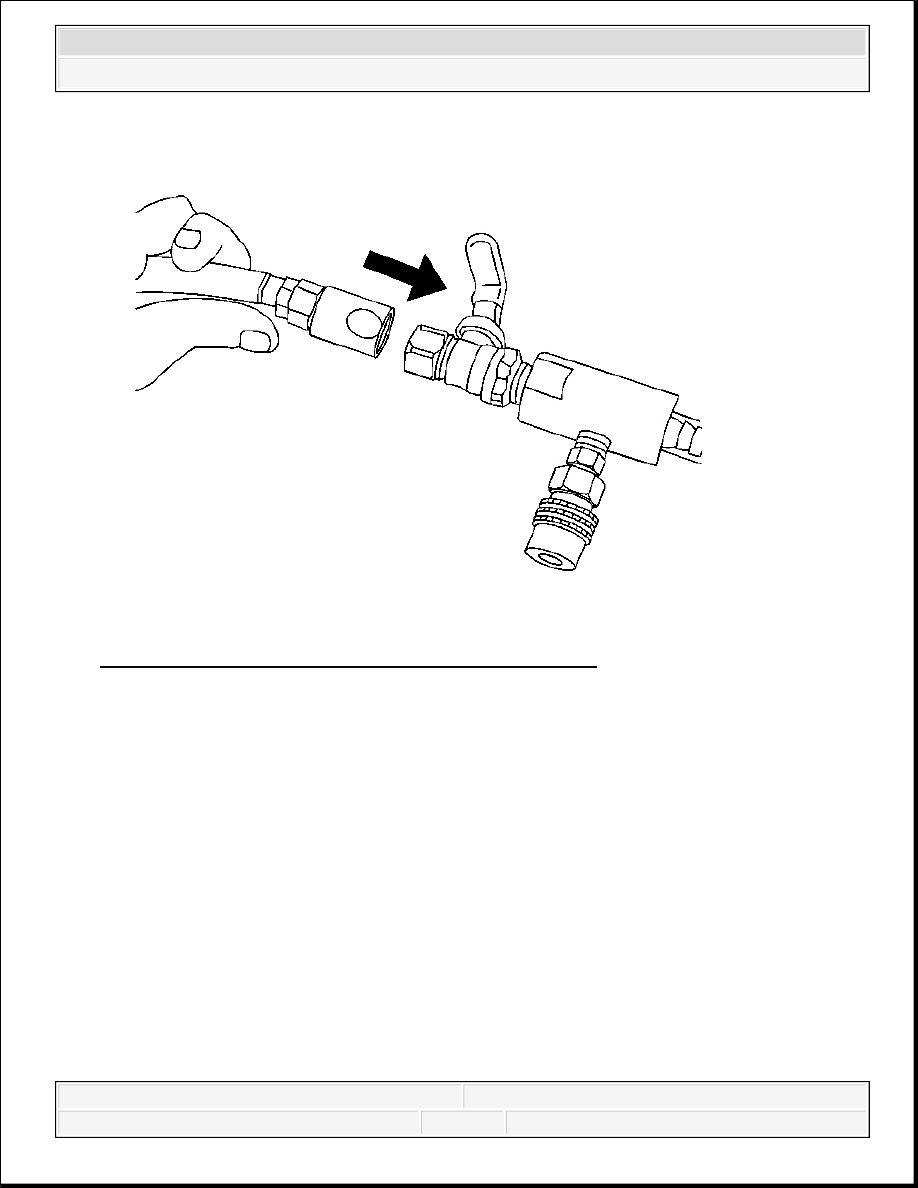
Fig. 11: Attaching Shop Air Hose To Venturi Assembly
Courtesy of GENERAL MOTORS CORP.
9. Attach a shop air hose to the venture assembly.
Ensure the valve on the venture assembly is closed.
2008 Chevrolet Silverado 1500
2008 ENGINE Engine Cooling - Cab & Chassis Sierra, Cab & Chassis Silverado, Sierra & Silverado

Fig. 12: Attaching Vacuum Hose To Vacuum Gauge Assembly & Vacuum Tank
Courtesy of GENERAL MOTORS CORP.
10. Attach the vacuum hose to the vacuum gage assembly and the vacuum tank.
11. Clamp off the overflow hose.
2008 Chevrolet Silverado 1500
2008 ENGINE Engine Cooling - Cab & Chassis Sierra, Cab & Chassis Silverado, Sierra & Silverado

Fig. 13: Identifying Valve On Venturi Assembly
Courtesy of GENERAL MOTORS CORP.
12. Open the valve on the venture assembly. The vacuum gage will begin to rise and a hissing
noise will be present.
2008 Chevrolet Silverado 1500
2008 ENGINE Engine Cooling - Cab & Chassis Sierra, Cab & Chassis Silverado, Sierra & Silverado

Fig. 14: View Of Vacuum Gauge
Courtesy of GENERAL MOTORS CORP.
13. Continue to draw vacuum until the needle stops rising. This should be 610-660 mm Hg (24-
26 in Hg).
Cooling hoses may start to collapse. This is normal due to vacuum draw.
14. To aid in the fill process, position the graduated reservoir above the coolant fill port.
2008 Chevrolet Silverado 1500
2008 ENGINE Engine Cooling - Cab & Chassis Sierra, Cab & Chassis Silverado, Sierra & Silverado
Content .. 1613 1614 1615 1616 ..