Content .. 1612 1613 1614 1615 ..
Chevrolet Silverado / GMC Sierra. Manual - part 1614
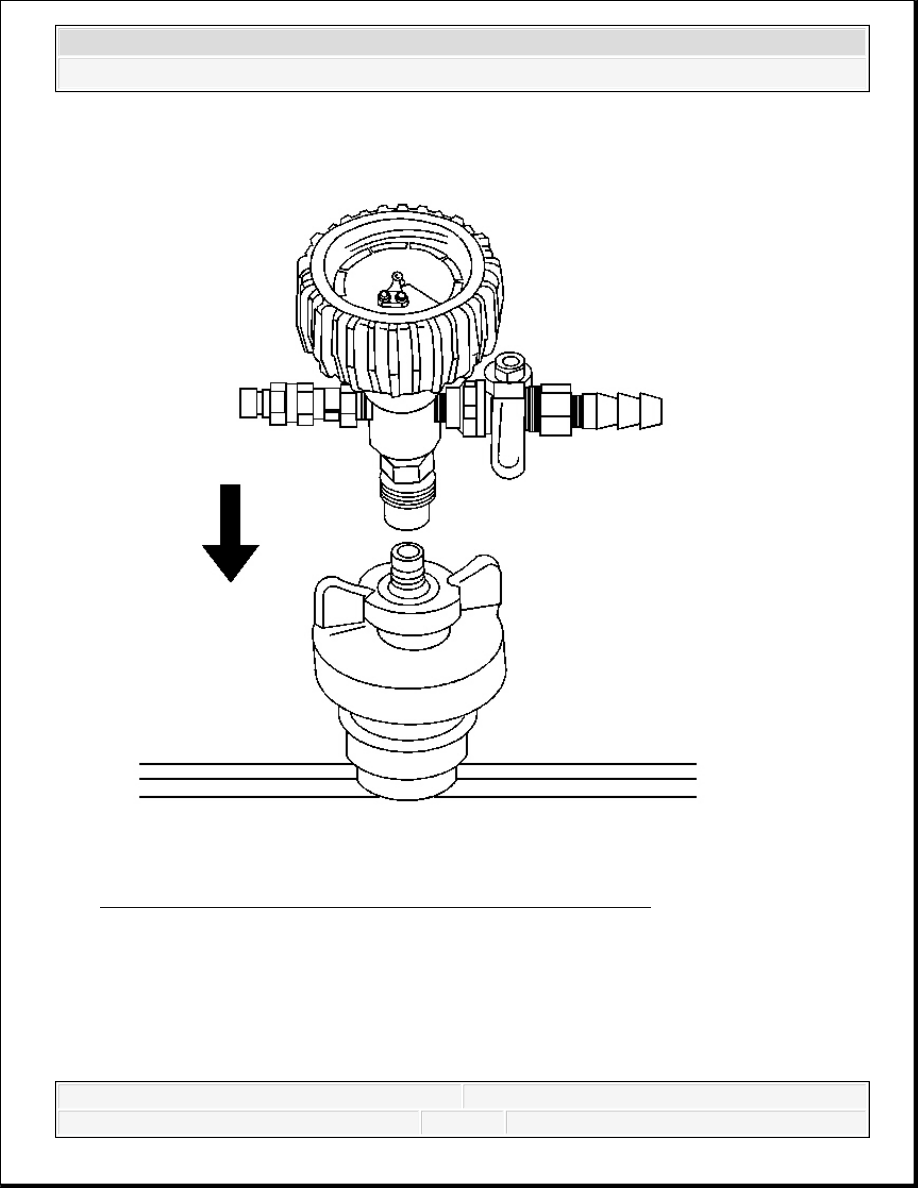
Fig. 7: Attaching Vacuum Gage Assembly To Vac-N-Fill Cap
Courtesy of GENERAL MOTORS CORP.
3. Attach the vacuum gage assembly to the Vac-N-Fill cap.
2008 Chevrolet Silverado 1500
2008 ENGINE Engine Cooling - Cab & Chassis Sierra, Cab & Chassis Silverado, Sierra & Silverado

Fig. 8: Attaching Fill Hose To Barb Fitting On Vacuum Gage Assembly
Courtesy of GENERAL MOTORS CORP.
4. Attach the fill hose to the barb fitting on the vacuum gage assembly.
Ensure that the valve is closed.
2008 Chevrolet Silverado 1500
2008 ENGINE Engine Cooling - Cab & Chassis Sierra, Cab & Chassis Silverado, Sierra & Silverado
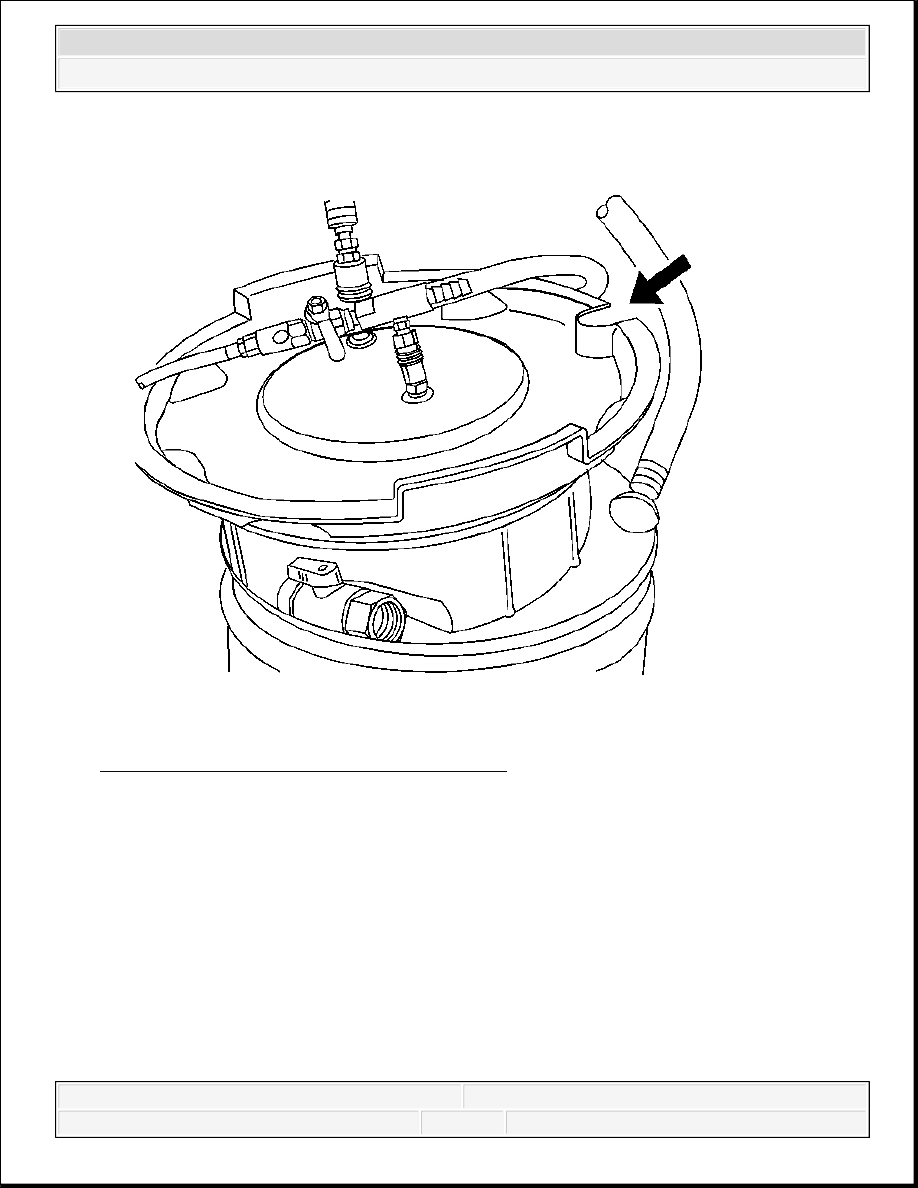
Fig. 9: View Of Graduated Reservoir & Hose
Courtesy of GENERAL MOTORS CORP.
5. Pour the coolant mixture into the graduated reservoir.
6. Place the fill hose in the graduated reservoir.
IMPORTANT: Use a 50/50 mixture of DEX-COOL antifreeze and clean,
drinkable water. Always use more coolant than necessary.
This will eliminate air from being drawn into the cooling
system.
IMPORTANT: Prior to installing the vacuum tank onto the graduated
reservoir, ensure that the drain valve located on the bottom
2008 Chevrolet Silverado 1500
2008 ENGINE Engine Cooling - Cab & Chassis Sierra, Cab & Chassis Silverado, Sierra & Silverado
7. Install the vacuum tank on the graduated reservoir with the fill hose routed through the cut-
out area in the vacuum tank.
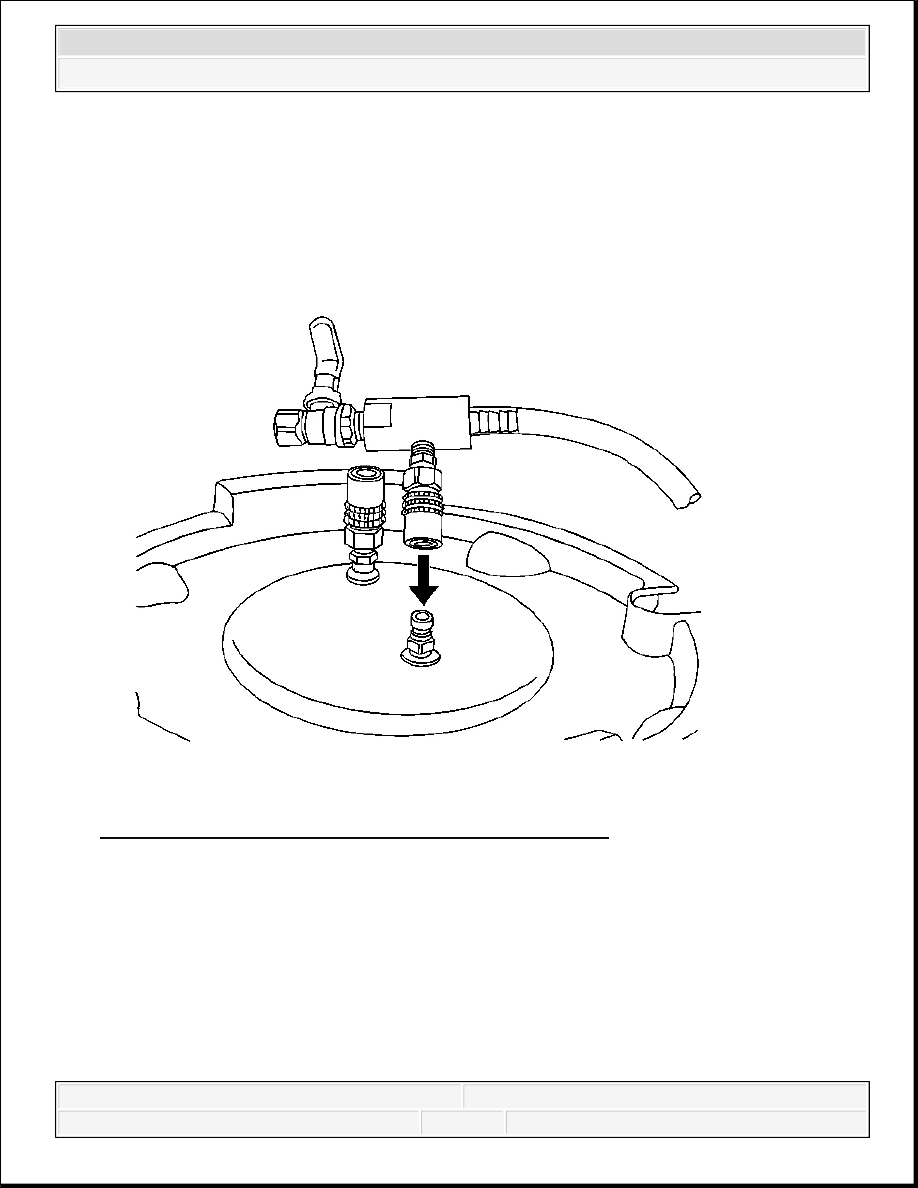
Fig. 10: Connecting Venturi Assembly To Vacuum Tank
Courtesy of GENERAL MOTORS CORP.
8. Attach the venture assembly to the vacuum tank.
of the tank is closed.
2008 Chevrolet Silverado 1500
2008 ENGINE Engine Cooling - Cab & Chassis Sierra, Cab & Chassis Silverado, Sierra & Silverado
Content .. 1612 1613 1614 1615 ..