Content .. 1091 1092 1093 1094 ..
Chevrolet Silverado / GMC Sierra. Manual - part 1093

Fig. 258: Identifying Manual Valve Link
Courtesy of GENERAL MOTORS CORP.
11. Lift the valve body carefully so that the checkballs remain on the spacer plate in the correct
location. While lifting the valve body, disconnect the manual valve link (89) from the
manual valve (340).
2008 Chevrolet Silverado 1500
2008 TRANSMISSION Automatic Transmission - 4L60-E/4L65-E/4L70-E - Cab & Chassis Sierra, Cab & Chassis
Silverado, Sierra & Silverado

Fig. 259: Identifying Valve Body Checkballs
Courtesy of GENERAL MOTORS CORP.
12. Remove the 7 valve body ball check valves (2-6, 8, and 12).
NOTE:
Do not use a magnet in order to remove the control valve body
ball check valves. This may magnetize the control valve body
ball check valves, causing metal particles to stick to them.
IMPORTANT: Some models do not use a #5 ball check valve.
2008 Chevrolet Silverado 1500
2008 TRANSMISSION Automatic Transmission - 4L60-E/4L65-E/4L70-E - Cab & Chassis Sierra, Cab & Chassis
Silverado, Sierra & Silverado
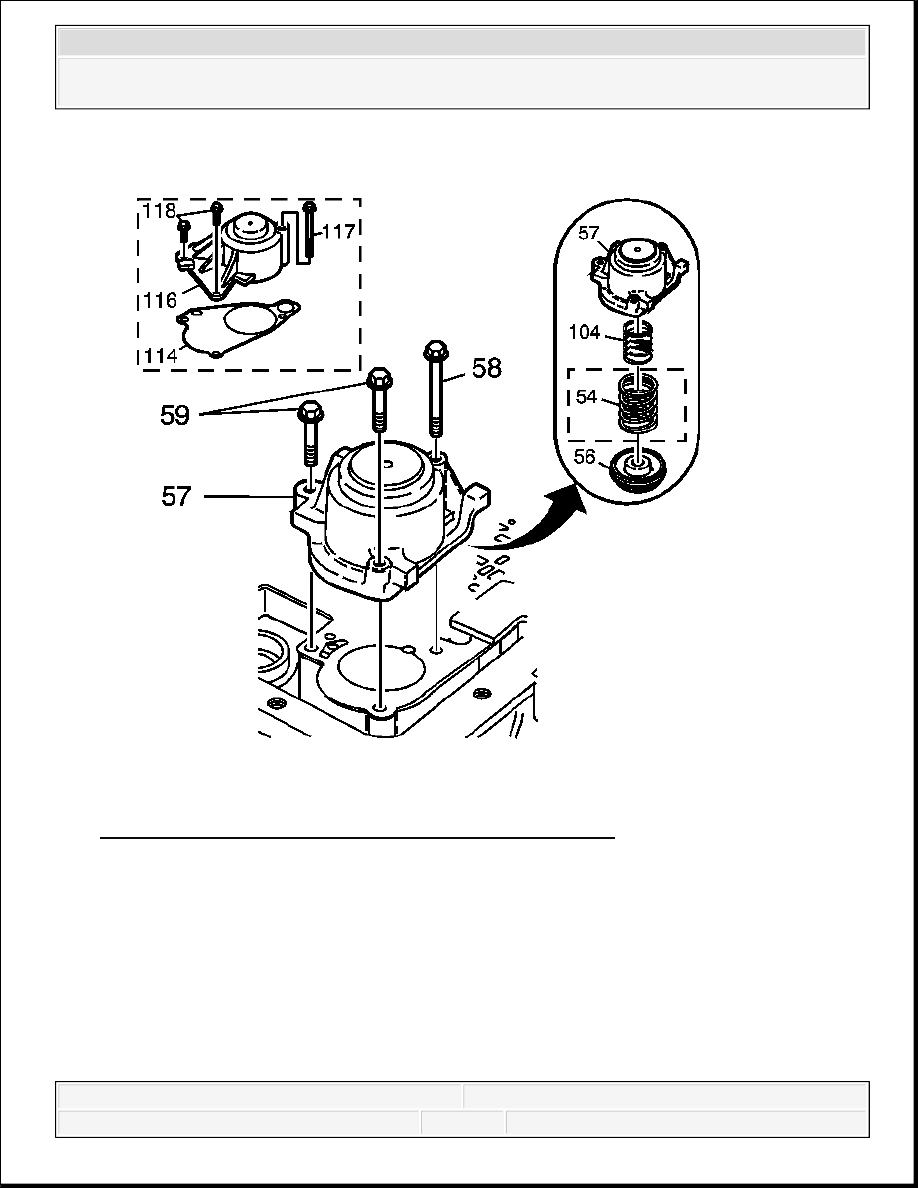
Fig. 260: View Of Body Ball Check Valves & Cover Bolts
Courtesy of GENERAL MOTORS CORP.
13. Remove the accumulator cover bolts (58, 59 or 117, 118).
14. Remove the 1-2 accumulator cover and pin assembly (57) or 1-2 accumulator cover
assembly (116), and gasket (114).
15. Disassemble the 1-2 accumulator assembly (54, 56, 57, 104).
IMPORTANT: Some models do not use an outer 1-2 accumulator spring
(54).
2008 Chevrolet Silverado 1500
2008 TRANSMISSION Automatic Transmission - 4L60-E/4L65-E/4L70-E - Cab & Chassis Sierra, Cab & Chassis
Silverado, Sierra & Silverado

Fig. 261: View Of Spacer Plate Support Plate & Bolts
Courtesy of GENERAL MOTORS CORP.
16. Remove the spacer plate support bolts (77).
17. Remove the spacer plate support (53 or 113).
2008 Chevrolet Silverado 1500
2008 TRANSMISSION Automatic Transmission - 4L60-E/4L65-E/4L70-E - Cab & Chassis Sierra, Cab & Chassis
Silverado, Sierra & Silverado
Content .. 1091 1092 1093 1094 ..