Chery Tiggo. Manual - part 357


  Index      Chery     Chery Tiggo - service repair manual 2009 year


Search            


Content   ..  355  356  357  358   ..


Chery Tiggo. Manual - part 357


5. Install the piston into the caliper bore and press the

piston down to the bottom of the caliper bore by
hand or with the handle of a hammer.

CAUTION:
When assembling, the force applied to the pis-
ton to seat it in the bore must be applied uni-
formly to avoid cocking and binding of the
piston.

6. Seat the dust boot in caliper.

7. Install the new caliper bleed screw.

8. Install

the

caliper

(See

Front

Brake

Caliper

Removal & Installation in Section 12 Brakes).

Rear Brake Caliper

Disassemble

Before disassembling the brake caliper, clean and inspect it.

WARNING!

• Under no condition should high pressure air ever be used to remove a piston from a caliper bore. Personal

injury could result from such a practice.

• Do not place face or hands near caliper and piston if using compressed air pressure to remove piston. Do not

use high pressure.

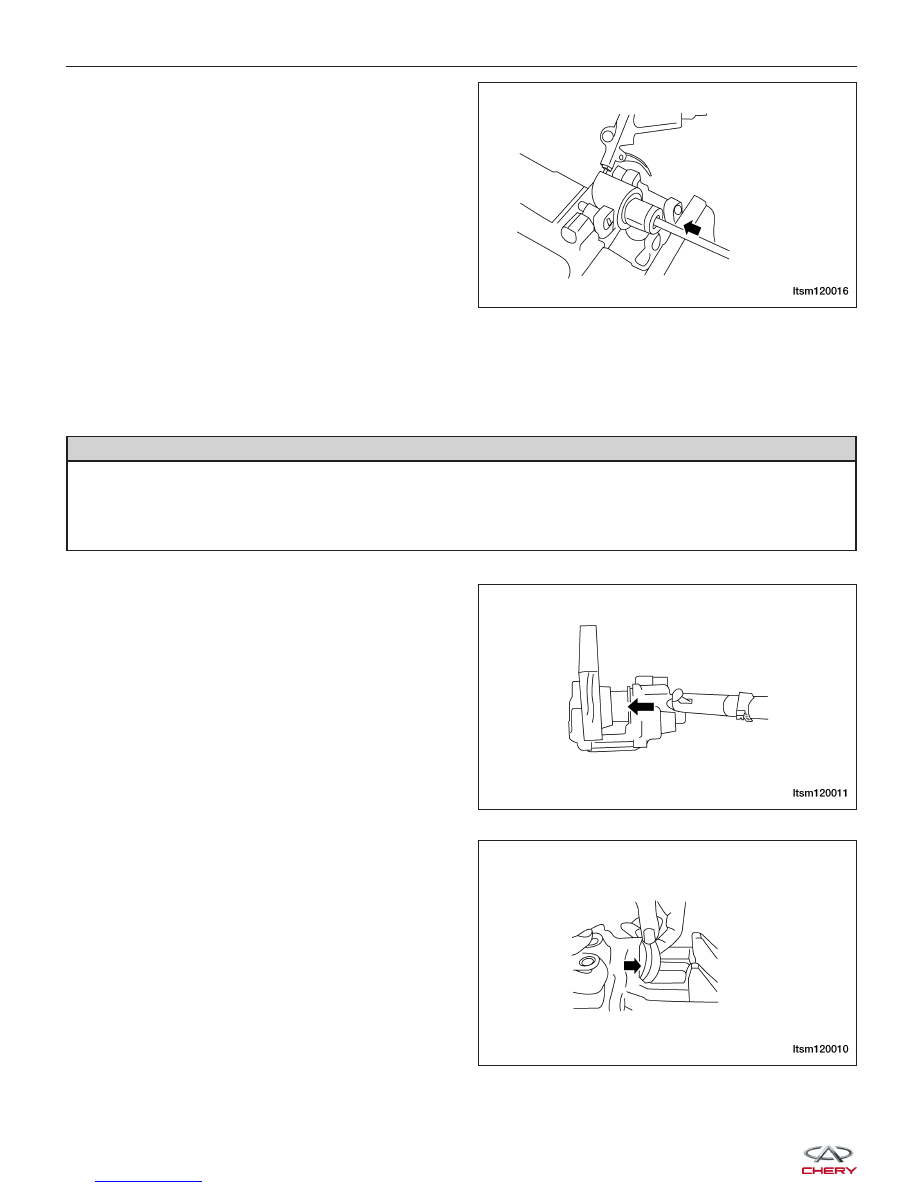
1. Place a wooden block in the caliper.

2. If necessary, apply low pressure compressed air to

the caliper fluid inlet in short spurts to force the pis-
ton out.

3. Remove the piston from the caliper.

4. Remove the dust boot from the piston and discard

it.

UNIT REPAIR

LTSM120016

LTSM120011

LTSM120010


CAUTION:
Do not use a screwdriver or other metal tool for seal removal. Using such tools can scratch the
bore or leave burrs on the seal groove edges.

5. Using a soft tool such as a plastic trim stick (1),

work the piston seal (2) out of its groove in caliper
piston bore. Discard the used seal.

6. Clean the piston bore and drilled passage ways

with alcohol or a suitable solvent. Wipe it dry using
only a lint-free cloth.

Inspection

1. Inspect both the piston and bore for scoring or pitting. Bores that show light scratches or corrosion can usually

be cleared of the light scratches or corrosion using crocus cloth.

2. Remove deposits on the piston using a soft brass wire brush or a rough shop towel. Do not clean piston with a

polishing or emery cloth because this will damage the chrome-plated surface. Replace the piston if the chrome
plated surface is damaged. If the piston is jammed or if the cylinder bores are scored or rusted, replace the
complete brake caliper. Remove small, light rust spots in the cylinder bore with a polishing cloth. Remove heavy
rust spots in front of the groove for the piston seal using fine-grit emery paper (grit size 380 to 500).

3. Inspect the caliper seal rings. Repair the seal rings

as necessary.

UNIT REPAIR

BESM120003

LTSM120021

LTSM120012

12


Assemble

NOTE :
• Always have clean hands when assembling a brake caliper.

• Always use fresh, clean brake fluid when assembling a brake caliper.

• Never use an old piston seal.

• Bleed the brakes as necessary.
Perform the following procedure to assemble the brake caliper:

1. Lubricate the caliper piston, piston seals and piston

bore with clean brake fluid.

2. Install the new piston seal into the seal groove.

NOTE :
Verify seal is fully seated into seal groove and not
twisted.

UNIT REPAIR

LTSM120014


3. Install the new dust boot on the caliper piston and

seat the dust boot lip into the piston groove.

4. Stretch the dust boot rearward to straighten the

boot folds, then move the boot forward until the
fold snaps into place.

5. Install the piston into the caliper bore and press the

piston down to the bottom of the caliper bore by
hand or with the handle of a hammer.

CAUTION:
When assembling, the force applied to the piston to seat it in the bore must be applied uniformly
to avoid cocking and binding of the piston.

6. Seat the dust boot in caliper.

7. Install the new caliper bleed screw.

8. Install the caliper (See Front Brake Caliper Removal & Installation in Section 12 Brakes).

UNIT REPAIR

LTSM120015

LTSM120016

12


Content   ..  355  356  357  358   ..