Chery QQ6 (S21) / S12LHD. Manual - part 226


  Index      Chery     Chery QQ6 (S21) / S12LHD - service repair manual


Search            


Content   ..  224  225  226  227   ..


Chery QQ6 (S21) / S12LHD. Manual - part 226


1.5 Insert the special tool CH-20003 into the timing hole 

and  tighten,  use  a  wrench  to  turn  the  big  nut  in  the 

crankshaft  pulley  to  make  the  crankshaft  rotate,  at  the 

same  time,  slowly  screw  in  CH-20003  until  the 

crankshaft can not rotate back and forth any longer. 


1.6  Use  a  13#  sleeve  to  remove  the  six  fixing  bolts  of 

crankshaft pulley and take out the crankshaft pulley. 

Torque: 55+5 Nm. 


1.7  Use  a  10#  sleeve  to  remove  the  six  fixing  bolts  on 

timing lower cover. 


1.8 The positions  of the  six  fixing  bolts  on timing  lower 

cover are shown by the red circles in the figure. 


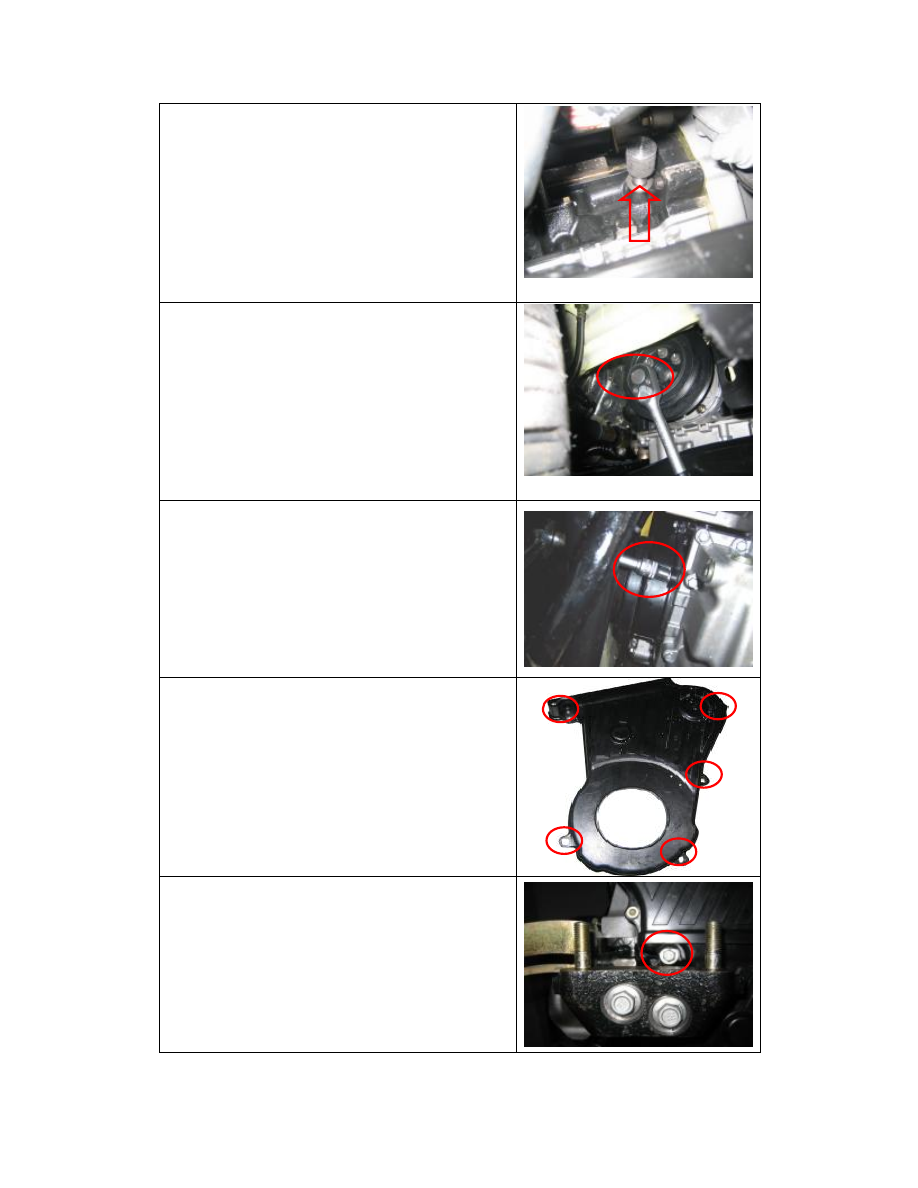
1.9  It  should  be  specially  explained  that,  the  position  of 

the  fixing  bolt  at  left  upside  on  the  lower  cover  is  very 

occult,  for  removal  of  which,  use  of  universal  joint 

connecting  rod  is  required.  Alternatively,  use  a  13mm 

sleeve to remove the three bolts of suspension bracket to 

take off the suspension bracket. 


1.10  Use  a  10#  sleeve  to  loosen  the  fixing  bolt  of  the 

tension pulley to take off the timing belt. 

Torque: 27±3 Nm. 


Note:   

when  taking  off  the  timing  belt,  pay 

attention  to  running  direction  of  the  belt 

and refer to running direction of the engine 

crankshaft  and  the  arrowhead direction  on 

the belt. 


II. Installation of Timing Belt 

1.  Loosen the fixing bolt of tension pulley and turn the 

tension pulley to minimum tension position. 

2.  Install the belt. 

3.  Use  a  5mm  hexagon  wrench  to  turn  the  tension 

pulley,  when  it  turns  to  a  position  that  the  hexagon 

wrench  and  the  fixing  bolt  are  roughly  on  the  same 

horizontal line, stop and tighten the fixing bolt. 

4.  Install timing lower cover. 

5.  Install crankshaft pulley. 

6.  Install  relevant  accessories  and  check  deflection  of 

the belt. 

7.  Install timing upper cover. 

8.  The installed timing belt is as shown in the figure. 


Note: 

During  the  disassembly  process,  be 

sure  not  to  turn  crankshaft/camshaft; 

otherwise,  ignition  timing  will  need 

re-check. 


III. Adjustment of Timing (general overhaul) 

1. Turn the crankshaft to  make the  four pistons align  on  a  horizontal line in  the  cylinders, screw 

the special tool into the crankshaft timing  adjusting  hole  at left rear of the cylinder (last segment 

of  the  crankshaft),  and  then  make  the  crankshaft  unable  to  turn  left  and  right  (the  bolt  of  the 

special tool must enter into the screw hole plane of the cylinder). 

2. After intake and exhaust camshaft is installed properly, install the camshaft timing gear, turn the 

groove  at  tail  of  intake  and  exhaust  camshaft  to  horizontal  direction,  and  then  insert  the  special 

tool into the groove and fix.   

3. After crankshaft and camshaft have been fixed according to requirements, install timing belt. In 

order to  facilitate  installation  of timing  belt, temporarily  do  not tighten the bolt  fixing the timing 

gear onto  camshaft  and let  it rotate  freely, then  fix the timing  gear bolt after the  tensioner pulley 

has fastened the timing belt to the specified value. After that, install other parts. 

IV. Adjustment of Timing (minor overhaul) 

Replace valve spring, grind valve and replace camshaft (do not raise the engine). 

1.  Remove the valve cover. 

2.  Remove the timing gear cover. Turn the timing gear. 

3.  Let  the  groove  at  tail  of  intake  and  exhaust  camshaft  on  a  horizontal  line,  then  insert  the 

projecting portion of the special tool into the groove and fix. 

4.  Turn the crankshaft, screw the special tool into the crankshaft timing adjusting hole at left rear 

of  the  cylinder (last segment  of the crankshaft),  and then  make the crankshaft  unable to  turn 

left  and  right  (if  the  cylinder  head  is  removed,  it  can  be  found  that  the  pistons  of  the  four 

cylinders now align at a horizontal position).   

5.  Install timing belt and make tightness of the belt conform to requirements. 

6.  Fasten the fixing bolt of timing gear. 

7.  Install other accessories, such as timing cover and belt pulley etc. 


Special tool for camshaft timing check      Special tool for crankshaft timing check 


        (CH-20010)   


(CH-20003) 


Chapter Nine Disassembly of Engine Assembly 

I. Disassembly Procedure 


1. Disassembly of engine wire harness 

1.1 Pull out the connecting plug of engine wire harness. 


1.2 Use a 10# sleeve to loosen the  fixing bolt  of  engine 

ground. 


2. Use a 10# sleeve to remove the fixing bolt and bearer 

of battery. 


Note: 

Please  use  regular  equipment,  especially  for  such 

equipment as crane etc., so as to avoid occurrence of accident. 

Before  any  disassembly  job,  disassemble  cathode  of  battery 

first, so as to protect safety of electricity consumption equipment. 

When  disassembling  engine  suspension,  pay  attention  to 

disassembly order, so as to avoid occurrence of accident. 


Content   ..  224  225  226  227   ..