Chery QQ6 (S21) / S12LHD. Manual - part 161


  Index      Chery     Chery QQ6 (S21) / S12LHD - service repair manual


Search            


Content   ..  159  160  161  162   ..


Chery QQ6 (S21) / S12LHD. Manual - part 161


III. Removal and Installation of In-door harness   

Part number: S12-3724050 

(I). Preparations 

Tools: sleeve wrench, cross head screwdriver, flat head screwdriver 

(II). Notes 

When  disassembling  the  electrical  components  and  harness,  make 
sure to disconnect the power supply.   
The ignition switch must be OFF.   

(III). Removal Steps   

1. Removal of license plate light harness.   
 
1.1.  Disassemble  the  rear  bumper  assembly.  (See  Removal  and 
Installation of Rear Bumper) 
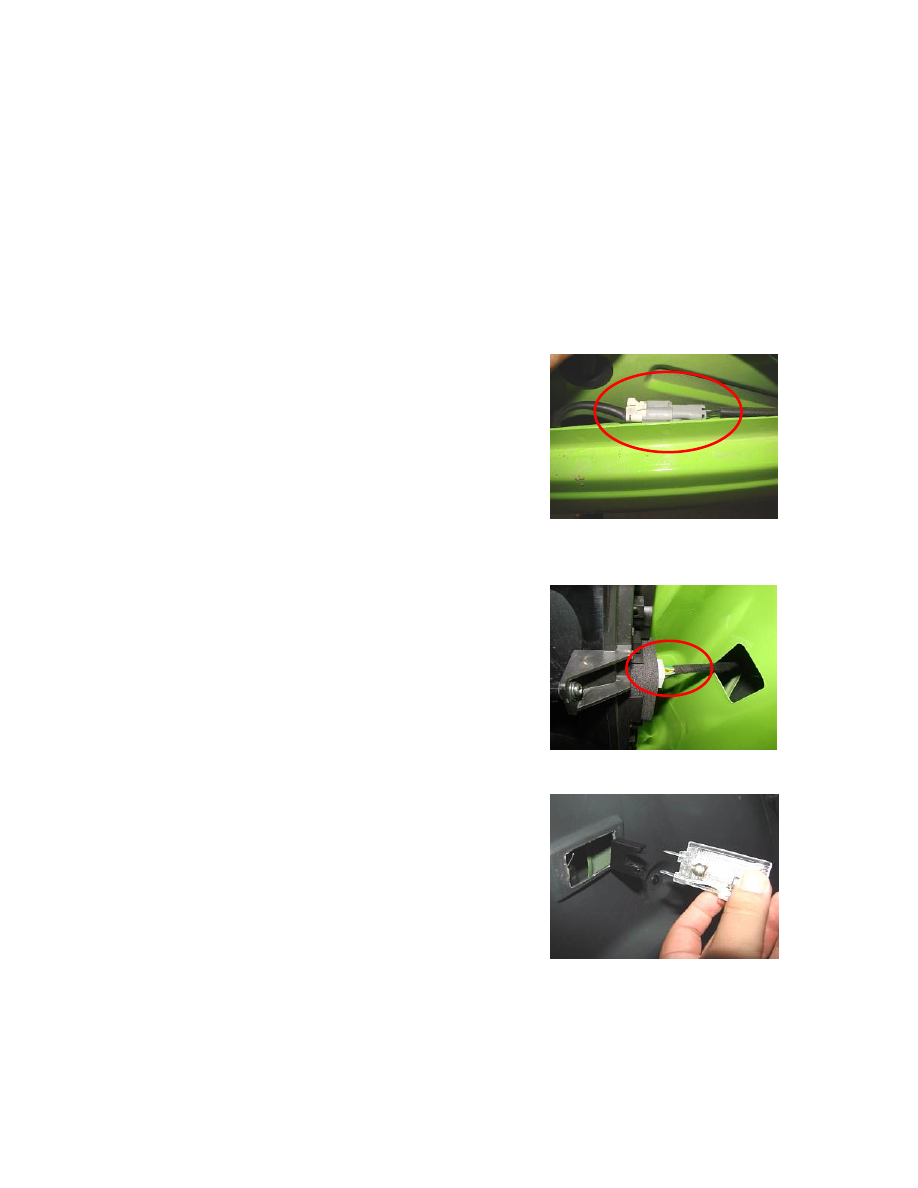
1.2. Unplug the plug of the license plate light harness.   


2. Removal of left-rear group tail Llights harness 
 
2.1.  Disassemble  the  left-rear  group  tail  lights  assembly.  (See 
Removal and Installation of Left-rear Combination Tail Lights) 
2.2. Unplug the plug of the left-rear combination tail lights harness.   


3.  Use  a  flat  head  screwdriver  to  pry  off  the  luggage  light,  and 
unplug the luggage light harness.   


4. Unplug the plug of the left-rear speaker harness.   


5. Removal of fuel pump harness.   
 
5.1.  Pull  off  the  right-rear  seat,  and  take  down  the  plastic  cover  on 
the fuel pump. 
5.2. Unplug the fuel pump harness plug.   


6. Unplug right-rear speaker harness plug.   


7. Disassemble the right-rear combination tail light harness.   
 
7.1.  Disassemble  right-rear  combination  tail  lights  assembly.  (See 
Removal and Installation of Right-rear Combination Tail Lights ) 
7.2. Unplug the right-rear combination tail lights harness plug. 


8. Removal of BCM MODULE.   
 
8.1. Open BCM module box.   
8.2. Unplug the BCM module A plug.   


8.3. Unplug the BCM Module B plug.   


9. Removal of hand brake harness 
 
9.1.  Disassemble  the  auxiliary  Instrument  Panel  assembly.  (See 
Removal and Instalaltion of Auxiliary Instrument Panel) 
9.2. Unplug the hand brake harness plug.   


10. Removal of ceiling light harness.   
 
10.1.  Disassemble  the  ceiling  light.  (See  Removal  and  Installation 
of Ceiling Light) 
10.2. Unplug the ceiling light harness plug.   


11. Unplug the seat belt switch harness plug.   


12. Removal of instrument harness butt joint 
 
12. 1 .  Disassemble  the  Instrument  Panel.  (See  Removal  and 
Installation of Instrument Panel ) 
12.2. Unplug the instrument harness butt joint.   


13. Removal of instrument harness butt joint 
 
13. 1 .  Disassemble  the  Instrument  Panel.  (See  Removal  and 
Installation of Instrument Panel) 
13.2. Unplug the instrument harness butt joint.   


14. Removal of front compartment harness connector.   
 
14. 1 .  Disassemble  the  Instrument  Panel.  (See  Removal  and 
Installation of Instrument Panel) 
14.2. Unplug the front compartment harness plug.   


Content   ..  159  160  161  162   ..