Chery QQ6 (S21) / S12LHD. Manual - part 162


  Index      Chery     Chery QQ6 (S21) / S12LHD - service repair manual


Search            


Content   ..  160  161  162  163   ..


Chery QQ6 (S21) / S12LHD. Manual - part 162


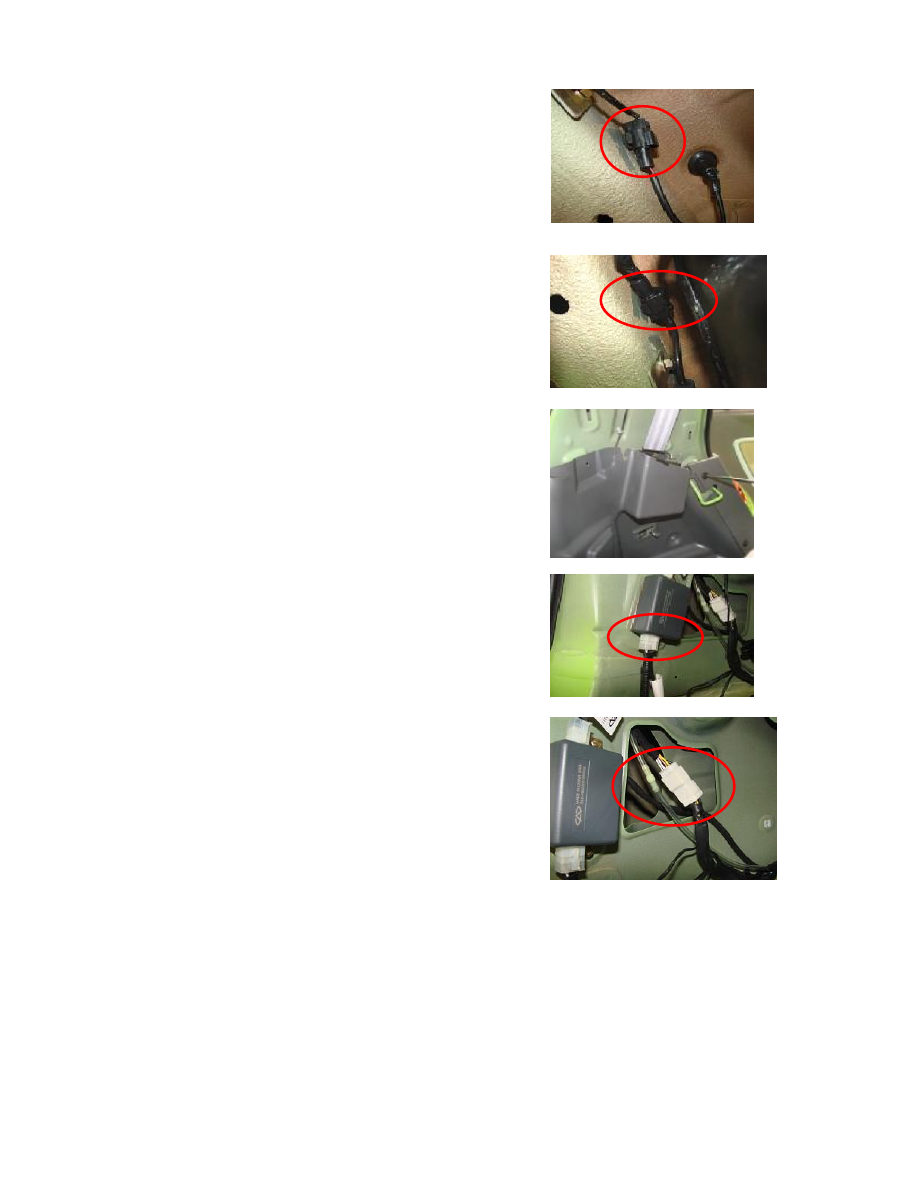
15. Removal of left-rear wheel ABS sensor harness 
 
15.1. Raise the vehicle by hoister. (Take care of your safety) 
15.2. Unplug the left-rear wheel ABS sensor connector.   


16. Removal of right-rear wheel ABS sensor harness.   
 
16.1. Raise the vehicle by hoister. (Take care of your safety) 
16.2. Unplug the right-rear wheel ABS sensor connector.   


17. Removal of reverse radar power harness 
 
17.1. Use a cross  head screwdriver to remove the left C-pillar inner 
shield.   


17.2. Unplug the reverse radar power plug.   


18. Removal of the tail door harness’ butt jointed harness.   
 
18.1. Disassemble the left C-pillar inner shield.   
 
18.2. Unplug the tail door harness’ butt jointed harness.   


19. Disassemble the ground.   


20. Removal of right-rear door contact switch harness   
 
20.1. Open the right-rear door and disassemble the crews that fix the 
contact  switch  with  a  cross  head  screwdriver,  and  then  take  off  the 
right-rear door contact switch.   


20.2. Unplug the right-rear door contact switch plug.   


21. Removal and removal of left-rear door contact switch harness 
 
21.1. Open the left-rear  door and  disassemble the  crews that  fix the 
contact  switch  with  a  cross  head  screwdriver,  and  then  remove 
left-rear door contact switch.   
 
21.2. Unplug the left-rear door contact switch plug.   


22. Disassemble the rigth C-pillar inner shield and then disassemble 
the ground wire.   


23. Removal of left-front door harness butt joint 1.   
 
23.1.  Disassemble  the  left  A-pillar  inner  shield,  and  push  down  the 
plastic  lock  that  fixed  the  connector  of  the  left-front  door  harness 
butt joint 1. (See Removal of A-pillar inner shield ) 
23.2. Unplug the plug of the left-front door harness butt joint 1.   


24. Removal of the left-front door harness butt joint 2.   
 
24.1.  Disassemble  the  left  A-pillar  inner  shield,  push  down  the 
plastic  lock  that  fixes  the  connector  of  left-front  door  harness  butt 
joint 2. (See Removal of A-pillar Inner Shield) 
 
24.2. Unplug the plug of left-front door harness butt joint 2.   


25. Removal of interior and right-front door butt joint 1.   
 
25.1. Disassemble the right A-pillar inner shield, and push down the 
plastic  lock  that  fixes  the  right-front  door  harness  butt  joint  2.  (See 
Removal of A-pillar Inner Shield) 
25.2. Unplug the plug of right-front Door harness butt joint 1.   


26. Removal of interior and right-front door butt joint 2. 
 
26.1.  Disassemble  the  right  A-pillar  inner  shield,  push  down  the 
connector  plastic  lock  that  fixes  the  right-front  door  harness  butt 
joint 2. (See Removal of A-pillar Inner Shield). 
26.2. Unplug the plug of Right-front Door harness butt joint 1.   


27. Removal of right-front door contact switch harness.   
 
27.1. Use a cross  head screwdriver  to loosen off the screws that  fix 
the  right-front  door  contact  switch,  and  then  remove  the  right-front 
door contact switch.   


27.2. Unplug the right-front door contact switch plug.   


28. Removal of left-front door contact switch harness. 
 
28.1.  Use  a  cross  head  screwdriver  to  loosen  off  the  screws  that 
fixes  the  left-front  door  contact  switch,  and  then  remove  the 
left-front door contact switch.   


28.2. Unplug the left-front door contact switch plug.   


Content   ..  160  161  162  163   ..