Chery QQ6 (S21) / S12LHD. Manual - part 5


  Index      Chery     Chery QQ6 (S21) / S12LHD - service repair manual


Search            


Content   ..  3  4  5  6   ..


Chery QQ6 (S21) / S12LHD. Manual - part 5


17 


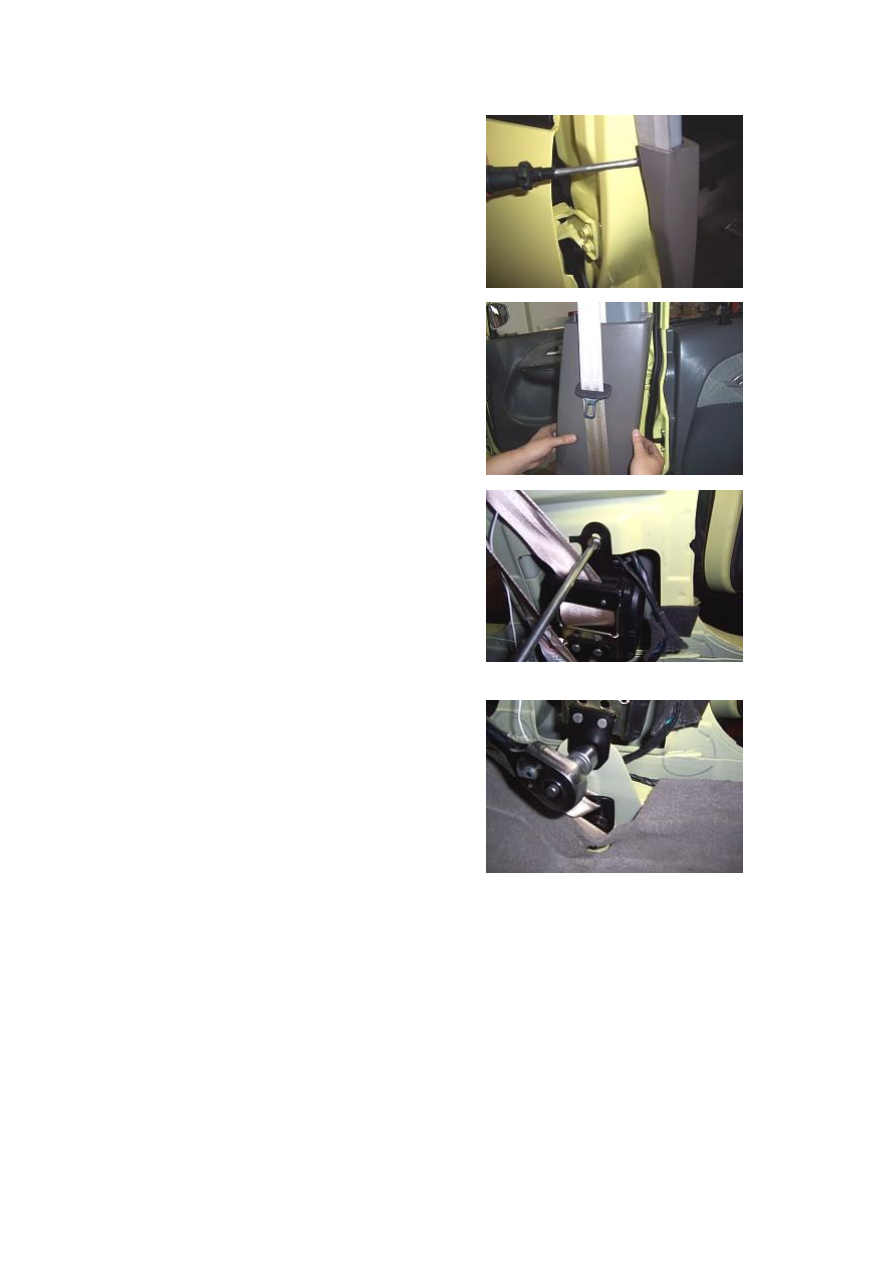
3.9.  Unclench  the  B  pillar  trim  with  a 

right-angled screwdriver.   


3.10. Take off the B pillar trim.   


3.11.  Remove  the  fix  screws  from  the  seat  belt 

with a cross screwdriver.   


3.12. Loosen  the fixing  nuts  with a 17# sleeve, 

and then take off the seat belt.   


4. Installation Step 

The  installing  steps  are  reverse  to  those  for 

removal. 

Note: 

4.1. Keep the seat belt clean, avoid the oil stain, 

and check whether the seat belt is damaged. 

4.2.  The  pillar  trim  shall  securely  fit  with  the 

body,  without  any  loose  symptoms;  and  the 

trim  shall  fit  well  with  the  ceiling  and  rubber 

strip. 

4.3. The seat belt adjusting slide baffle on the B 

pillar upper trim shall move freely, without any 

influence on the adjustment of seat belt, and the 

fit  clearance  of  lower  trim  shall  be  even  and   

below 1mm; 

4.4. The fit clearance between B pillar low trim 

and front/rear scuff plate shall be even and less 

than 1mm; 


18 

II.  Disassembly/Reassembly  of 

Seat 

Tool: 16# sleeve 

1. Front passenger seat removal step 

1.1.  Pull  the  moveable  handle  under  the  left 

seat to move the left seat backwards and reveal 

the fixing bolts under the seat.   


1.2. Remove two  fixing bolts before the seat. 

by sleeve   


1.3.  Turn  the  moveable  handle  and  pull 

forwards  the  seat,  and  expose  two  fixing  bolts 

on the rear of seat.   


1.4  Disassemble  two  fixing  bolts  at  the  back 

of seat with sleeve. 


1.5  Pull  off  the  inserter  under  seat  and  take 

away the seat. 


2. Rear passenger seat removal step 

2.1 Lift up the rear passenger seat cushion by 

hand,  and  then  take  out  the  cushion  from  the 

clips of chassis and body.   


2.2. Directly take out the seat cushion by both 

hands.   


19 


2.3. Loosen the front fixing bolts at the right 

side of rear right seat with an open-end wrench.   


2.4.  Loosen  the  front  fixing  bolts  at  the  left 

side of rear right seat with an open-end wrench.   


2.5.  Pull  up  the  ring-pull  of  rear  right  seat, 

and lay down the seat forwards.   


2.6. Loosen the rear fixing bolts at the right side 

of rear right seat with an open-end wrench. 


2.7. Loosen the rear fixing bolts at the left side 

of rear right seat with an open-end wrench, and 

then remove the rear right seat.   


20 


2.8.  Loosen  the  front  fixing  bolts  of  rear  right 

seat with a open-end wrench. 


2.9. Pull up the ring-pull of rear left seat, and 

lay down the seat forwards. 


3.0. Loosen the rear fixing bolt  of rear left seat 

with  a  sleeve,  and  then  remove  the  rear  left 

seat. 


3. Installation Step 

The  installing  steps  are  reverse  to  those  for 

removal. 

Installation torque is 25±3Nm 


III.  Disassembly/Reassembly  of 

Console 

Tool: cross head screwdriver 

1. Removal Step 

1.1.  Remove  each  two  bolts  at  left  and  right 

sides  with  a  cross  screwdriver,  these  bolts  of 

which  are  used  to  joint  the  console  and  front 

lower guard plate.   

(The tightening torque is 2±0.5N.m) 


Content   ..  3  4  5  6   ..