Acura CSX. Manual - part 424


  Index      Acura     Acura CSX - P/NO. 61SNR03 - service repair manual 2006-2009 year


Search            


Content   ..  422  423  424  425   ..


Acura CSX. Manual - part 424


01

04

05

*01

20-20

Doors

A

B

C

Fastener Locations

: Bolt, 2

6 x 1.0 mm
9.8 N·m
(1.0 kgf·m,
7.2 lbf·ft)

B

C

A

A

A

B

A

B

A

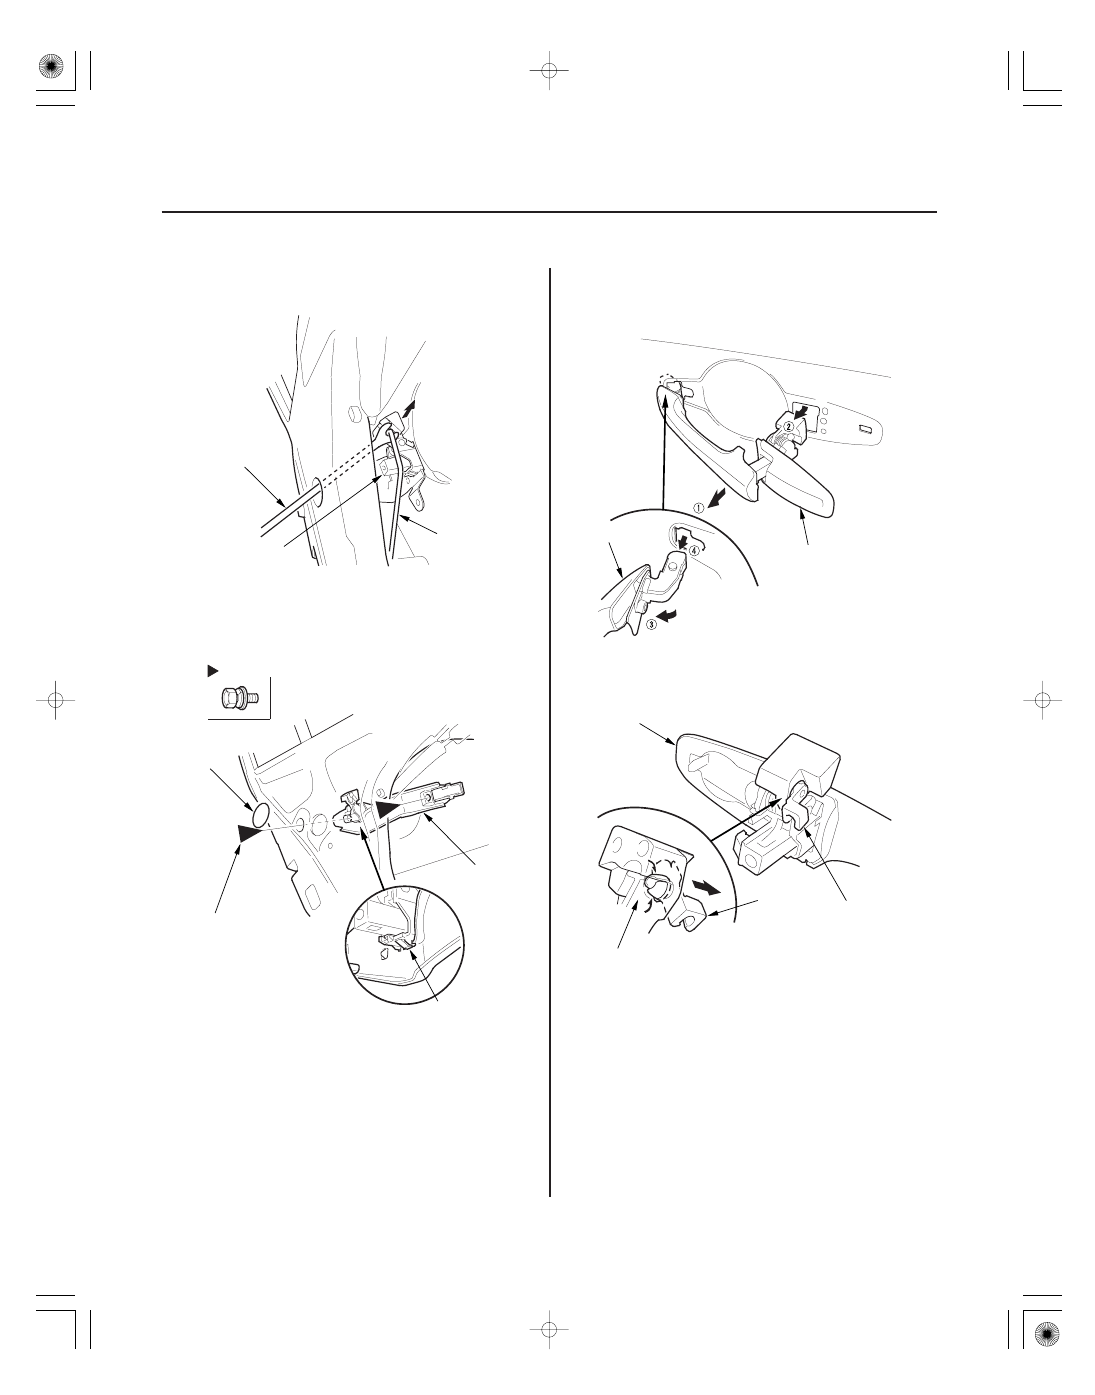
7. Disconnect the outer handle rod (A) with a clip

remover (B) from the outer handle (C).

8. Remove the maintenance seal (A). Remove the

bolts securing the outer handle protector (B), then
remove the protector by releasing the hook (C).

9. While pulling the outer handle (A), remove the

handle from the holes in the door panel. Take care
not to scratch the door.

10. Remove the rod fastener (A) from the outer handle

(B), then replace it with a new one.

Replace.

08/08/21 14:59:07 61SNR030_200_0022

01

SNR9A00J16166220801KBAT00

20-21

20-21

Rear Door Latch Replacement

Fastener Locations

: Screw, 3

A

: Screw, 1

B

A

A

A

6 x 1.0 mm
6 N·m
(0.6 kgf·m, 4 lbf·ft)

6 x 1.0 mm
6 N·m
(0.6 kgf·m, 4 lbf·ft)

C

B

11. Install the handle in the reverse order of removal,

and note these items:

• Make sure the door locks and opens properly.
• When reinstalling the door panel, make sure the

plastic cover is installed properly and sealed
around its outside perimeter to seal out water.

• Check for water leaks (see step 9 on page 20-29).

NOTE: Put on gloves to protect your hands.

1. Raise the glass fully.

2. Remove the door panel (see page 20-17).

3. Remove the plastic cover, as needed (see step 4 on

page 20-19).

4. Remove the screws (A, B) securing the latch (C),

then lower it.

5. Detach the rod fastener (see step 6 on page 20-19).

6. Disconnect the outer handle rod from the outer

handle (see step 7 on page 20-20).

08/08/21 14:59:07 61SNR030_200_0023

01

03

04

20-22

Doors

A

B

C

D

F

E

Fastener Location

: Screw, 1

A

B

A

A

B

C

B

7. Detach the latch cable (A) and the inner handle

cable (B) from the holder (C), then remove the latch
(D) out from between the rear lower channel (E)
and the door. Take care not to bend the outer
handle rod (F), the latch cable, or the inner handle
cable.

8. Remove the screw, then remove the latch protector

(A) by releasing the hook (B).

9. Detach the latch cable (A) and the inner handle

cable (B) from the latch (C).

10. Install the latch in the reverse order of removal, and

note these items:

• Make sure the connector is plugged in properly,

and each rod is connected securely.

• Make sure the door locks and opens properly.

08/08/21 14:59:07 61SNR030_200_0024


Content   ..  422  423  424  425   ..