Acura CSX. Manual - part 422
04
01
02
SNR9A00J16126720361KBAT10
20-15
20-15
Front Door Glass Outer
Weatherstrip Replacement
A
A
B
B
A
A
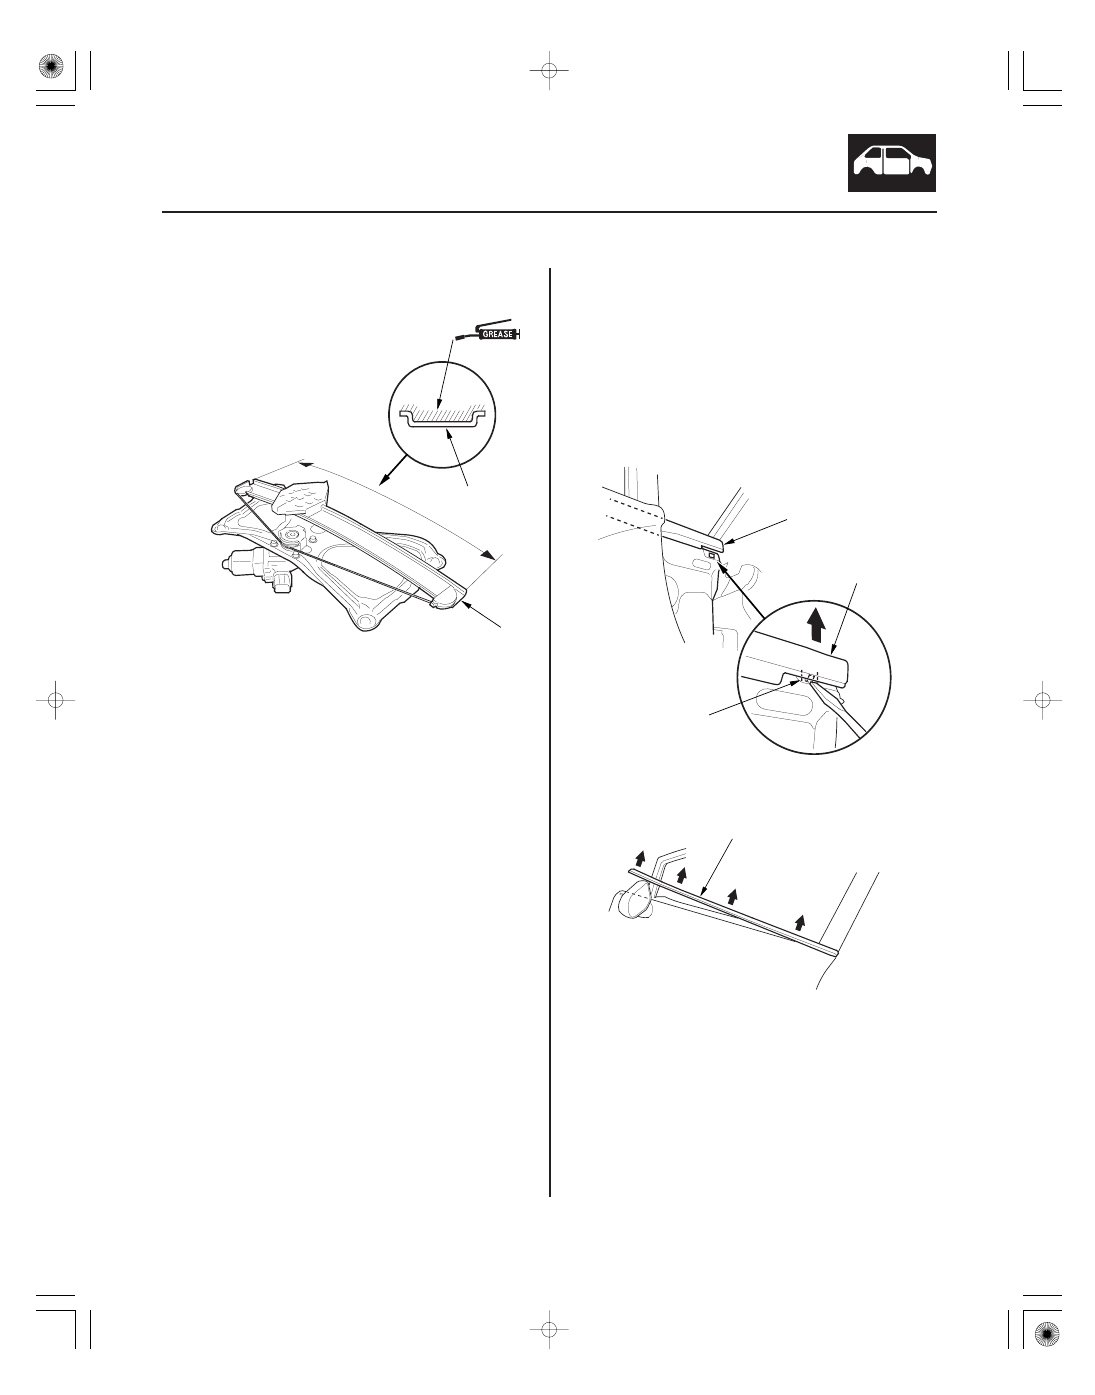
7. Apply multipurpose grease to all the sliding
surfaces of the regulator (A) where shown.
8. Install the glass and regulator in the reverse order
of removal, and note these items:
• Roll the glass up and down to verify it moves
freely without binding.
• Make sure that there is no clearance between the
glass and glass run channel when the glass is
closed.
• Adjust the position of the glass as necessary
(see page 20-28).
• When reinstalling the door panel, make sure the
plastic cover is installed properly and sealed
around its outside perimeter to seal out water.
• Check for water leaks (see step 9 on page 20-29).
• Make sure the power door locks, the windows
and the power mirror operate properly.
• Test-drive and check for wind noise and rattles.
NOTE:
• Put on gloves to protect your hands.
• Take care not to scratch the door.
1. Lower the glass fully.
2. Release the front hook (A) from inside of the door,
then pull up the front door glass outer weatherstrip
(B).
3. Starting at the front, slowly pull up the front door
glass outer glass weatherstrip (A).
08/08/21 14:59:02 61SNR030_200_0017