Acura CSX. Manual - part 196


  Index      Acura     Acura CSX - P/NO. 61SNR03 - service repair manual 2006-2009 year


Search            


Content   ..  194  195  196  197   ..


Acura CSX. Manual - part 196


11

12

13

04

13-10

Manual Transmission

A

B

B

B

A

B

A

B

C

D

B

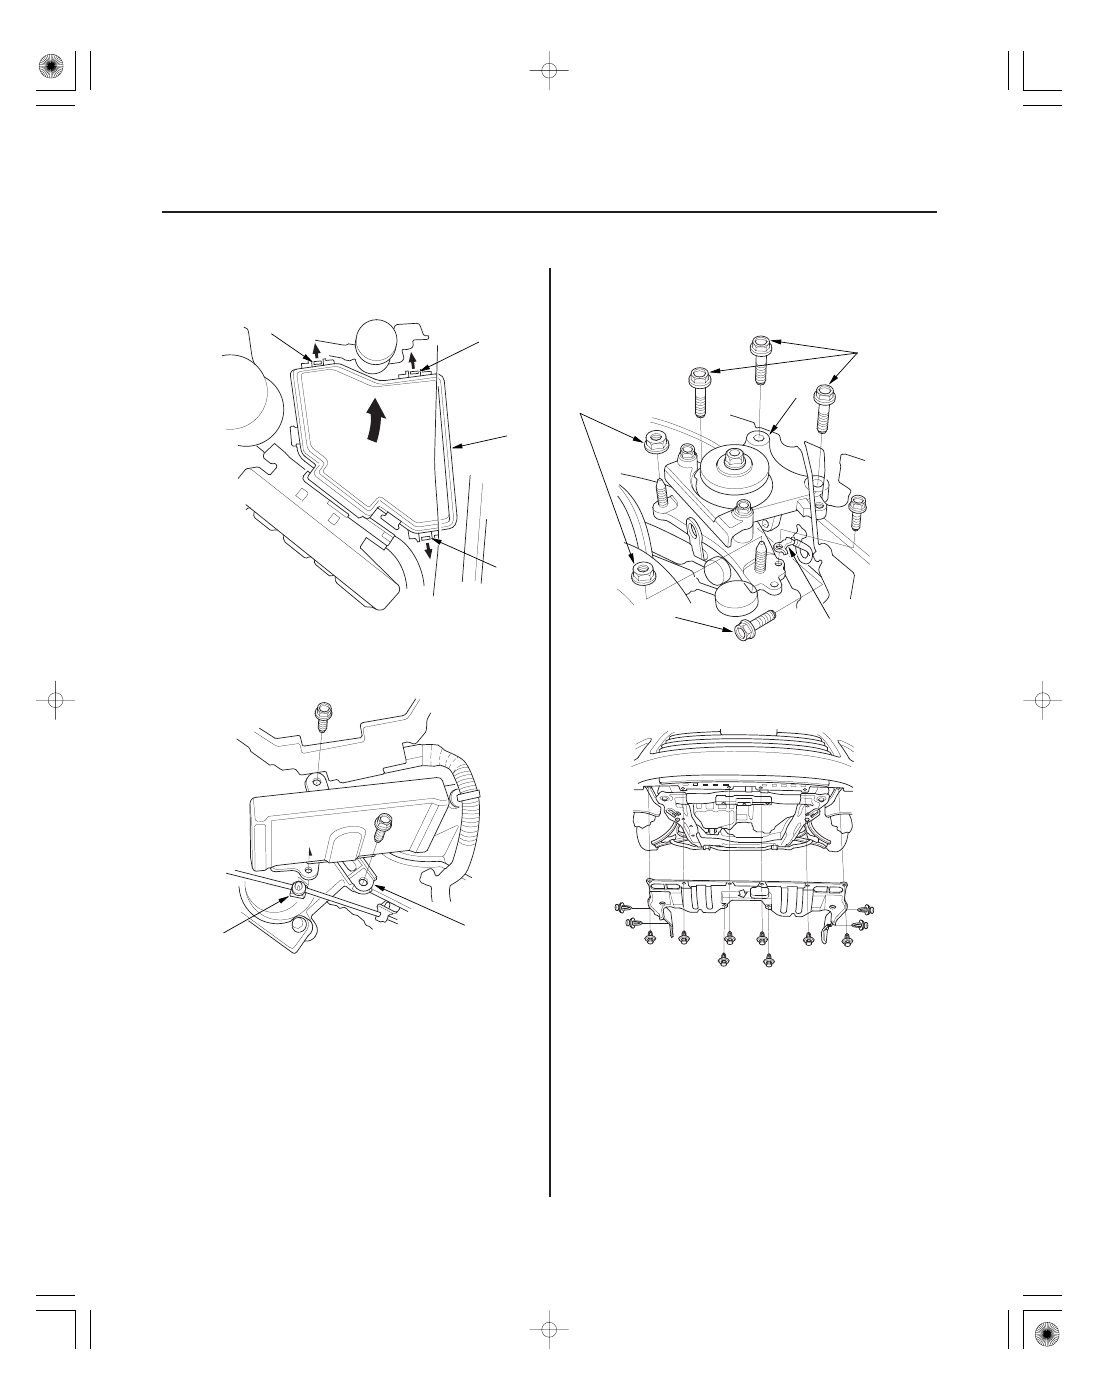
14. Remove the under-hood fuse/relay box (A) by

lifting up on the lock tabs (B), then move it aside.

15. Remove the engine control module (ECM) bracket

(A), then move it aside. Remove the clutch pipe
clamp (B).

16. Disconnect the ground cable (A), then remove the

transmission mount bracket bolts (B) and nuts (C).
Remove the transmission mount bracket (D).

17. Raise the vehicle on a lift.

18. Remove the splash shield.

19. Drain the MTF. Reinstall the drain plug with a new

sealing washer (see page 13-5).

20. Separate the lower arm (see step 5 on page 16-4).

08/08/21 14:44:22 61SNR030_130_0012

15

16

*05

18

13-11

A

B

C

A

B

A

B

A

21. Remove the stiffener plate (A) from the left side of

the steering gearbox, and the mounting bracket (B)
from the right side of the steering gearbox.
Disconnect the exhaust mounting rubber (C).

22. Remove the stiffener plate (A) and the harness clip

(B).

23. Remove the front engine mount mounting bolt (A)

and nut (B), then remove the lower radiator hose
from the front engine mount bracket.

24. Remove the front engine mount (A) from the

transmission and the engine.

08/08/21 14:44:22 61SNR030_130_0013

19

20

05

*06

22

13-12

Manual Transmission

A

A

B

B

A

B

C

VSB02C000016

A

A

B

A

A

25. Remove the lower torque rod mounting bolt.

26. Remove the middle subframe mounting bolts (A).

27. Note the reference marks (A) on both sides of the

front subframe that lines up with the body (B).

28. Attach the front subframe adapter (VSB02C000016)

to the front subframe, and hang the belt (A) of the
subframe attachment over the front subframe, then
secure the belt with the stop (B).

29. Raise the jack, and line up the slots in the arms with

the bolt holes on the corner of the jack base (C),
then attach them securely.

30. Remove the front subframe mounting bolts (A) and

the front subframe (B).

NOTE: Suspend the steering gearbox with an
appropriate size wire.

08/08/21 14:44:24 61SNR030_130_0014

*07

*08

13-13

31. Pry out the driveshafts inboard joint (see step 8 on

page 16-5).

32. Remove the intermediate shaft (see page 16-23).

33. Remove the clutch cover.

34. Support the transmission with a transmission jack.

35. Remove the transmission mounting bolts.

36. Pull the transmission away from the engine until

the transmission mainshaft clears the clutch
pressure plate.

37. Slowly lower the transmission about 150 mm (6 in.).

Check once again that all hoses and harnesses are
disconnected and free from the transmission, then
lower it completely.

08/08/21 14:44:24 61SNR030_130_0015


Content   ..  194  195  196  197   ..