Kia Sedona (2008 year). Manual - part 299


  Главная      Kia     Kia Sedona (2008 year) - Service Repair Manual


поиск по сайту           правообладателям


содержание   ..  297  298  299  300   ..


Kia Sedona (2008 year). Manual - part 299
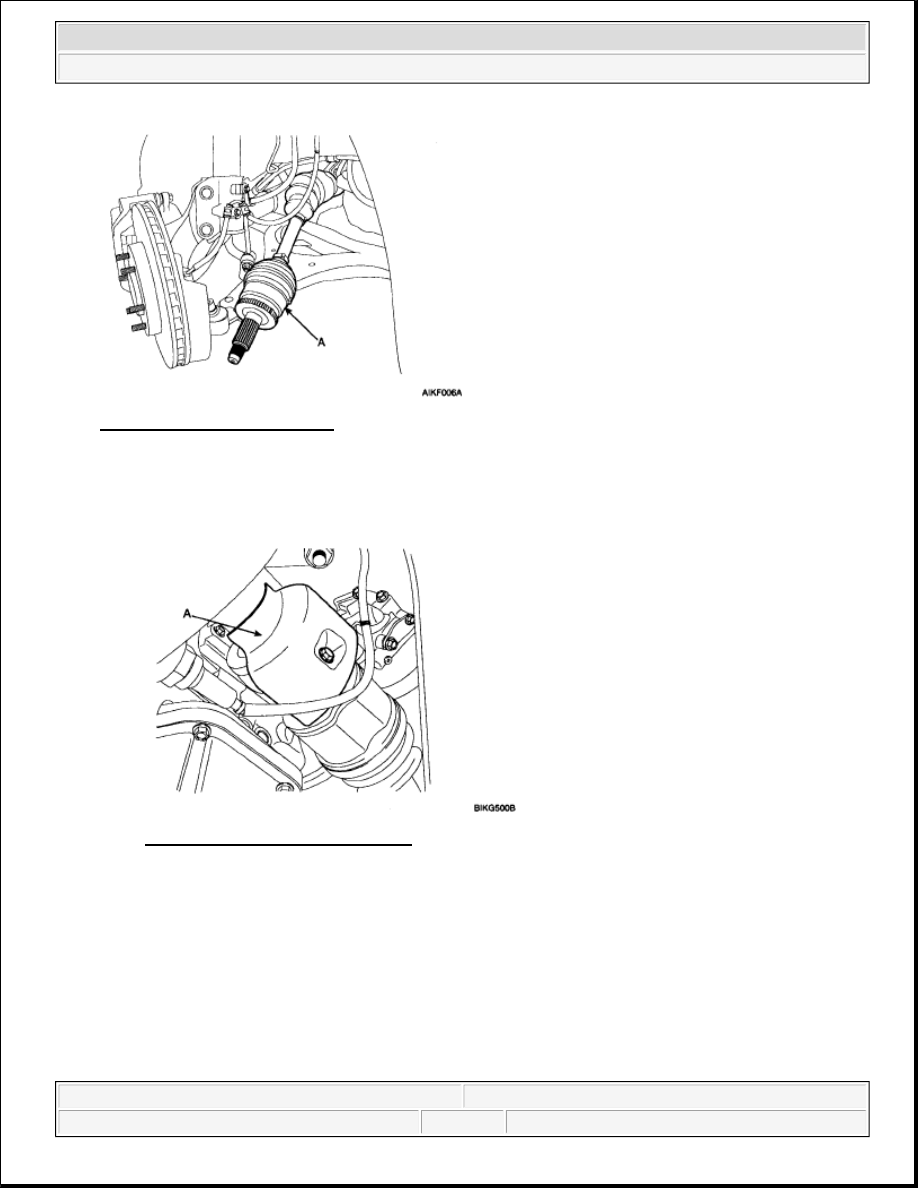


Fig. 10: Identifying Driveshaft 
Courtesy of KIA MOTORS AMERICA, INC. 

9. Removal of the driveshaft [RH]. 

a. Remove the heat protector (A). 

Fig. 11: Identifying Heat Protector 
Courtesy of KIA MOTORS AMERICA, INC. 

b. Remove the inner shaft bearing bracket assembly mounting bolts (A).  

Tightening torque N.m (Kgf.m, lb-ft):  

Gasoline: 50-65 (5.0-6.5, 36-47) 


2008 Kia Sedona 

2008 DRIVELINE/AXLES Driveshaft - Sedona


Microsoft 


Saturday, May 22, 2010 6:49:48 PM

Page 6 

© 2006 Mitchell Repair Information Company, LLC. 

Fig. 12: Identifying Inner Shaft Bearing Bracket Assembly Mounting Bolts 
Courtesy of KIA MOTORS AMERICA, INC. 

10. Insert pry bar (C) between the transaxle case (B) and driveshaft joint (A), separate driveshaft from the 

transaxle. 

Fig. 13: Identifying Transaxle Case And Driveshaft Joint 
Courtesy of KIA MOTORS AMERICA, INC. 

11. Pull out the driveshaft from the transaxle case. 

CAUTION:

Use a pry bar being careful not to damage the transaxle and 
joint.  

Do not insert a pry bar too deep, as this may cause damage to 
the oil seal.  

Do not pry on the driveshaft by excessive force it may cause 
components inside the joint kit to dislodge resulting in a torn 
boot or a damaged bearing.  


2008 Kia Sedona 

2008 DRIVELINE/AXLES Driveshaft - Sedona


Microsoft 


Saturday, May 22, 2010 6:49:48 PM

Page 7 

© 2006 Mitchell Repair Information Company, LLC. 

INSPECTION 

1. Check the driveshaft boots for damage and deterioration.  

2. Check the ball joints for wear and damage.  

3. Check the splines for wear and damage. 

Fig. 14: Checking Driveshaft Boots 
Courtesy of KIA MOTORS AMERICA, INC. 

INSTALLATION 

Fig. 15: Identifying Driveshaft Splines And Differential Case Oil Seal

CAUTION:

Plug the hole of the transaxle case with the oil seal cap to 
prevent contamination.  

Replace the retainer ring whenever the driveshaft is removed 
from the transaxle case.  

CAUTION:

Replace the circlip with new ones before the installation.  

Before the installation, apply the gear oil on the driveshaft splines (A) 
and contacting surface of differential case oil seal (B).  


2008 Kia Sedona 

2008 DRIVELINE/AXLES Driveshaft - Sedona


Microsoft 


Saturday, May 22, 2010 6:49:48 PM

Page 8 

© 2006 Mitchell Repair Information Company, LLC. 

Courtesy of KIA MOTORS AMERICA, INC.

1. Installation is the reverse of removal. 

Fig. 16: Staking Driveshaft Lock Nut Using Hammer & Chisel 
Courtesy of KIA MOTORS AMERICA, INC. 

Fig. 17: Staked Driveshaft Lock Nut 
Courtesy of KIA MOTORS AMERICA, INC. 

FRONT DRIVESHAFT (UTJ-BJ TYPE) 

COMPONENTS 

CAUTION:

After installing the driveshaft joint to the transaxle case, be sure 
not to come out.  

The driveshaft lock nut should be replaced with new ones.  

After installation driveshaft lock nut, stake the lock nut using a 
chisel and hammer as shown in the illustration below.  


2008 Kia Sedona 

2008 DRIVELINE/AXLES Driveshaft - Sedona


Microsoft 


Saturday, May 22, 2010 6:49:48 PM

Page 9 

© 2006 Mitchell Repair Information Company, LLC. 


содержание   ..  297  298  299  300   ..