BMW Motorcycle (R1100RT, R1100RS, R850/1100GS, R850/1100R). Manual - part 16


  Index      Manuals     BMW AG Motorcycle (R1100RT, R1100RS, R850/1100GS, R850/1100R). Repair Manual


Search            


Content   ..  14  15  16  17   ..


BMW Motorcycle (R1100RT, R1100RS, R850/1100GS, R850/1100R). Manual - part 16


11.76

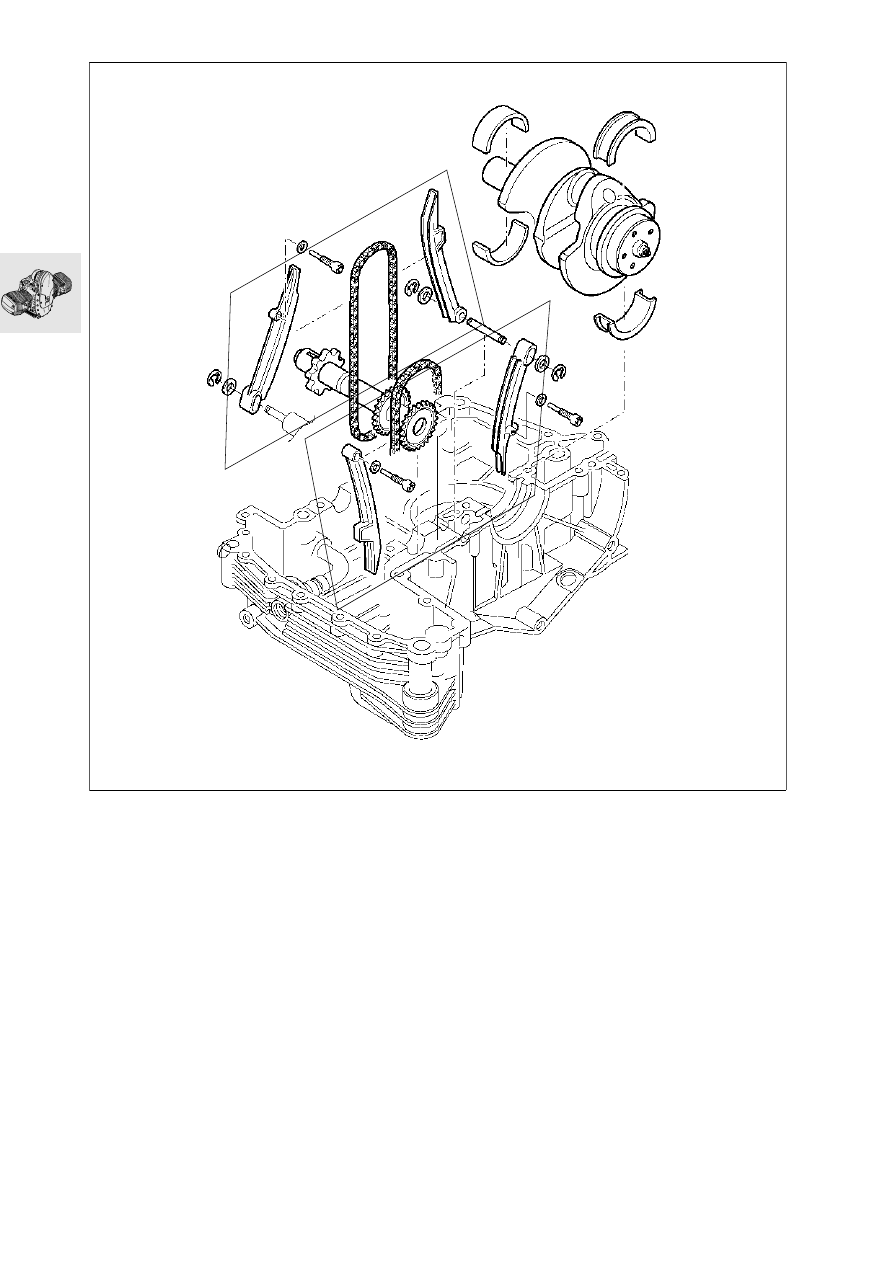
Removing crankshaft, auxiliary shaft 
and timing chain tensioning and slide 
rails

RS110290
11.77

Removing and installing oil pick-up 
basket

X

 Tightening torque:

M6 screw ........................................9 Nm (0.354 in)

e

 Caution:

Make sure that the O-ring is not omitted, and is 
installed undamaged.

Replacing oil level sight glass

•

Pierce the plastic disc with a large screwdriver 
and lever out the oil level sight glass.

•

Coat the sealing face of the new oil level sight 
glass with engine oil and drive it in with drift, 
BMW No. 00 5 550. 

Removing conrods

•

Clamp crankshaft in a vise provided with protec-
tive jaws.

•

Remove conrod

e

 Caution:

Do not accidentally confuse the conrods.

Checking conrods 

•

Check conrod dimensions.

a

See Technical Data.

e

 Caution:

Sintered-metal conrods must never be straightened 
– risk of fracture.

RS110300

11.78

Measuring main and big end bearing 
play

easuring radial bearing play

•

Measure main bearing journal with an external 
micrometer crosswise in two planes, A and B.

•

Enter measured values on record sheet.

a

See Technical Data.

e

 Caution:

The crankshaft can only be reground in 
grinding stage 0; after this it must be rehardened 
and finished. Grinding stages are identified by a 
paint mark on the front crank web.
a See Technical Data
If the bearing shells have to be replaced, note 
colored marks on crankpins and big end bearings.

RS110310

11.79

Install main bearings

•

Insert tensioner rail/slide rail pivot pin (1) for 
centering purposes.

•

Tighten M8 and M10 housing screws..

Tightening torque/tightening sequence:
1. M10 screw (oiled) ..................................... 45 Nm
2. M8 screw (oiled) ....................................... 20 Nm

•

Measure main bearings front/back in the load 
direction.

•

Enter measured values on record sheet and 
determine main bearing play values.

a

See Technical Data.

Measuring axial bearing play

•

Place crankshaft in engine block.

•

Insert tensioning rail/slide rail pivot pin (1) for 
centering purposes.

•

Tighten housing screws.

•

Screw measuring device BMW No. 00 2 500, 
with dial gauge, BMW No. 00 2 510, in the 
tapped hole for the alternator mount cover.

•

Move crankshaft forwards and backwards, and 
read off play at dial gauge.

a

See Technical Data.

1

RS110320

00 2 500

00 2 510

RS110910

11.80

Measuring big end bearing play

•

Measure crankpin with an external micrometer in 
the thrust direction and offset through 90

o 

.

•

Install bearing shells and assemble conrods.

•

Tighten big end bolt with tightening angle 
indicator, BMW No. 11 2 210.

X

 Tightening torque:

Big end bolts oiled
Joint torque.................................................. 20 Nm
Wrench angle .................................................... 80°

•

Measure big end bearing with internal gauge in 
thrust direction.

•

Enter measured values on record sheet and 
determine big end bearing clearances.

a

See Technical Data.

RS110340

11 2 210

RS110350

RS110360

11.81

Assembling engine

Installing conrod

•

Clamp crankshaft in a vise provided with 
protective jaws.

•

Screw big end bolts (oiled) in by hand and tighten 
with tightening angle indicator, 
BMW No. 11 2 210.

e

 Caution:

Oil the bearings. Do not accidentally confuse 
conrods or bearing shells. Always use new big 
end bolts.

Installed direction of conrods:

...................................................lettering facing up

X

 Tightening torque:

Big end bolts (oiled)
Joint torque.................................................. 20 Nm
Wrench angle .................................................... 80°

11 2 210

RS110370

11.82

Installing crankshaft

e

 Caution:

Oil the bearings.

Installing timing chain tensioning and 
slide rails

•

Seal pivot pin for tensioning rail/slide rail at 
clutch side (arrow) with  3-Bond 1209.

•

Insert pivot screw (1) into chain tensioner rail, us-
ing a new sea.

X

 Tightening torqu:

Chain guide rail pivot pin .............................. 18 Nm

Installing auxiliary shaft/timing chains

e

 Caution:

Timing chains (2) must mesh fully with auxiliary shaft 
sprockets.

1

u

2

RS110291

11.83

Assembling engine block

•

Coat clean, grease-free sealing faces (arrow) 
with 3-Bond 1209.

•

Secure the timing chain with rubber band (1) to 
the timing chain tensioning and slide rail.

M6

x

5

0

M6

x

2

5

M6

x

3

5

M

10x

1

0

0

M6x

5

0

M6

x

2

5

M6

x

3

5

M6x

3

5

M6

x

5

0

M6x

5

0

M1

0x

1

0

0

M6

x

5

0

M6

x

3

5

M6x

3

5

M6

x

3

5

M6

x

5

0

M6

x

3

5

M6

x

5

0

M6

x

5

0

M6

x

5

0

M6x

2

5

1

u

RS110920


Content   ..  14  15  16  17   ..